When you think about an Oatmeal Stout, you normally expect this in your glass:

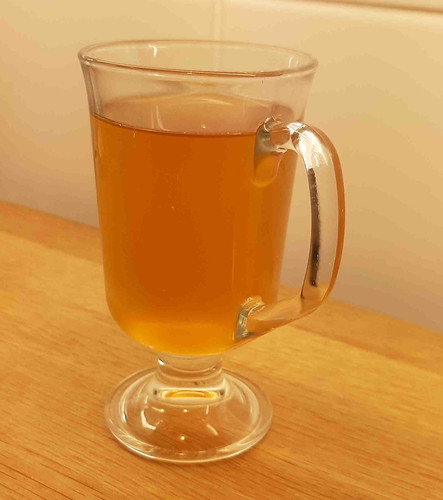
But for something completely different, what about an Oatmeal Stout that looks like this:
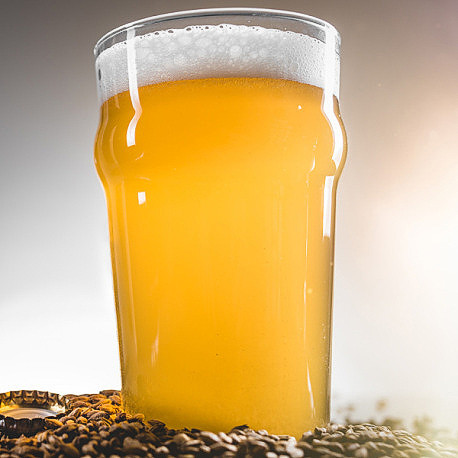
Until a year or so ago, I had not heard about these new, niche beers, but they have become quite popular to make amongst the small craft brewers and I expect we will see more of them. The colour of a traditional oatmeal stout comes from the roasted malt, which also gives stouts their infamous roasted character in aroma and taste. As for gold coloured stouts, is it really a stout if the barley isn’t roasted?
Golden Stouts, as the name suggests, are beers that pour a golden colour and yet have all the traditional aromas and flavours associated with dark stouts, those trusty workhorses of the beer world that span the colour spectrum from ruby to brown to cola to pitch black. Typical stout flavours include chocolate and coffee with lesser contributions of caramel and nuttiness as well as hints of toffee and fruit. In regular stouts, be they Dry Stouts like Guinness, Imperial Stouts like Courage Imperial Russian Stout, or Oatmeal Stouts like Samuel Smith’s, the chocolate and coffee flavours are owed to the dark malts that are used. Heavily roasted malts impart all the coffee and chocolate we could ever want. Malts also impart colour to the beer. Thus, a style like stout whose characteristics are inextricably linked to these dark malts will, by definition, be dark in colour, right? Well, Golden Stouts would argue otherwise.
In this sense, it is useful to think of Golden Stouts as a thought experiment born into reality. Some intrepid brewers wanted to challenge themselves to see if they could create a beer that was golden yet tasted like the darker beers we’ve come to know and love. It’s a fairly simple brewing process, really. Brewers making a golden stout simply omit the darker malts in the grain bill. They can still include lighter malts that will offer flavours of toffee, caramel, and nuttiness. To replicate the chocolate and coffee flavours missing from the now-omitted dark malts, brewers add actual chocolate and coffee. Vanilla can be added as well for additional flavour. These actual adjunct additions will provide flavour and aroma without affecting the colour. Golden Stouts are a brewery sleight-of-hand, so to speak. They’re a great way to create some cognitive dissonance in yourself or others. Our brains are programmed to expect a certain range of flavours when we see golden beers and golden stouts mess with these neural pathways. You may very well have to drink a few before your brain comes around to it.
Since the concept of golden stouts seems to have gained some traction and won’t be consigned to the dustbin of history in the immediate future, I thought it high time I experienced this enigma and attempted to brew one.
ABOUT THE INGREDIENTS
Fermentables
The backbone of this recipe is Maris Otter Pale Ale Malt from Warminster Maltings, Britain’s oldest working maltings. Situated in the Wiltshire town of the same name, on the western tip of Salisbury Plain, the Pound Street maltings has been continuously making malt for the brewing industry since 1855. Not only that, in defiance of all the 20th century technology which completely overwhelmed the malting industry in the 1960’s, Warminster Malt is still made the traditional way, by hand, on floors, almost totally unchanged from the day the maltings was originally commissioned. Maris Otter barley was first introduced to British farmers, maltsters and brewers in 1965, and has endured for over half a century.

A little Munich Malt is added to my recipe and is often used in Oatmeal Stouts. Munich malt is a well-modified lager malt which is kilned in such a way that modification continues during kilning and very high finishing temperatures are used to produce the characteristic colour and malty flavours. Munich has more pronounced rich toasty flavours and is ideal for dark ambers, milds, brown ale beer styles.
As the name of Oatmeal Stout suggests, oats are used in this recipe. Oats are wonderful in a porter or stout. Oatmeal lends a smooth, silky mouthfeel and creaminess to a stout that must be tasted to be understood. Oats are “flaked” by rolling them between two hot rollers, heating them sufficiently to gelatinize the starch during the process. They are also called “rolled” oats because of the rollers used in the process. There may be some difference in the quality, cut, and final size between what you see at the homebrew store and the grocery, but they are fundamentally the same product. In my case, I chose my local Lidl store for the rolled oats as they were a good price and of known quality.
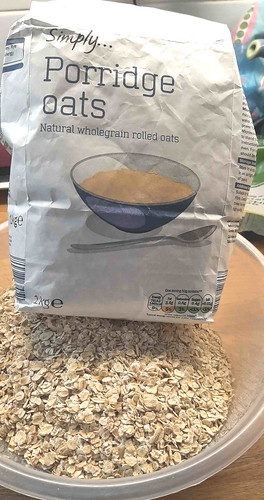
Flaked barley is another ingredient you often find in oatmeal stouts. Flaked Barley is steam treated to soften them prior to passing through rollers. This process of part gelatinisation and flaking aids the mashing liquor to access the endosperm and negates the need to mill the product. Added in up to 10% of the total grist, Flaked Barley is used to add unfermentable saccharides in the brewing process. This increases the attenuation limit, while also adding high molecular weight protein for head retention, as well as greater body and turbidity. Flaked Barley gives a grainy bite to beers. I didn’t have any flaked barley in my inventory at present, and with deliveries currently so unreliable, I popped across to my local Holland & Barrett health food shop to get what I needed.

The last fermentable ingredient I am using is Panela Sugar. Panela, also known as picadillo or jaggery, is an unrefined, non-centrifugal, dark brown cane sugar pressed into blocks or cones. Once set, it can be pulverised to make it easier to dissolve. It contains higher levels of molasses and natural minerals than ordinary refined sugars. As well as increasing attenuation of the beer and lightening the body, this sugar imparts a rich caramel flavour.

Special flavouring ingredients
As already stated, a Golden Oatmeal Stout gets the roast coffee and chocolate flavours from using dark grain substitutes. The way I did it was to create separate coffee and chocolate tinctures using cheap vodka. These tinctures can be added after primary fermentation, individually measured out into bottles, or added at the bulk bottling/kegging stage (or added to the Bright Tank if you use one). To create a coffee tincture, soak crushed beans in vodka. They only need to be crushed, as you don’t want any fine grounds sneaking into bottles. You’ll want to leave the beans in the vodka for 7 – 14 days to ensure complete extraction. Next you’ll want to strain out the beans so you’re able to add the extract freely. The same process is used for the Cacao Nibs.
In my recipe I also used two vanilla beans to lend a nice smooth vanilla background flavour. Take the beans, cut the ends, split it down the middle and scrape them down a bit to rough up the insides. Scrape the “caviar” from them, and then cut them into rough 1 inch bits after that. Put it all in vodka, enough to cover them and seal it up in a glass jar for 14 days. Toss the whole lot into the beer through a strainer at the same time as the coffee and cacao.
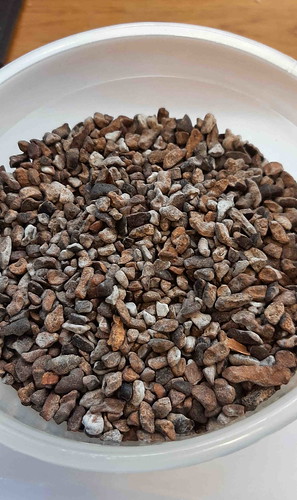
Cacao Nibs

Vanilla pods shredded and steeping in cheap Lidl’s vodka

Lidl’s Italian coffee beans

Yeast
The yeast used on this occasion is “Imperial A09 Pub”. Brewers swear by this strain to achieve super bright ales in a short amount of time. One of the most flocculent brewer’s strains around, Pub will rip through fermentation and then drop out of the beer quickly. Pub produces higher levels of esters than most domestic ale strains, making it an excellent choice for when balance between malt and yeast derived esters is necessary. Beers made with Pub need a sufficient diacetyl rest when main fermentation is finished.
Hops
An oatmeal stout is an English creation, so English hops work best when making this beer style. Examples include East Kent Goldings, Fuggles, Northern Brewer, and Target. Aim for 25-40 IBUs. Hop flavour and aroma are usually minimal or non-existent, but if present they should not dominate the flavour of the final beer, so use restraint in the late hop additions. I am fortunate to still have some fine hops from my CAMRA colleague Bob Keaveny that were grown locally in his ‘hop garden’. So, in my recipe I have used Target as the bittering hop and Fuggles as a late addition aroma hop.
The recipe details now follow.
GOLDEN OATMEAL STOUT – RECIPE DETAILS
All grain recipe with no sparge. I used my Speidel 50L Braumeister to brew this beer, so the figures below relate to my particular set up and should be adjusted as necessary to your own equipment requirements.
Vitals:
Size: 32.5 Litres (post-boil hot)
Batch volume into fermenter: 27 Litres
Mash Efficiency: 81 %
Attenuation: 79.6%
Calories: 52.5 kcal per 100 ml
Original Gravity: 1.056 (style range: 1.045 – 1.065)
Terminal Gravity: 1.011 (style range: 1.010 – 1.018)
Colour: 11 EBC (style range: 43.5 – 79, but this is for a ‘black’ version)
Alcohol: 7.4% ABV (style range: 4.2% – 5.95%)
Bitterness: 37 IBU (style range: 25 – 40)
Mash:
5.0 kg Maris Otter Pale Ale Malt (Warminster) 7 EBC (73.5%)
0.5 kg Munich Malt (Bairds) 9.9 EBC (7.4%)
0.5 kg Rolled Oats (Lidl) 3 EBC (7.4%)
0.5 kg Flaked Barley (Holland & Barrett) 140 EBC (7.4%)
Mash pH 5.6
Boil:
50 g Target Hops (8.0%) – added during boil, boiled 60 min (31 IBU)
25 g Fuggle Hops (4.0%) – added during boil, boiled 20 min (6 IBU)
0.5 Protafloc Tablet (Irish moss) – added during boil, boiled 15 min
0.3 g NBS Yeast Nutrient – added during boil, boiled 10 min
5 g Polyclar BrewBrite (finings)- added during boil, boiled 10 min
Post-boil:
300 g Panela Sugar 26 EBC (4.4%). Pre-dissolved in small amount of the boiling wort and stirred into beer in fermenter before pitching yeast.
Yeast:
1 packet of Imperial A09 Pub
(2 litre starter using 200 g dry malt extract, roughly 290 billion yeast cells)
Bottling/kegging stage tincture:
220 g of Roasted Cacao Nibs (Waitrose or Sainsbury’s cooking ingredients)
250 g of Coffee Beans (Lidl’s Italian roast was used)
2 Vanilla pods
All the above soaked separately in just enough vodka to cover for two weeks. In my case, about 1 Litre of cheap vodka was used (again from Lidl). Pour tinctures through strainer into bulk beer.
NOTES / PROCESS
- Add 300mg potassium metabisulphite to 43 litres tap water to remove chlorine / chloramine.
- Water profile dark and malty: Ca=110, Mg=11, Na=25, SO4=50, Cl=150. SO4/Cl ratio 0.3.
- 4.0 L/kg mash thickness with no sparge.
- Single infusion mash at 68C for 90 mins.
- Raise to 77C mashout temperature and hold for 15 mins.
- Boil for 60 minutes, adding Protafloc, etc., as per boil schedule. Lid on at boil-out, whirpool with large spoon or paddle and allow to settle. Start chilling immediately.
- Whilst wort is boiling, draw off about 500 ml in a plastic jug and dissolve the 300 g of Panela sugar.
- Cool the wort quickly to 19C (I use a one-pass convoluted counterflow chiller to quickly lock in hop flavour and aroma) and transfer to fermenter.
- Stir previously dissolved Panela sugar mixture into fermenter.
- Aerate well. I use pure oxygen from a tank at a rate of 1 litre per minute for 90 seconds.
- Pitch yeast and ferment at 19-20C (wort temperature).
- After the beer has fermented to near final gravity the beer is raised from fermenting temperature to a higher temperature roughly 1-2 degrees C above the original fermentation temperature and allowed to sit for two to four days for a diacetyl rest. Assume fermentation is done if the gravity does not change over 3 days.
- Before packaging you may optionally crash cool to around 6C and rack to a bright tank or bottling/kegging vessel that has been purged with CO2 to avoid oxygen pickup.
- Strain the tincture flavourings into the beer, as per the bottling/kegging stage described above.
- Package as you would normally. I rack to a cornie keg that has first been purged with CO2, and then carbonate on the low side (around 2.4 volumes of CO2) to minimize carbonic bite and let the flavours shine through. After 1-2 weeks at serving pressure the kegs will be carbonated and ready to serve. If bottling, use 151 g of table sugar in 25 Litres at 20 C. Leave at room temperature for two weeks, then store at cellar temperature for another week before serving.
COMMENTARY WITH PICTURES AND VIDEO
Here’s all the equipment set up ready for the brew. Notice the obligatory cup of tea! If you are wondering about the engine hoist, it’s there to lift the heavy malt tube out prior to boiling the wort.

Before the brewing day starts, I have to make sure that there is sufficient yeast for the fermentation. The best way to do this is with a yeast starter. A yeast starter is simply a fancy way of saying that you’re going to grow more yeast cells. A starter is simply a small unhopped beer, whose sole purpose is to allow the yeast to reproduce. You cultivate this yeast and then throw away the resulting ‘beer’, keeping only the yeast. This is usually done by making a small batch of lower gravity (1.036 – 1.040) wort in a flask by boiling dry malt extract (DME) and allowing it to ferment to completion. Lower gravity is best as it maximizes healthy yeast growth. The more yeast you need, the larger the starter you need. Here’s my 2 litre starter on the stir plate:
Starter at peak fermentation:

When the starter is finished, it needs to be put in the fridge for two or three days for the yeast to settle out. After settling, the unwanted ‘beer’ above the yeast is decanted off. Swirl a little of the wort from the fermenter into it, and tip the lot back into the fermenter (after wort has been oxygenated).
As well as preparing a starter, I have to prepare the tap water to make it suitable for brewing. My tap water alkalinity measured 233 (ppm as CaCO3) on the day of brewing and is far too high. There is no sparge water to treat as this is a non-sparge recipe. However, I do have to treat 43 litres of water for mashing. As the treated water needs to be chloride forward for the beer style, I am using 1M strength Hydrochloric Acid to lower the alkalinity. I used 134 ml of the acid and this gave me a very suitable alkalinity measurement of 33 (ppm as CaCO3). The tap water once treated is now called “liquor”.
Alkalinity out of the tap

Alkalinity after acid treatment

Here are the milled malt grains and flaked ingredients ready for the mash:
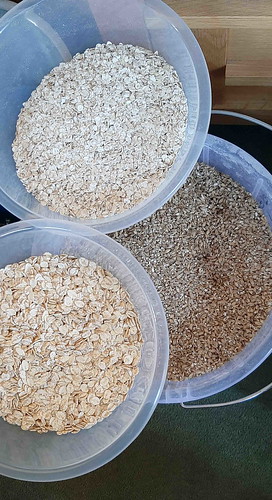
With the grist carefully poured inside the 50L Braumeister malt tube, I start the mashing process. Here’s a video of the wort rising up the malt tube and recirculating by running out of the top plate and down the side of the malt tube:
While waiting for the boil, I weigh the hops ready to add to the boiling wort:
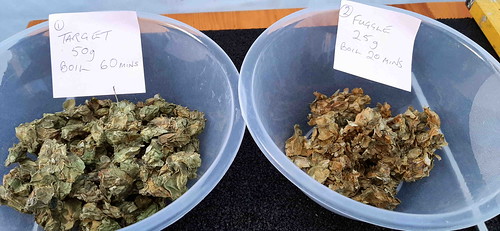
After the mashing is over, the malt tube is removed and the wort is heated to boiling point.
When the boil is over, I pump the boiled wort into the fermenter via a counter-flow chiller to cool it down to yeast pitching temperature. Here’s a picture of a previous brew showing how it’s done:

This is what the beer looked like after two days in the fermenter. The A09 yeast is really chomping away at this one!

This is a photo of the beer when fermentation was finished. I’ve not yet crash cooled or added the tinctures, at this stage, but the colour is perfect and the taste – even without the coffee, chocolate and vanilla – is like a very smooth and full bodied amber ale. The hoppiness seems about right as well and is slightly understated as it should be for a oatmeal stout.
And finally, as this beer is a bit of an enigma – being both golden and a stout – I’ve decided that “Enigma” would be a perfect name for it. So here is the bottle label I will be using:

Another successful brewing day over and a welcome increase in my brewing knowledge.
CONCLUSION
Some beer drinkers love these new, niche beers, while some couldn’t be bothered. Still others, like yours truly, have yet to come down on one side of the fence or the other. Do they taste good? Indeed they do, and they’re a fun exercise in the creativity of modern brewing techniques. But will they ever supplant their darker brethren? I doubt it. In my experience, while delicious in their own right, golden stouts lack some of the depth of malt complexity that I yearn for in a stout (this makes sense, given that their malt bills are, by definition, simpler). You could even think of golden stouts as coffee blonde ale with chocolate and maybe some lactose-smoothness added. Luckily, I think golden stouts are here to stay. So the next time you feel like taking a walk on the wild side with a mind-bending beer, try a golden stout! Cheers!

