
My big fat shiny American Keg brewery build with pics
-
setmash
Re: My big fat shiny American Keg brewery build with pics
Im having real issues drilling the kegs. I have a set of fairly new cobalt bits. I managed to break the 2mm bit after about 20 mins of slow drilling and then moved to the 3mm bit which is hardly making a dent. Im using plenty of cutting oil. Using a hand drill at slow speed (think it may have been a bit quick to start with). Hmmm... any advice ? Im going to order a cobalt step bit i think....
-
Fil
- Telling imaginary friend stories
- Posts: 5229
- Joined: Sun Oct 16, 2011 1:49 pm
- Location: Cowley, Oxford
Re: My big fat shiny American Keg brewery build with pics
IM no epert but 1st time i tried to drill one of my french pots i had taken all the work hardening woth hi speed drilling cautions to heart and using a very contralble 18v hand drill drilled as slow as i could,, snapped all the small cobalt drill bits i had bought by spending 10 mins a time leaning on em drilling slowly..
i ended up with a dome of cold formed SS on the pot interior where i was drilling!!
Finally i did get thru that way but it was hard work, next time rnd i had lent me fancy drill to a pal and it was late back so i pulled the dusty old 450w mains drill with a more on/off trigger.. using that with a 3 or 4mm hss jobber bit pulsing the trigger with short sub second pulses spraying with wd40 between pulses i was thru in 1-2 pulses, granted the skin of a french pot is thinner than a keg wall but if my experience helps at all -good luck, if not u can have a giggle at my stoopidity for light relief meanwhile..
ist update for months n months..
Fermnting: not a lot..
Conditioning: nowt
Maturing: Challenger smash, and a kit lager
Drinking: dry one minikeg left in the store
Coming Soon Lots planned for the near future nowt for the immediate
Fermnting: not a lot..
Conditioning: nowt
Maturing: Challenger smash, and a kit lager
Drinking: dry one minikeg left in the store
Coming Soon Lots planned for the near future nowt for the immediate
-
dean_wales

- Drunk as a Skunk
- Posts: 991
- Joined: Mon Jul 12, 2010 1:13 pm
- Location: Welshman exiled in Exeter!
Re: My big fat shiny American Keg brewery build with pics
My eyes!
Thoroughly and absoultely superb job though. Mine just got wrapped in bubble wrap Of course mine will retain heat better but that is little consolation!
Following with intrest.
Thoroughly and absoultely superb job though. Mine just got wrapped in bubble wrap
Following with intrest.
-
rossi74
Re: My big fat shiny American Keg brewery build with pics
I drilled mine with a cheep tool station 4mm cobalt bit then a 20mm starratt hole saw. Slow and keep cooling oil on it.
Good luck
Good luck
-
setmash
Re: My big fat shiny American Keg brewery build with pics
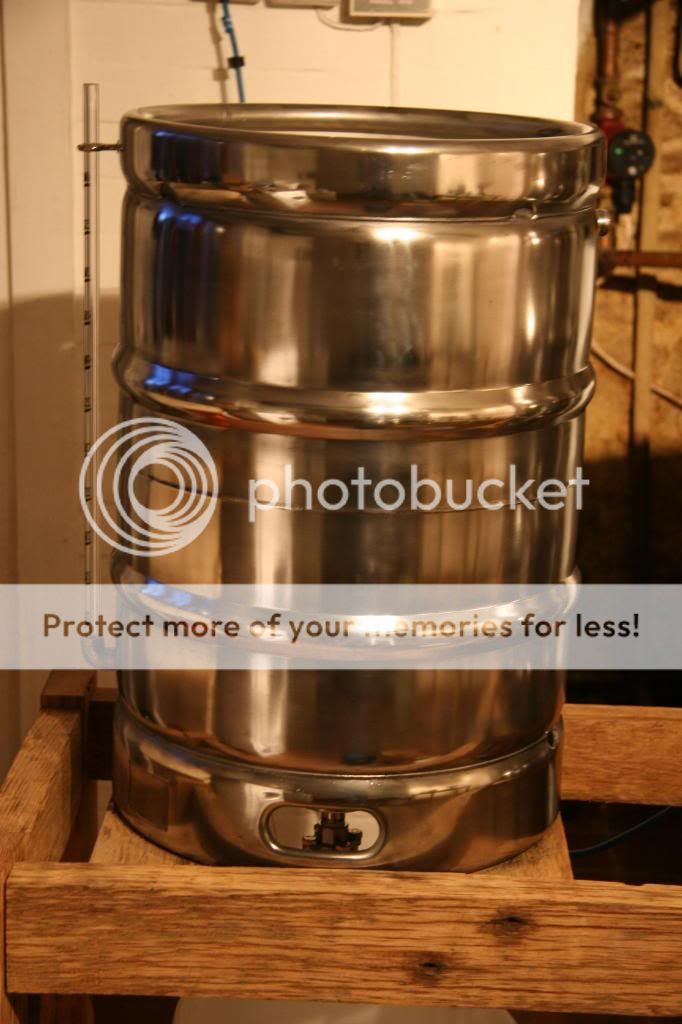
Took the day off work today to try make some progress. My new Cobalt drill bits, step bits and avionic connectors (Din connectors now in the bin) all arrived. The day went well. Ive completely drilled the HLT including element, float switch, thermowell, liquor in and sight glass. I even managed to calibrate and put on the stickers on the HLT sight glass. They look great - even though i would change the orientation 90 degrees - not decided if i will change them on the copper. Ive tried to ensure that all the holes are at the back of the rig so that as little as possible is seen in way of cables etc. I want to maintain a clean look (loads of kit will be visible once the RIMs and plate chiller are installed). I want the kegs to look as much like kegs as possible and not look cluttered with openings and protrusions. It seems to be working so far. Drilling was really easy (Scotia would be proud). The new cobalt bits (slow drill with plenty of pressure) went through the kegs with ease. Even the cheap step bits (£8 for 3 off fleabay) worked really well.
Here is the HLT with sight glass, kettle, float switch, thermowell and liquor feed installed as viewed from the front of the rig. Nice and clean
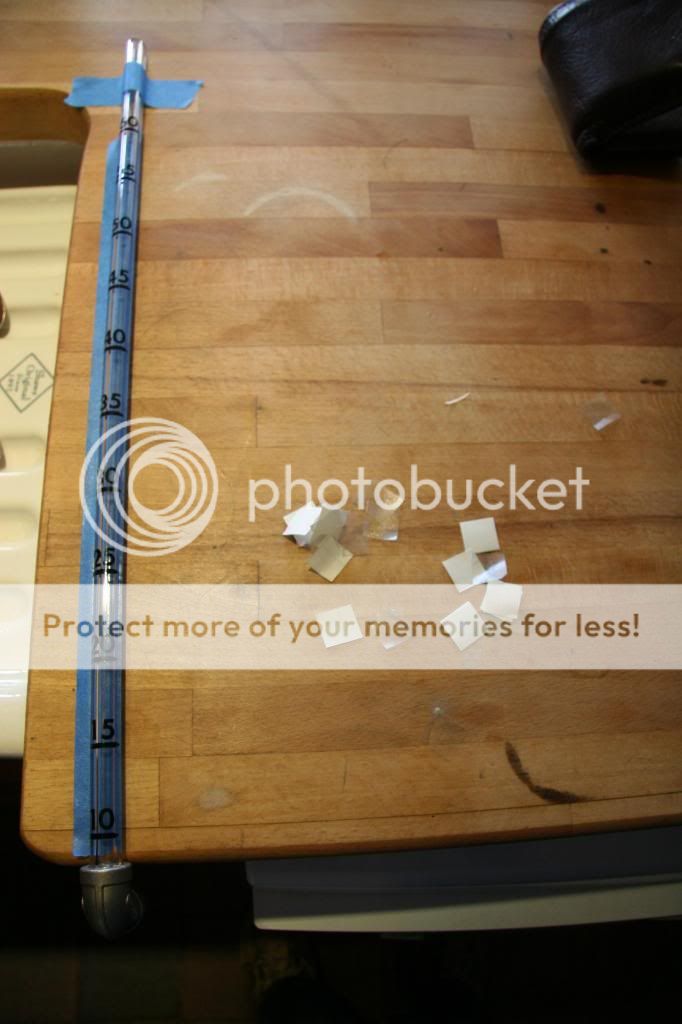
Adding the calibration stickers after calibrating
Kettle element installed minus the outer casing - you can see the two connection points for the cable

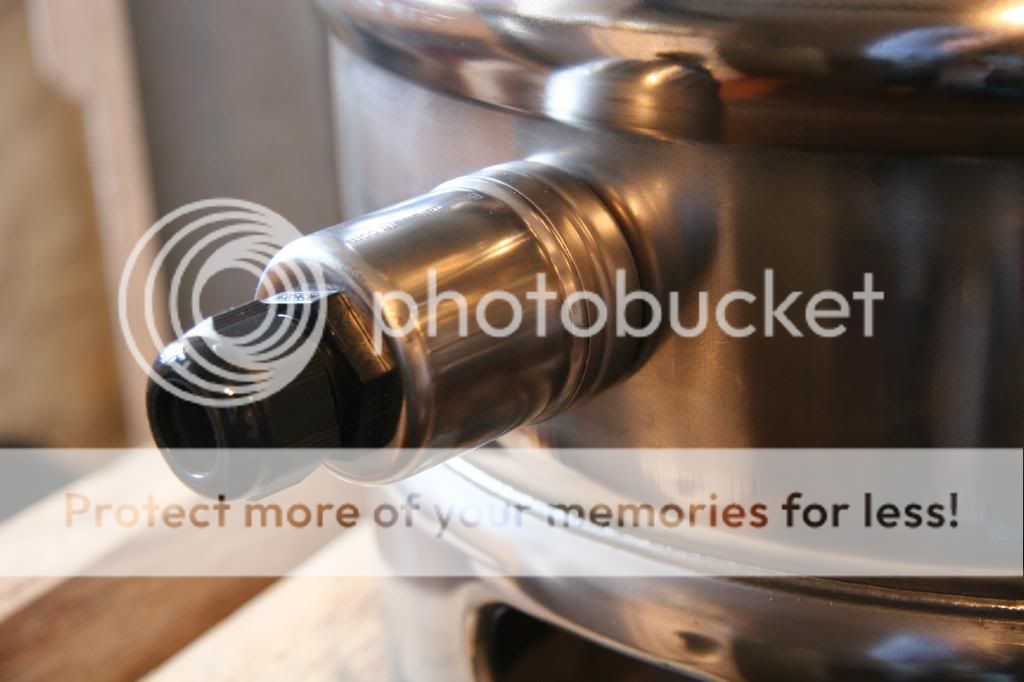
Kettle element with outer casing - power cable from control panel will pass through the grommet
Couple of shots of inside the HLT. You can see the float switch , ULWD 5.5KW element, 6 inch Thermowell and the Liquor in ( as well as the bottom drain of the keg)
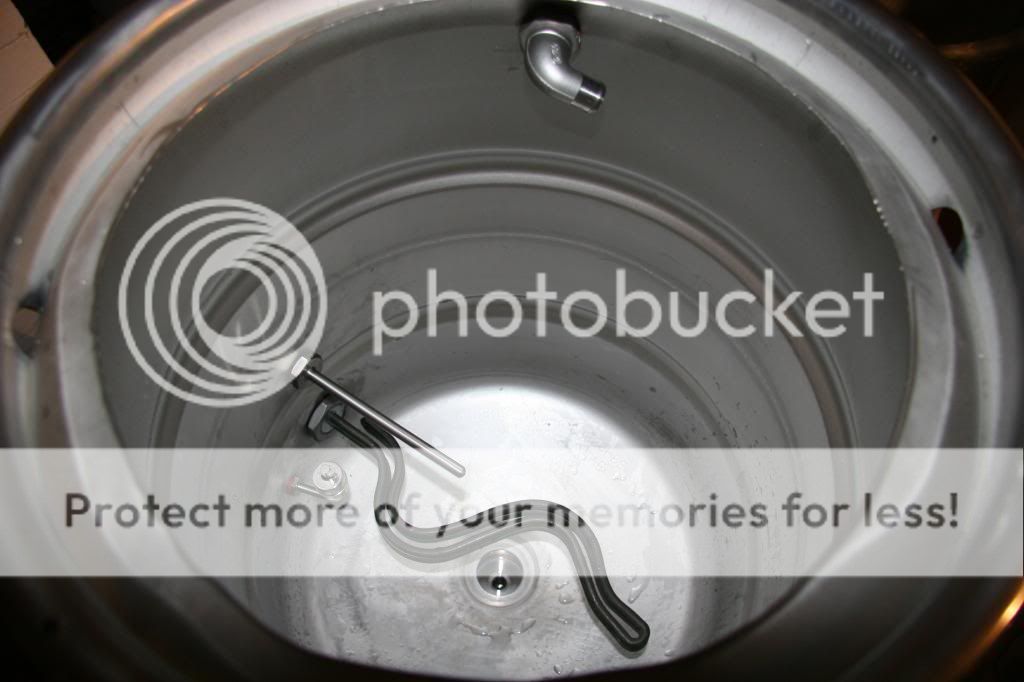
you can see the sight glass bushings to the left
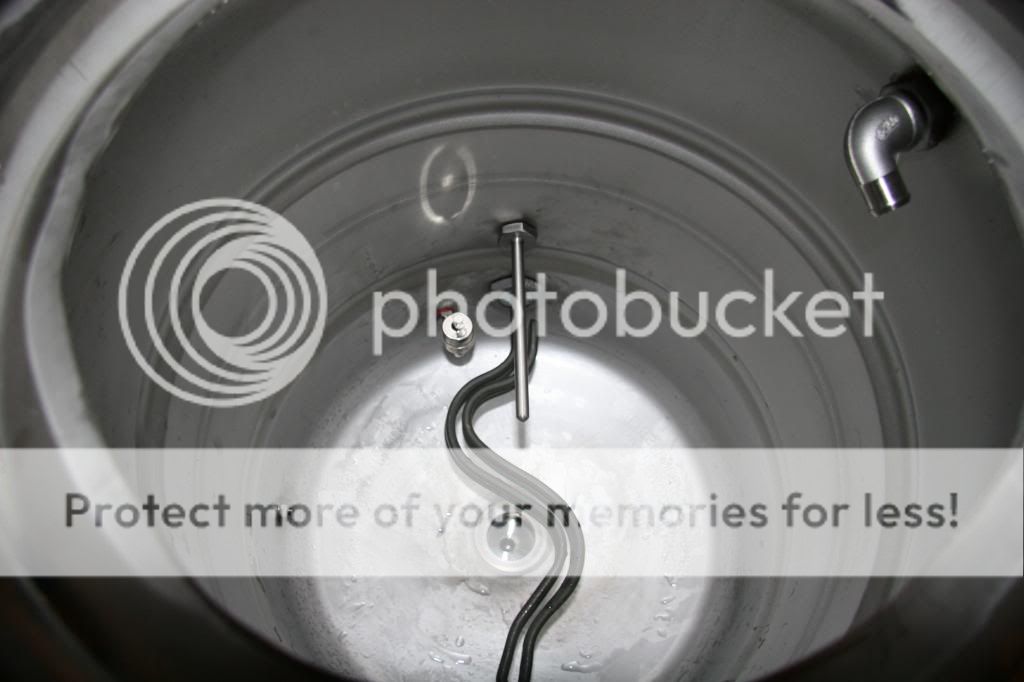
This the rear of the HLT. You can see the float switch, element housing and thermowell (no probe inserted). All nice and neat and out of sight at the rear of the keg

Kettle and MT drilling tomorrow.....
Here is the HLT with sight glass, kettle, float switch, thermowell and liquor feed installed as viewed from the front of the rig. Nice and clean
Adding the calibration stickers after calibrating
Kettle element installed minus the outer casing - you can see the two connection points for the cable
Kettle element with outer casing - power cable from control panel will pass through the grommet
Couple of shots of inside the HLT. You can see the float switch , ULWD 5.5KW element, 6 inch Thermowell and the Liquor in ( as well as the bottom drain of the keg)
you can see the sight glass bushings to the left
This the rear of the HLT. You can see the float switch, element housing and thermowell (no probe inserted). All nice and neat and out of sight at the rear of the keg
Kettle and MT drilling tomorrow.....
-
Fil
- Telling imaginary friend stories
- Posts: 5229
- Joined: Sun Oct 16, 2011 1:49 pm
- Location: Cowley, Oxford
Re: My big fat shiny American Keg brewery build with pics
the new drill bits did the job then, u could take some pics of the drilling and prep others for drilling thru thicker skins than the usual french pots too perhaps;)?
ist update for months n months..
Fermnting: not a lot..
Conditioning: nowt
Maturing: Challenger smash, and a kit lager
Drinking: dry one minikeg left in the store
Coming Soon Lots planned for the near future nowt for the immediate
Fermnting: not a lot..
Conditioning: nowt
Maturing: Challenger smash, and a kit lager
Drinking: dry one minikeg left in the store
Coming Soon Lots planned for the near future nowt for the immediate
-
rossi74
Re: My big fat shiny American Keg brewery build with pics
Don't forget to earth the shiney. Couldn't see an earthing point by the element terminals.
-
setmash
Re: My big fat shiny American Keg brewery build with pics
Yes the element housing have earth tags...a very good point indeed !! I will check how well the earths are working when its all together, if im not happy i will drill some earth tags in to all three vessels.
Fil - good idea, ive taken lots of shots today and will do a separate post 'Drilling thick stainless steel for dummies' as i am a bloody dummy lol
Fil - good idea, ive taken lots of shots today and will do a separate post 'Drilling thick stainless steel for dummies' as i am a bloody dummy lol
-
setmash
Re: My big fat shiny American Keg brewery build with pics
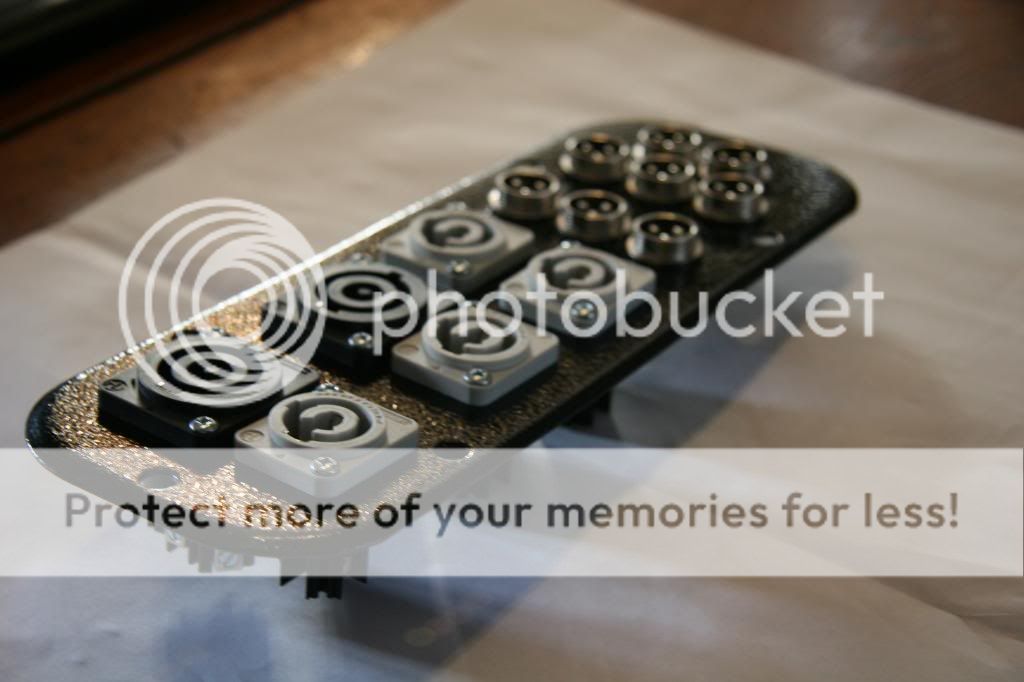
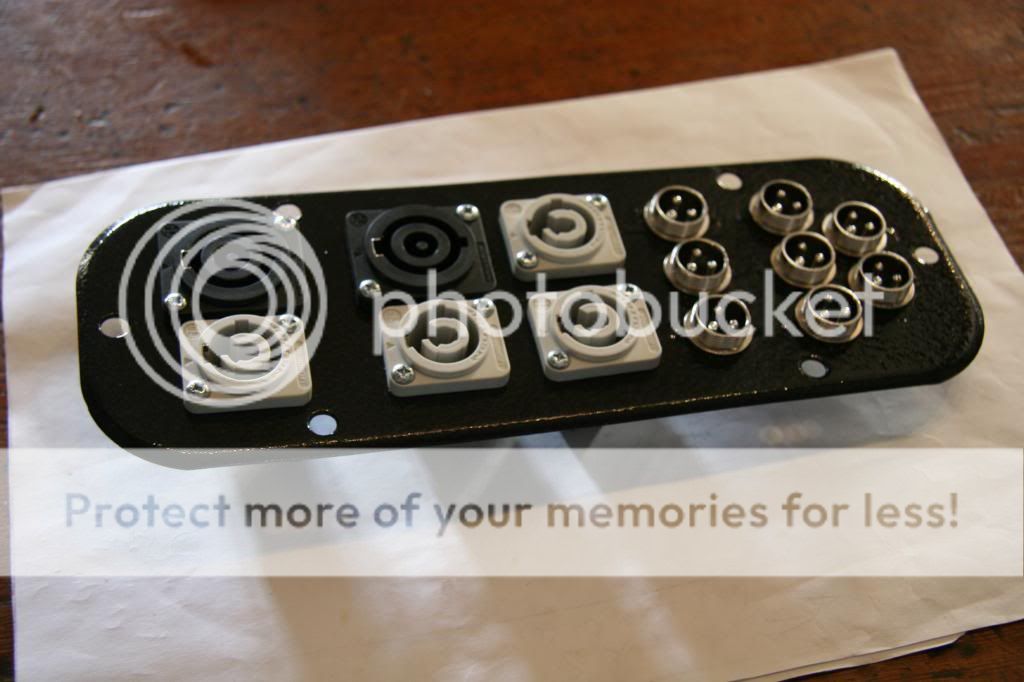
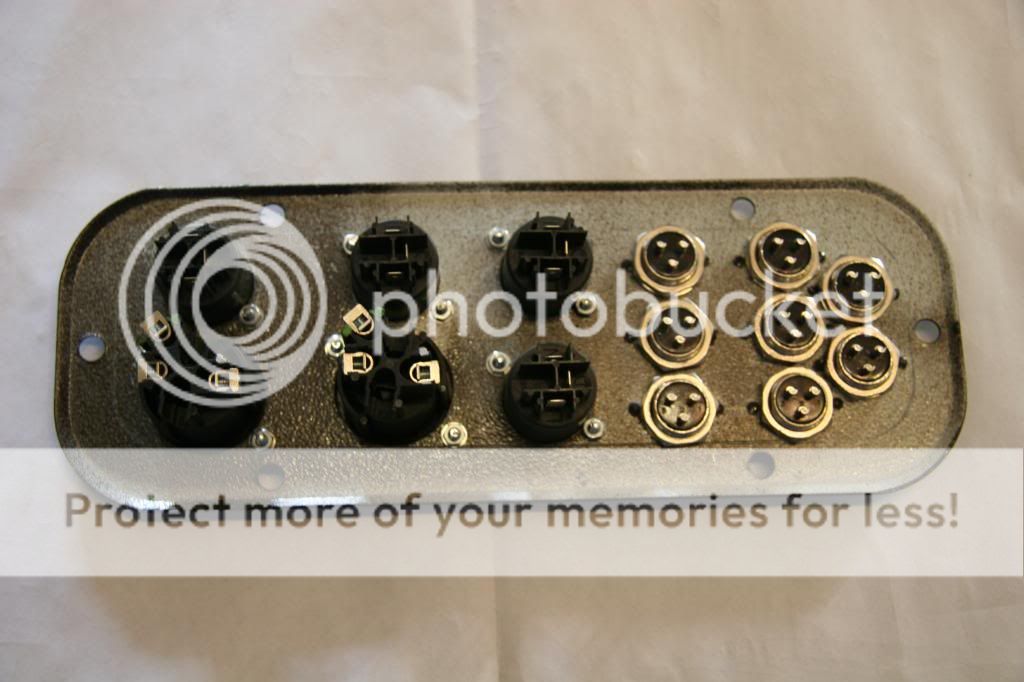
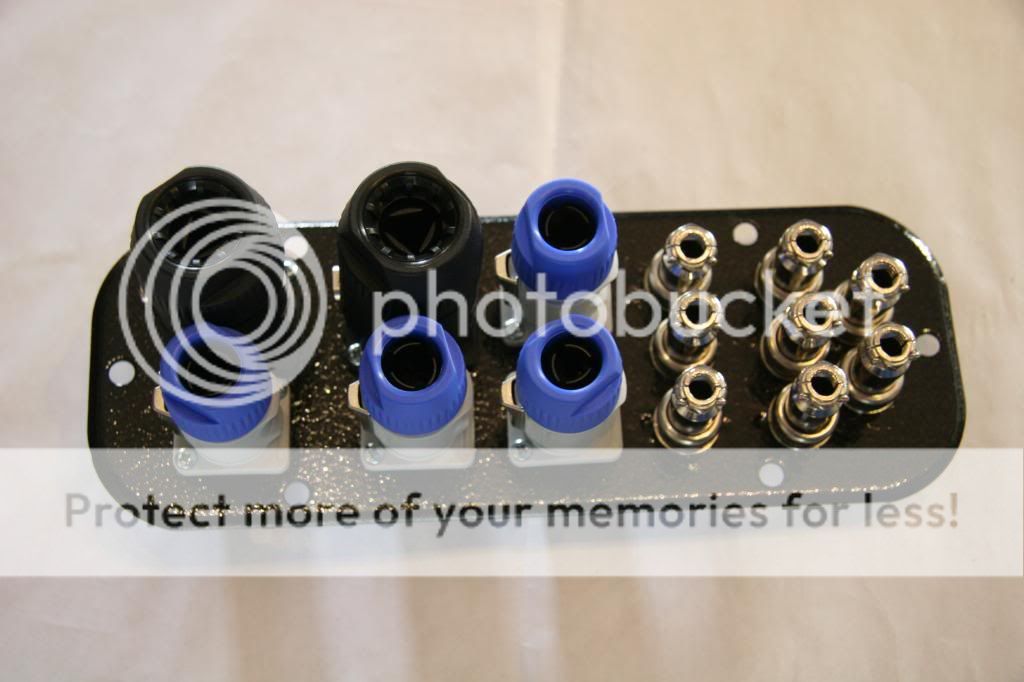
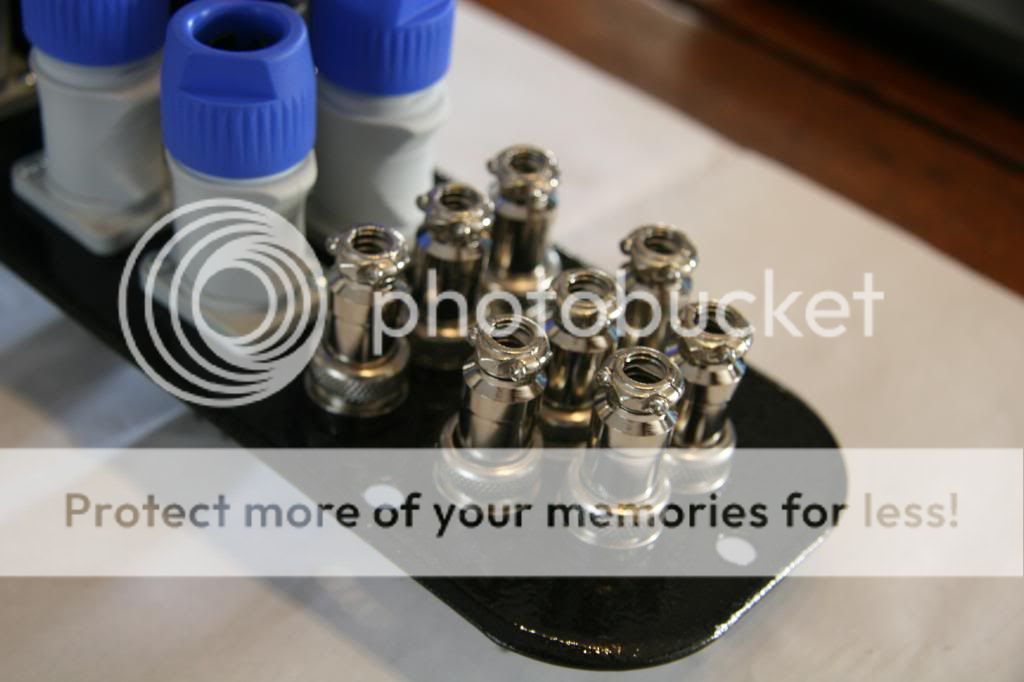
I ordered Aviation connectors to replace the horrible DIns - Thanks Bobsbeer. I ordered them from China - took a while to come as it was Chinese New Year. They cost about £7 for 10 males and females, a bargain. Ive filled the DIN screw holes and painted the plate. Its taken a lot of time to do this but it looks well. Im happy with the density of connectors on there but they were tricky to install. I can now finish off the control panel. Ive made a design change, im going to have automatic and manual pump control - from the front of the stand.
Hope you like
Hope you like
-
setmash
Re: My big fat shiny American Keg brewery build with pics
Ive been quiet for a bit partly down to a hectic work schedule and partly down to getting my panel built.
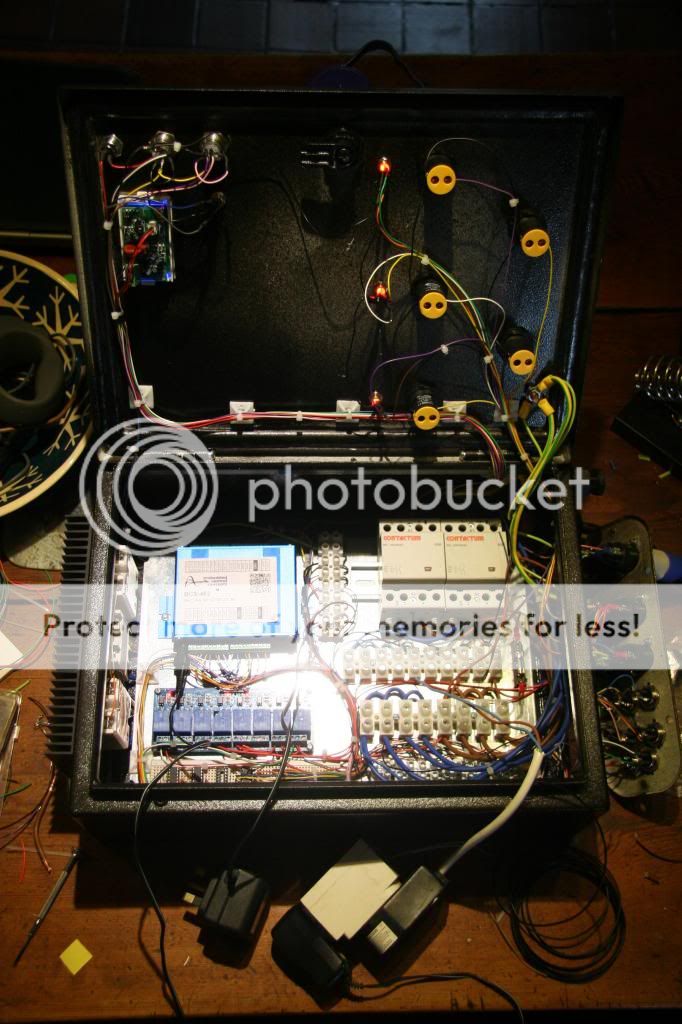
Its now at the debug stage. Ive had a few small issues but nothing major. I need to make a couple of changes next weekend then the panel should be complete. I did manage to give myself a 240V belt when one of the crimp plugs fell off during test and touched against the base plate. Because the base plate was not installed it wasnt earthed....that'll teach me. Moral of the story ...please be careful. I also noticed some interesting stuff. The SSR's leak like hell (i.e switched off) when not under load - mine 190V to 220V leakage, so be careful. I noticed they were leaking as the LEDs lit up. You can add a snubber circuit but i dont see an issue as they will generally be connected to an element i.e. a decent load. Just dont go poking around assuming they are off....as they may not be !! Also discovered that the supplier of my relay board tells lies. The board is active low and not high (as advertised) - this is a real pain in the arse but i can get round it as the relays are single pole change over. Needs a bit of re-wiring...but i hate it when stuff doesnt do what its supposed to.
Sorry about the photo - but here is the inside of the panel under debug
-
setmash
Re: My big fat shiny American Keg brewery build with pics
See below
Last edited by setmash on Mon Mar 17, 2014 7:36 pm, edited 3 times in total.
-
setmash
Re: My big fat shiny American Keg brewery build with pics
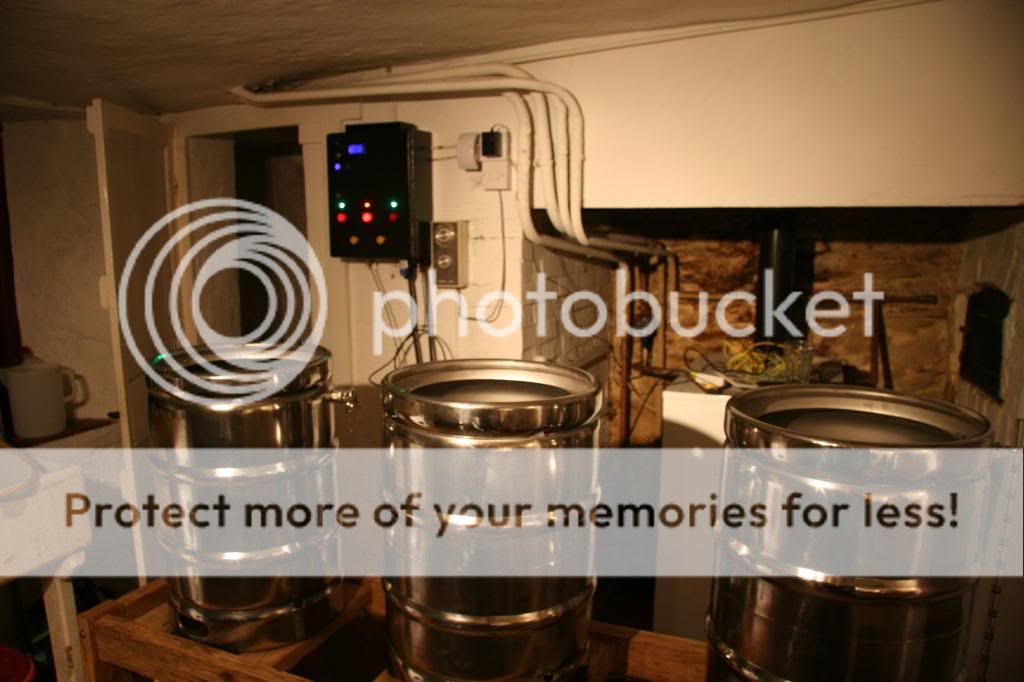
Pretty good weekends work. A bit frustrating at times but fairly pleased with progress. I managed to root out all the faults in the panel. Re-wired the relay board, fixed some other wiring issues. Found what i thought was a fault with my amp meter on the panel. Turns out i had put the live and neautral cables through the sensing transformer and not just the live. Easy fix but it took me 2 hours to figure out what i had done wrong. The good news is that my own design logic board seems to be working (so far). This board will not allow the elements to fire unless certain conditions are met - pump on, flow switch enabled , float switch enabled etc... Once the panel was up and working I installed my 40 amp supply (including plug and cable). The MCB i bought for the job was incorrect so i had to run to B & Q to get the right breaker. Anyway all installed and the panel is now in its final position on the wall next to the brew stand. I connected up the Copper and gave her a spin. Amp meter showed 22 Amps being drawn as it raised 25 liters of water to boiling in a matter of minutes...wow it was fast, im used to propane burners which are much slower. The BCS is going to be fantastic to use. I wrote my first commands. Raise Copper to 100 degrees then switch to PID control and roll boil for 5 minutes then sound an alarm and switch off...it worked a charm. The BCS is a fine piece of kit but its a bit fussy about which network access point you connect it to. Im going to buy a decent router this week as the one i have is a bit naff. I did discover an issue. Condensation. I used to brew in a wider vessel using propane on the back kitchen floor. I never really had many condensation issues with window and door open. However the kegs are higher and they focus the steam like a blow pipe on to the ceiling - really powerful. Condensation builds up much quicker than before. I need to figure out an extraction system (suggestions ?) pretty quick.
Final stages of debug


Wall mounted and fired up. You can see the voltage and current consumption on the meter. The box is arranged so that the 3 big LEDs represent HLT element , RIMs element and Copper element (left to right) The 3 small bright LEDs above the big red ones are driven from my logic board. Green means element can fire under the control of the BCS, red means it cant. So as we can see here the HLT and the Copper elements can fire (float switches detected enough water in vessels to cover element) but the RIMs cant.
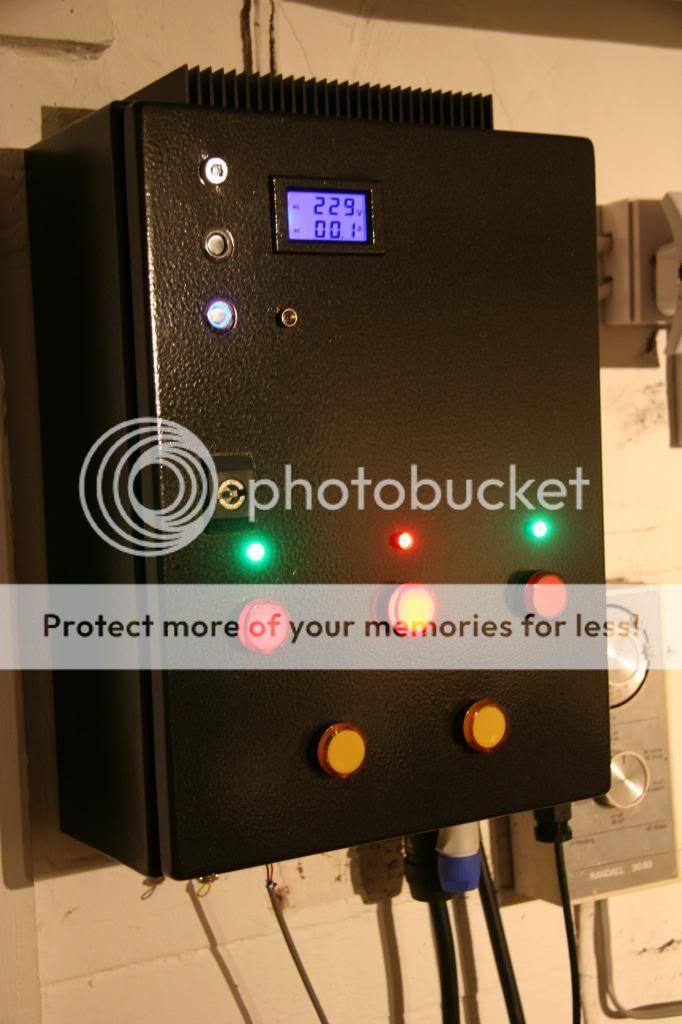
Shot of the brewery with panel in position - brew stand further forward than normal as I fit cabling. Some drilling left to do, need to fit RIMs next weekend if I get the chance.
Final stages of debug
Wall mounted and fired up. You can see the voltage and current consumption on the meter. The box is arranged so that the 3 big LEDs represent HLT element , RIMs element and Copper element (left to right) The 3 small bright LEDs above the big red ones are driven from my logic board. Green means element can fire under the control of the BCS, red means it cant. So as we can see here the HLT and the Copper elements can fire (float switches detected enough water in vessels to cover element) but the RIMs cant.
Shot of the brewery with panel in position - brew stand further forward than normal as I fit cabling. Some drilling left to do, need to fit RIMs next weekend if I get the chance.
-
Frothy
Re: My big fat shiny American Keg brewery build with pics
Very nice indeed!
Do the neutrik come with rubber seals? i.e. do they seal on the cable or on the control box?
cheers
Do the neutrik come with rubber seals? i.e. do they seal on the cable or on the control box?
cheers
-
setmash
Re: My big fat shiny American Keg brewery build with pics
Thanks - they come as a plug and a socket. Ive put the socket on the control box and the cable plugs in to that. The mating is excellent but dont think its fully waterproof. The cable connector ships with a grommet insert and grips the cable nicely - but again i dont think its water proof. I seem to remember seeing them with rubber gland options.
If you want some extra pics let me know i dont mind taking some if it helps.
If you want some extra pics let me know i dont mind taking some if it helps.
-
Frothy
Re: My big fat shiny American Keg brewery build with pics
Great thanks - it the box wireless controlled?