
SetMash,
where did you get the false bottom? did you make it yourself?
How do you seal it around the bottom of the keg? or do you assumethe weight of the grain (~8-10Kg) will do that for you?
My big fat shiny American Keg brewery build with pics
-
setmash
Re: My big fat shiny American Keg brewery build with pics
Hi, I got the false bottom from here. Be warned thsi is for an American Sanke keg so Ive no idea if it will fit a 50 liter European keg....
http://brewhardware.com/false-bottoms-f ... alsebottom
http://brewhardware.com/false-bottoms-f ... alsebottom
-
setmash
Re: My big fat shiny American Keg brewery build with pics
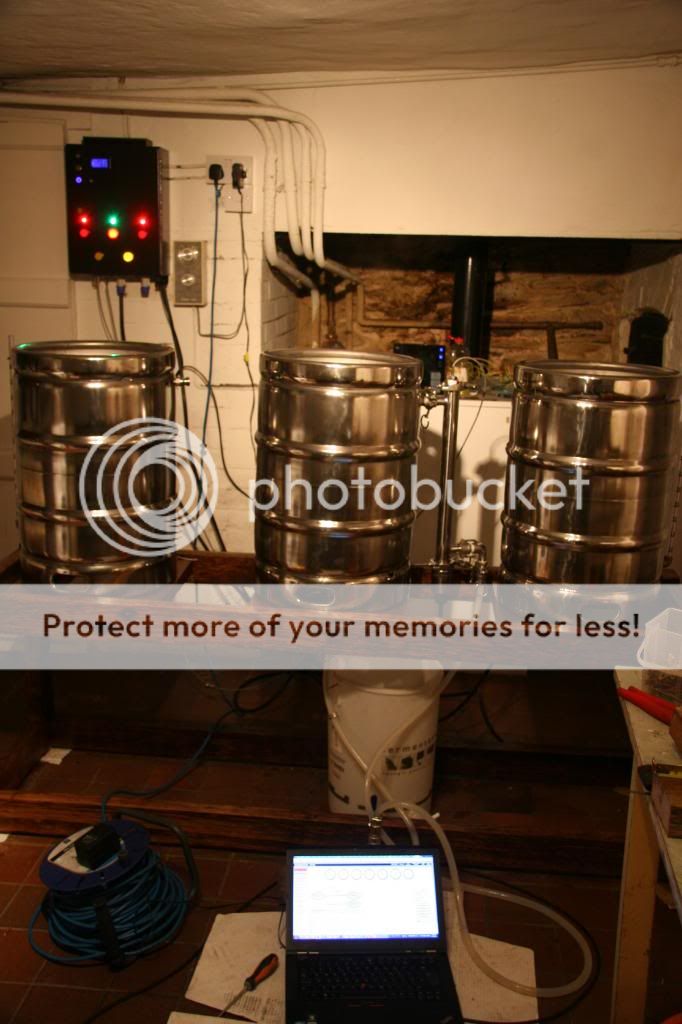
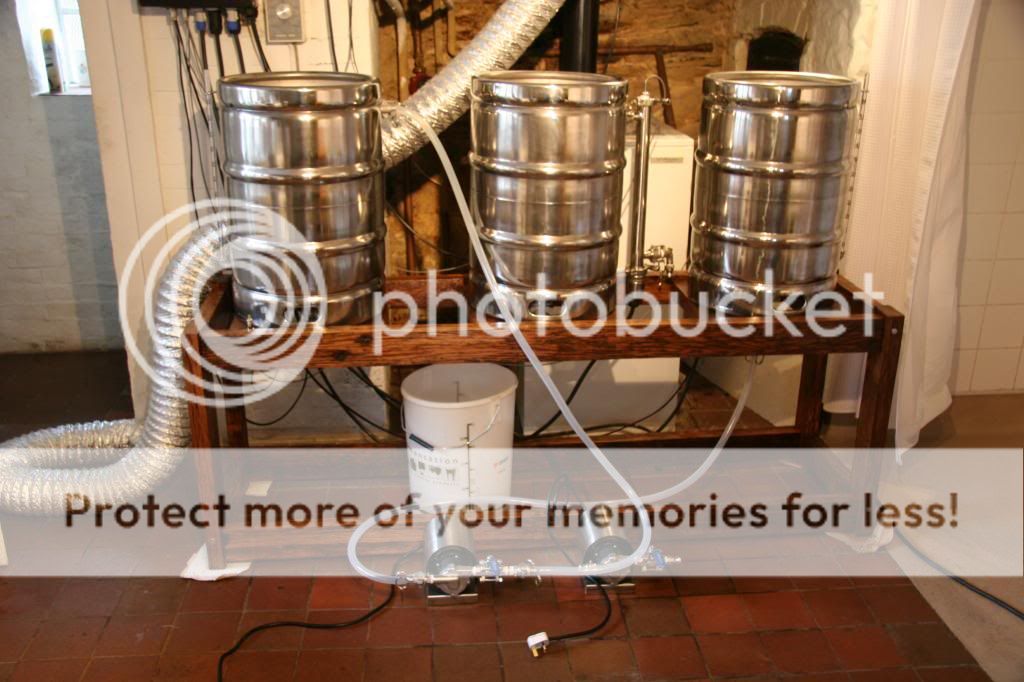
Much progress has been made in the past few weeks. I will update on my RIMs build and test first - it works really well. The RIMs tube comes with camlocks. I attach the RIMs to the side of the MT Keg. The RIMs has a 4.5Kw element as i use it to heat the strike water. This saves a lot of time and energy as i bring up the sparge water in the HLT later in the process so it doesnt have to sit around. I transfer the strike water (38 litre brew so sparge is approx 18 litres). My mash schedule is thus:
1. Transfer 18 liters from my Copper (which has pre-boiled treated water (liqour) in to the MT- transferring 18 liters with the chuggers is really quick
2. Heat the strike water in the MT to strike temperature using the RIMs tube...this is REALLY quick - less than 10 minutes (so from switching the rig on im doughing in in less than 12 mins !!)
3. Mash for 60 or 90 mins at 66 degrees.
4. 25 mins before the end of the Mash transfer the sparge water from the Copper to the HLT - heat to 79 degrees whilst mashing continues
5. Raise Mash to 76 degrees to mashout
6. Sparge
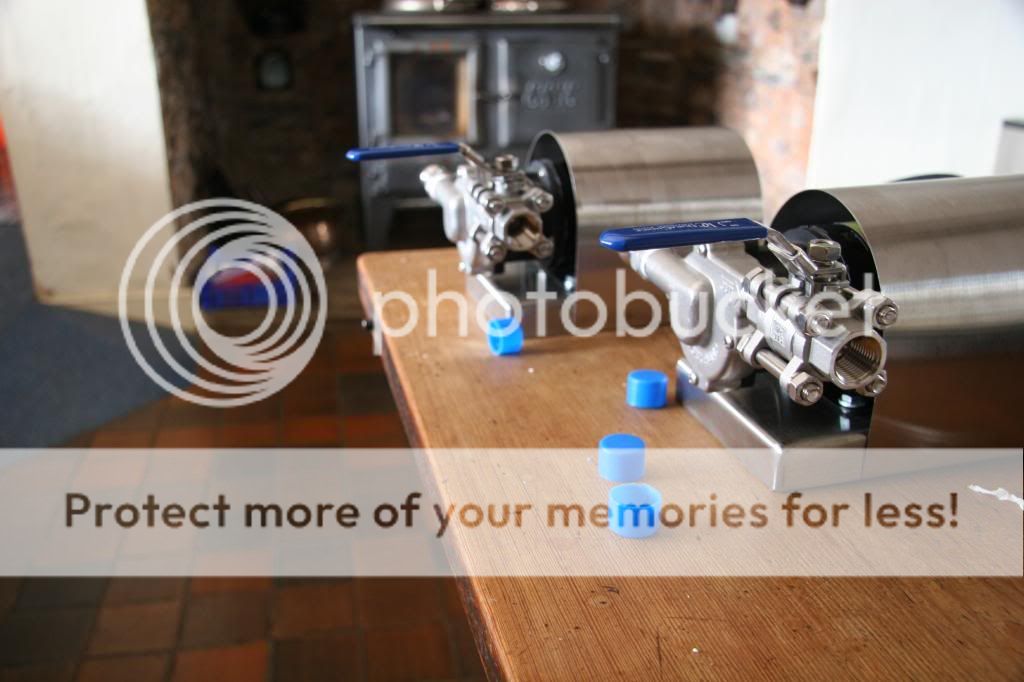
Here Im drilling the keg for the RIMs tube fixing screw

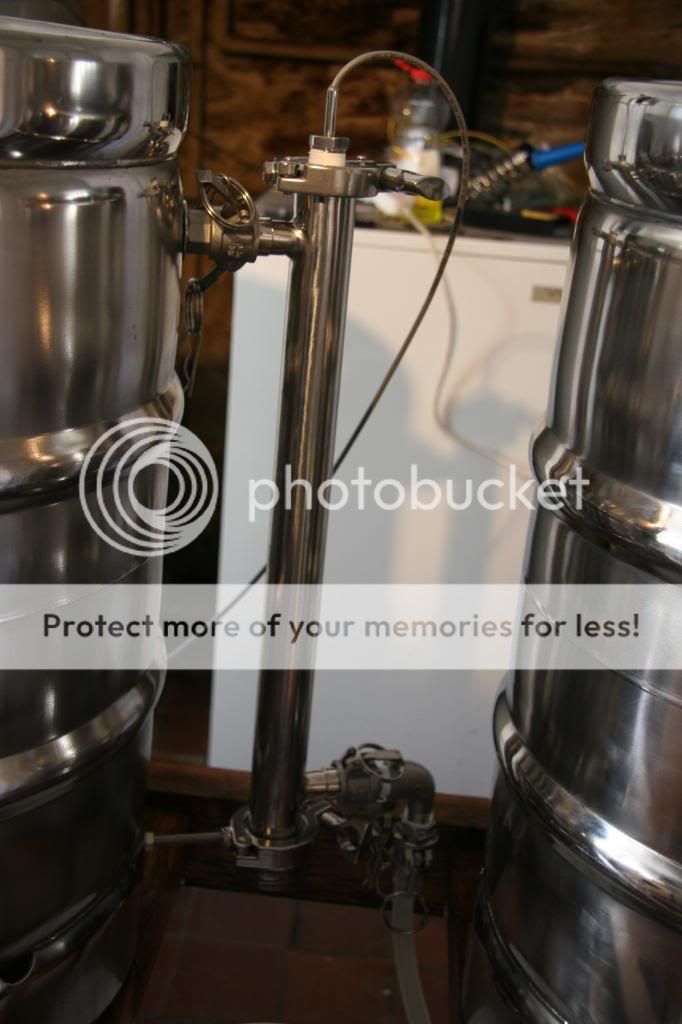
Here you can see the RIMs tube mounted on the side of the MT - you can see the RIMs tube output quick disconnect at the top of the tube which attaches to the keg
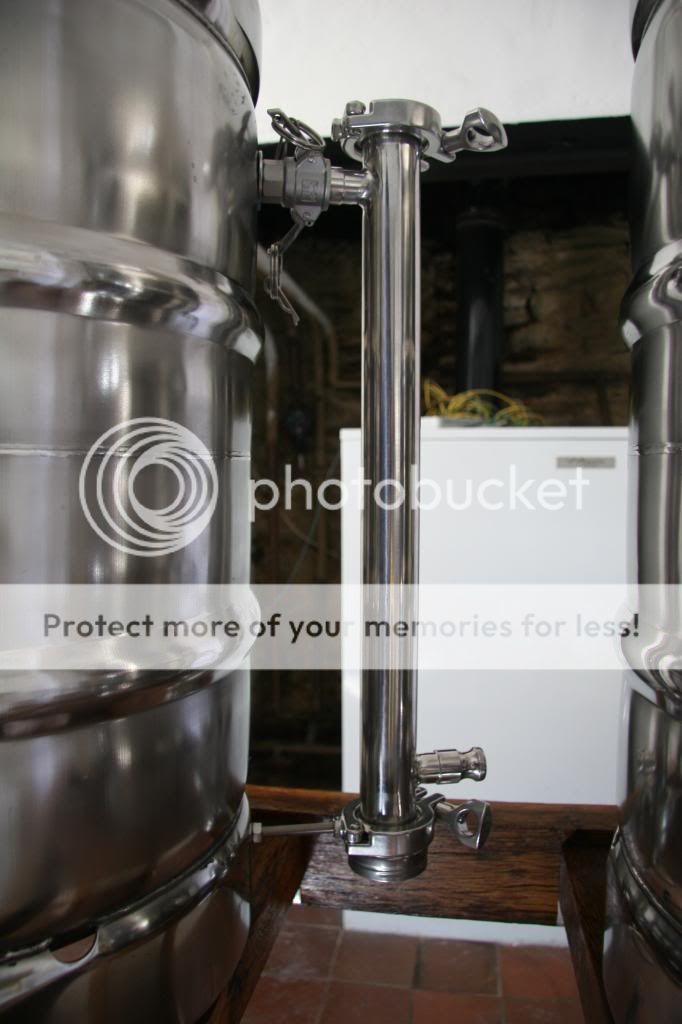
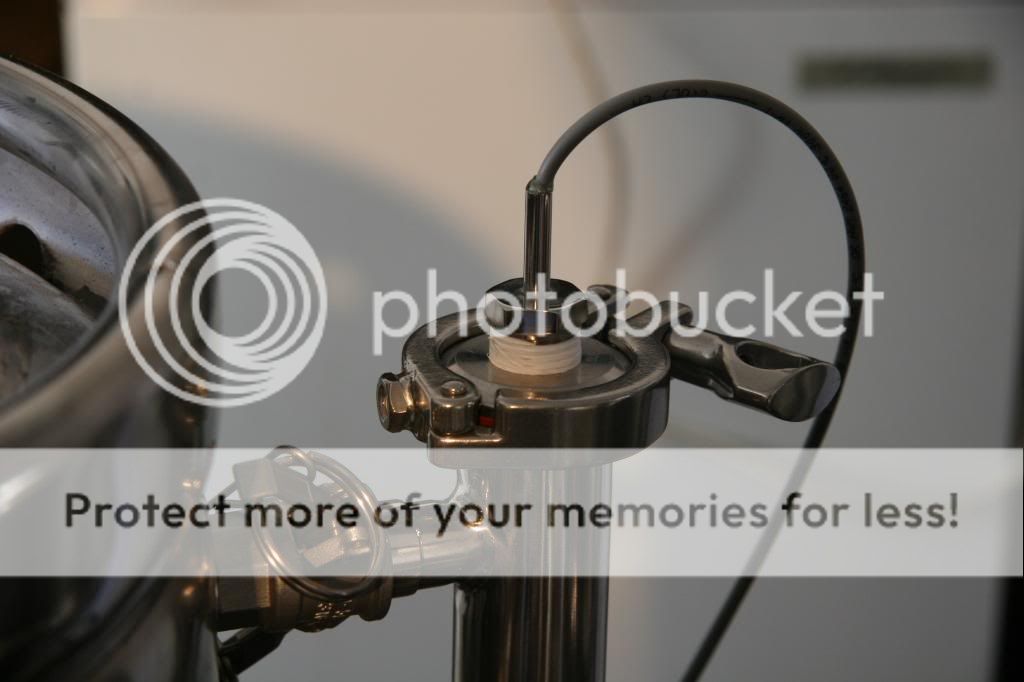
Top of RIMs tube showing more detail of the quick disconnect in to the keg and also the RIMs temp probe inserted in to the top of the RIMs tube
RIMS attached to side of keg (no element fitted)
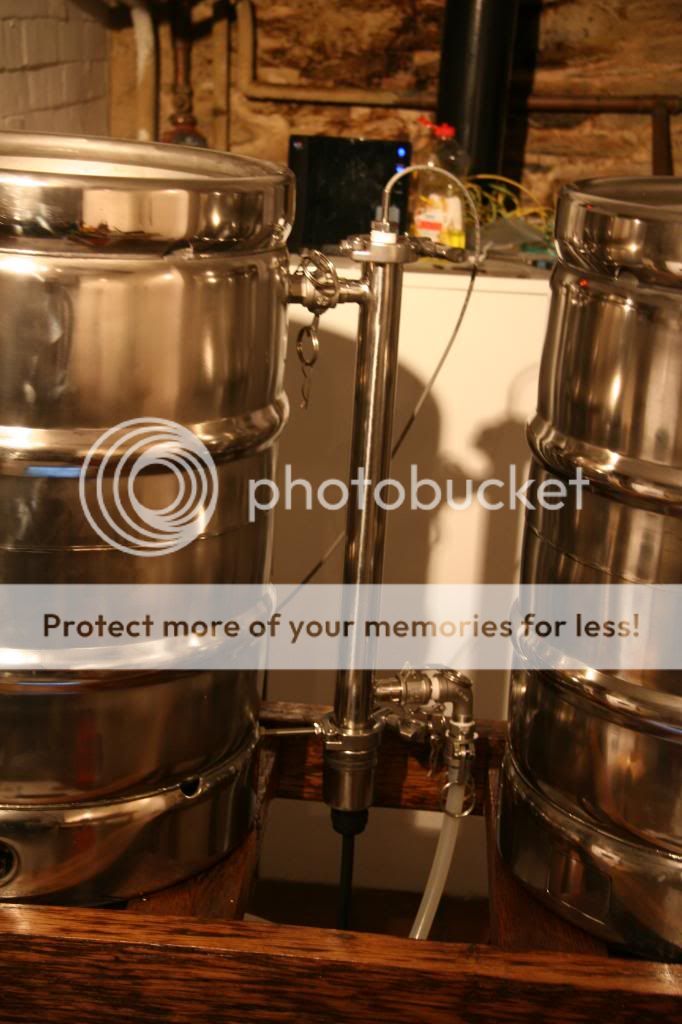
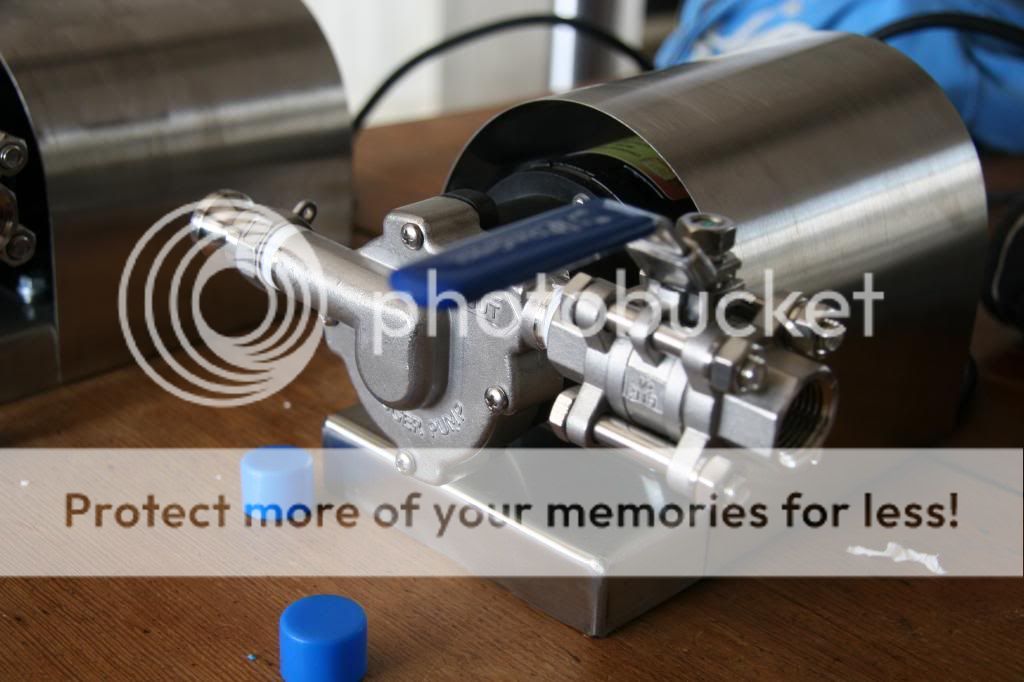
Bottom of RIMs tube showing quick disconnect input (flow sensor to be fitted later)

4.5Kw ULWD element in its housing

Wiring of element in its housing (note heat shrink insulation and proper earth connection)

Completed element housing prior to installtion in the RIMs (tri-clamps together)

The complete unit put together
Wet testing the MT and RIMs
1. Transfer 18 liters from my Copper (which has pre-boiled treated water (liqour) in to the MT- transferring 18 liters with the chuggers is really quick
2. Heat the strike water in the MT to strike temperature using the RIMs tube...this is REALLY quick - less than 10 minutes (so from switching the rig on im doughing in in less than 12 mins !!)
3. Mash for 60 or 90 mins at 66 degrees.
4. 25 mins before the end of the Mash transfer the sparge water from the Copper to the HLT - heat to 79 degrees whilst mashing continues
5. Raise Mash to 76 degrees to mashout
6. Sparge
Here Im drilling the keg for the RIMs tube fixing screw
Here you can see the RIMs tube mounted on the side of the MT - you can see the RIMs tube output quick disconnect at the top of the tube which attaches to the keg
Top of RIMs tube showing more detail of the quick disconnect in to the keg and also the RIMs temp probe inserted in to the top of the RIMs tube
RIMS attached to side of keg (no element fitted)
Bottom of RIMs tube showing quick disconnect input (flow sensor to be fitted later)
4.5Kw ULWD element in its housing
Wiring of element in its housing (note heat shrink insulation and proper earth connection)
Completed element housing prior to installtion in the RIMs (tri-clamps together)
The complete unit put together
Wet testing the MT and RIMs
-
Beer_Matt
Re: My big fat shiny American Keg brewery build with pics
One word, inspirational! Keep the updates coming 

Re: My big fat shiny American Keg brewery build with pics
Great posts I am following with interest. I am interested to see when you do your first mash how your recirculation of wort works out. I saw you did a test with I think was cold grain and it flowed fast but as the grain gets more glupee  it will be harder for the wort to pass through it. keep the posts coming.
Deos miscendarum discipule
http://www.nationalhomebrewclub.ie
http://www.nationalhomebrewclub.ie
-
setmash
Re: My big fat shiny American Keg brewery build with pics
Many thanks guys. I did a full brew at the weekend (which turned out to be rather interesting - I will do a full update with pics when i get chance). I had no issues at all with recirculation the bottom drain worked perfectly with excellent flow through the RIMs - I had to set the output valve from the MT in to the RIMs at about half as the flow was so strong. After i finished sparging i emptied the MT and every drop of liquid came out - as it did in the Copper after boil - the hops were almost dry when i pulled them out every drop of liquid went in to the FV !!
-
setmash
Re: My big fat shiny American Keg brewery build with pics
Juts calculated efficiencies , Mash = 83.7% Overall 81.5%, best efficiencies Ive ever recorded (not obsessed with efficiency but it shows just how good the bottom drain and RIMs are).
-
setmash
Re: My big fat shiny American Keg brewery build with pics
Here are some pics of the first brew. The rig is not complete I still have to build several parts of it including mounting the pumps, building the remote pump control box, sorting my chill solution out, emergency stop button, control tablet mounting and various bits of plumbing and drilling including sparge arm. Performing a couple of brews on the rig in its basic form like this is well worth doing. I learned tons and tons about it and I have made several design changes as a result of these brews. I have done two brews now and ran out of sparge water (i pre-boil to treat) on both occasions. But i have thought of a simple solution. Because i raise the strike water temperature in the MT via the RIMs I can use both the HLT and the Copper to pre-boil enough water. So for my 3rd brew (hopefully easter) I will pre-boil and cool overnight 30 liters in the HLT and 50 liters in the Copper. I will transfer 30 liters from HLT in to MT and raise to strike. After a quick clean of the HLT I will transfer sparge water from the Copper to the HLT ready to be brought up to temp. Brilliant ! This now increases the rigs brew output capacity to about 58 liters if I ever needed it.
Things that Im impressed with:
BCS is fantastic.
Bottom drain kegs are so easy to clean and use and completely drain. They dont move off the brew stand.
RIMs is excellent - produces super clean wort, holds the Mash to within 1 degree, 4.5KW so raises the strike water to temp in just a few mins. Superb.
Chugger pumps have a massive flow output (which bit me in the arse on the second brew...more on that next time)
Camlock quick disconnects - they are brilliant and I use them inside the MT (more on that later) so i can attach different stuff (im working on a camlock sparge arm)
My own design logic board - preventing element firing unless liquid level sensors/flow control/wort pump on. I have an LED for each one which changes colour from red to green on the panel. Works a treat.
Things that havent worked well:
The beautiful dog kennels (overheat the chuggers)
I would re-position the temp probes a little lower in the HLT and the kettle
Mounting the chuggers in the kennels
Initial start of brew - then one of the chuggers overheated and shut down
I quickly removed them from their dog kennels and they work fine. I have plugs on them to control for now. Not finished pump control yet

You can see the control LEDs on the panel - 2 green and one red. The left hand is telling me there is enough water in the HLT to fire the element. The middle LED is saying RIMs ok to fire - pump on , flow is good. The right one says not enough liquid in Kettle to fire
BCS screen - still some work to do on this but the screen shows the temps in each vessel and the RIMs. The process it is executing is Mash RIMs process - its 36 minutes in and its concurrently controlling the RIMs Mash temperature (you can see the MT is at 67 degrees) and its just switched on the element in the HLT to start to raise the sparge water to 79 degrees

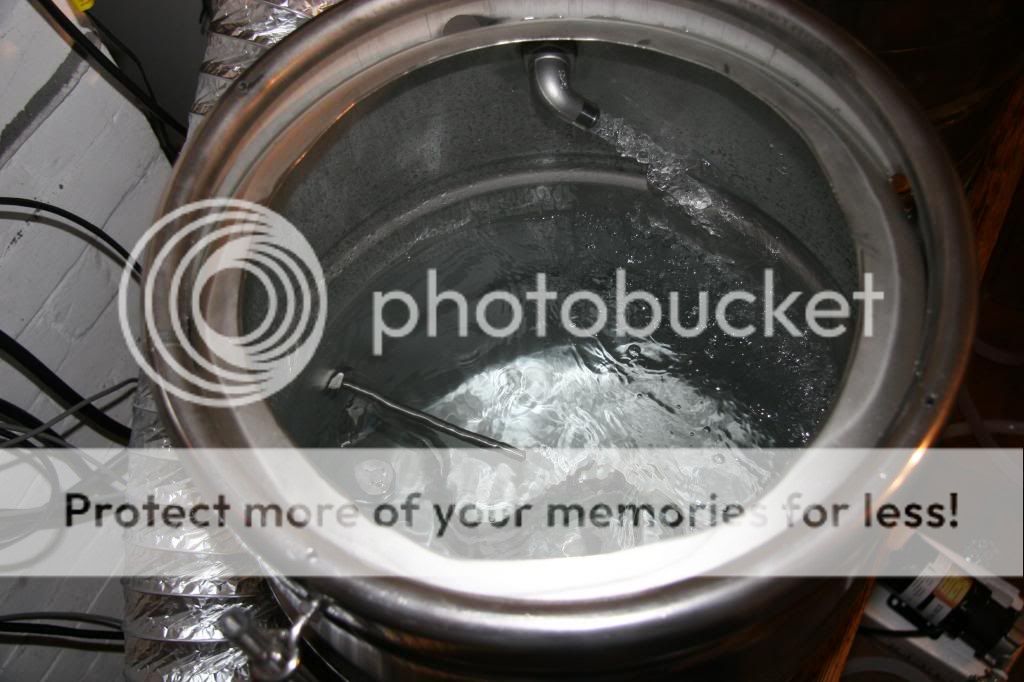
Here you can see the sparge water in the HLT being heated and re-circluated
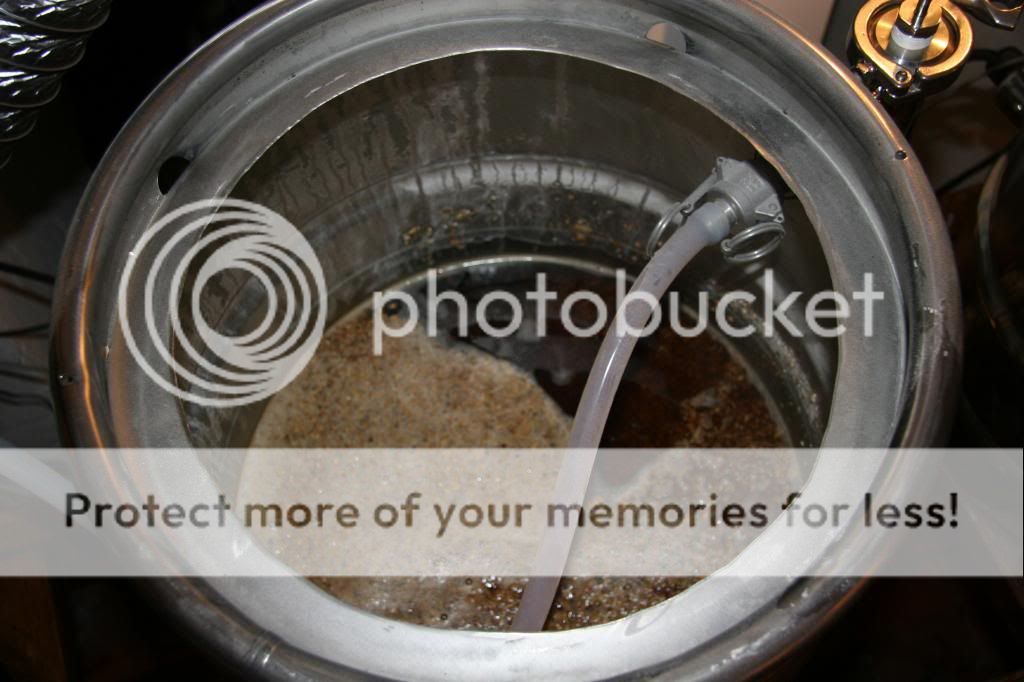
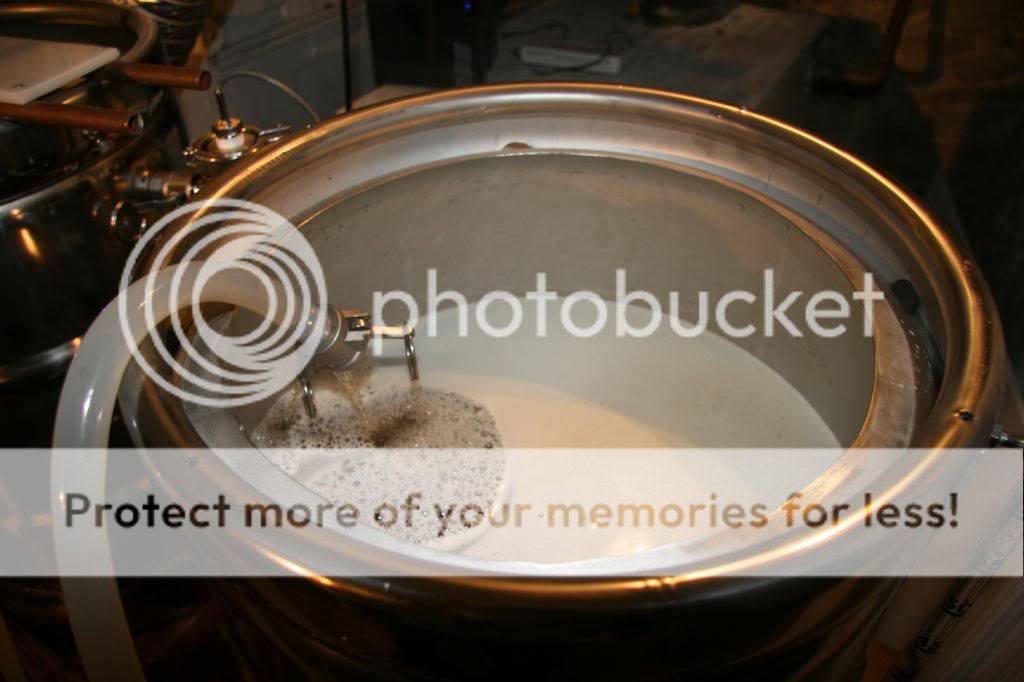
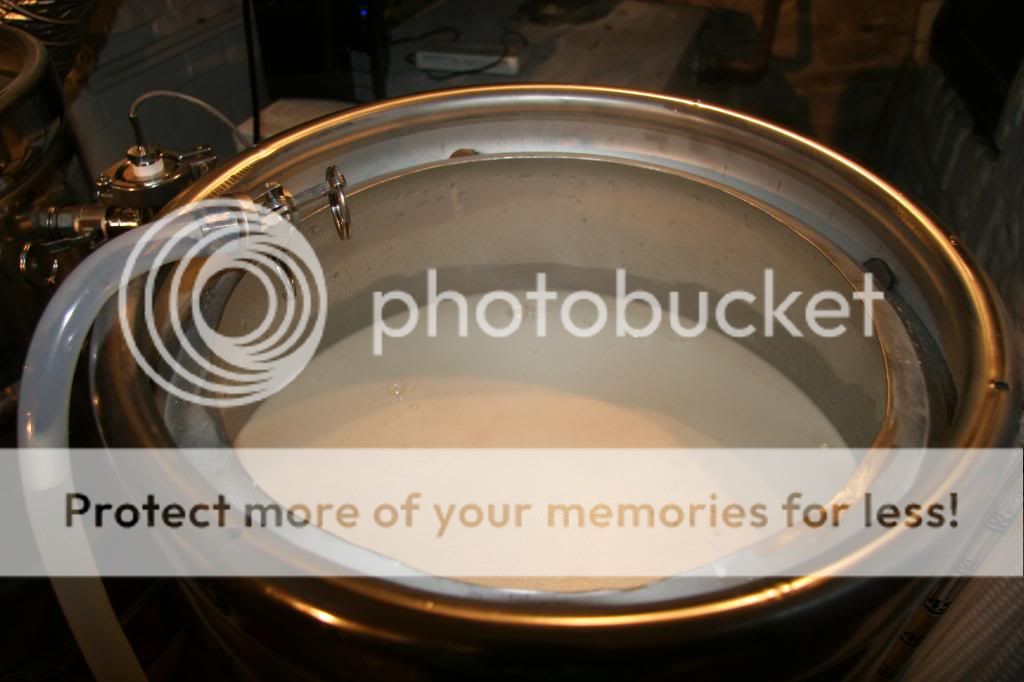
Mash Tun during Mashin..You can see the top of the RIMs which is attached via quick disconnect to the side of teh MT. Another quick disconnect on the inside of the MT allows me to change plumbing - right now it has the RIMs re-circulation tube attached. I plan to make a sparge arm with a nice small control valve that attaches so i can change the sparge flow whilst i look in the MT. Look how clear the re-circulating wort is
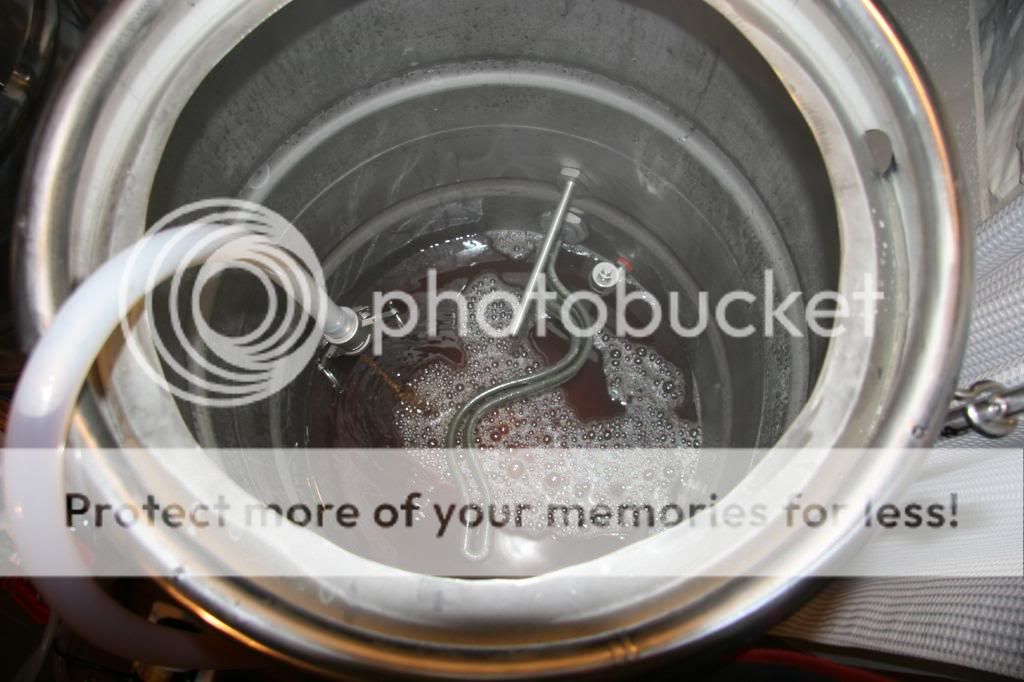
Start of sparge here we are looking inside the copper (Kettle) - look how clear the wort is
As soon as the wort is over the kettle element in the copper the BCS turns the element in the copper on and so by the time i have finished sparging the wort is almost boiling ...saving a ton of time. Look how creamy the wort is.
Sparge over and just about to boil
Things that Im impressed with:
BCS is fantastic.
Bottom drain kegs are so easy to clean and use and completely drain. They dont move off the brew stand.
RIMs is excellent - produces super clean wort, holds the Mash to within 1 degree, 4.5KW so raises the strike water to temp in just a few mins. Superb.
Chugger pumps have a massive flow output (which bit me in the arse on the second brew...more on that next time)
Camlock quick disconnects - they are brilliant and I use them inside the MT (more on that later) so i can attach different stuff (im working on a camlock sparge arm)
My own design logic board - preventing element firing unless liquid level sensors/flow control/wort pump on. I have an LED for each one which changes colour from red to green on the panel. Works a treat.
Things that havent worked well:
The beautiful dog kennels (overheat the chuggers)
I would re-position the temp probes a little lower in the HLT and the kettle
Mounting the chuggers in the kennels
Initial start of brew - then one of the chuggers overheated and shut down
I quickly removed them from their dog kennels and they work fine. I have plugs on them to control for now. Not finished pump control yet
You can see the control LEDs on the panel - 2 green and one red. The left hand is telling me there is enough water in the HLT to fire the element. The middle LED is saying RIMs ok to fire - pump on , flow is good. The right one says not enough liquid in Kettle to fire
BCS screen - still some work to do on this but the screen shows the temps in each vessel and the RIMs. The process it is executing is Mash RIMs process - its 36 minutes in and its concurrently controlling the RIMs Mash temperature (you can see the MT is at 67 degrees) and its just switched on the element in the HLT to start to raise the sparge water to 79 degrees
Here you can see the sparge water in the HLT being heated and re-circluated
Mash Tun during Mashin..You can see the top of the RIMs which is attached via quick disconnect to the side of teh MT. Another quick disconnect on the inside of the MT allows me to change plumbing - right now it has the RIMs re-circulation tube attached. I plan to make a sparge arm with a nice small control valve that attaches so i can change the sparge flow whilst i look in the MT. Look how clear the re-circulating wort is
Start of sparge here we are looking inside the copper (Kettle) - look how clear the wort is
As soon as the wort is over the kettle element in the copper the BCS turns the element in the copper on and so by the time i have finished sparging the wort is almost boiling ...saving a ton of time. Look how creamy the wort is.
Sparge over and just about to boil
Last edited by setmash on Tue Apr 08, 2014 12:58 pm, edited 1 time in total.

Re: My big fat shiny American Keg brewery build with pics
After reading this thread I have shiny envy! 
Re: My big fat shiny American Keg brewery build with pics
Looking great . How do you intend to filter out the hops at the end of the boil .
Deos miscendarum discipule
http://www.nationalhomebrewclub.ie
http://www.nationalhomebrewclub.ie
-
Dave S
- Even further under the Table
- Posts: 2514
- Joined: Sun Apr 01, 2012 5:38 pm
- Location: Wirral, Merseyside
Re: My big fat shiny American Keg brewery build with pics
I know, it's a beautiful job.Jim wrote:After reading this thread I have shiny envy!
Best wishes
Dave
Dave
-
floydmeddler

- Telling everyone Your My Best Mate
- Posts: 4160
- Joined: Mon Feb 16, 2009 10:37 pm
- Location: Irish man living in Brighton
Re: My big fat shiny American Keg brewery build with pics
An incredible brewery build. You are a shiny mad genius!
-
setmash
Re: My big fat shiny American Keg brewery build with pics
Many thanks guys, if your enjoying the build i will keep posting pics etc.
@ john luc I have a hop strainer (an old false bottom) inside the kettle. Have a look at back at the thread and you will see it (first page). I screwed up on the last brew and re-circulated through the hop strainer and back in to the kettle (to steralise) with the pump on full bore - not a good ideas as the hops get pulled with such force through the hop strainer they get pulverised and when I transferred to the FV small amounts of hop got through.
@ john luc I have a hop strainer (an old false bottom) inside the kettle. Have a look at back at the thread and you will see it (first page). I screwed up on the last brew and re-circulated through the hop strainer and back in to the kettle (to steralise) with the pump on full bore - not a good ideas as the hops get pulled with such force through the hop strainer they get pulverised and when I transferred to the FV small amounts of hop got through.
-
setmash
Re: My big fat shiny American Keg brewery build with pics
I have now mounted the chuggers on the stand - i inverted them. Performed another brew and they worked really well. This time I was careful not to circulate wort through the kettle Hop blocker too quickly. I need to analyse the beer once its out of the FV to see if any hops got sucked through. If there is any then I will buy a hop filter. Ive started using the BCS graphing functions to analyse data and its quite interesting - see the last pic !
The bottom drain kegs have one disadvantage - i cant immediately see the status of the drain valve so im constantly filling them with it open which results in liquid all over the floor I will place buckets under each vessel. I dont have pics yet but ive built and added the remote pump control - more on that next post. The bottom drain kegs are great to clean but I want to make them even easier still - so Im going to plumb in a direct to drain pipe system. Basically i will have a bucket under the kegs to catch the main crap (hops from Copper and grain from MT) but once thats out of the way I will connect (via camlock) directly to the house (sink) drain so i can dump large amounts of water straight to the outside drain without having to lift up buckets from underneath the stand...
So still on my to do list, Sparge arm, RIMs flow sensor, direct to drain system, hop filter (potentially) and chill solution - aka a goat .
Chuggers inverted and mounted on the stand - they have splash cover - this is pre-pump control so wiring everywhere im afriad.
This is my new aeration tool - clicks on to the end of my Wort pipe Camlock and hangs on the edge of the edge of the FV and aerates the wort - nice


Ello ello ello..whats all this then. On analysing the BCS temp data i noticed a spike on the RIMs over the set safety limit (programmed at 80 degrees). You can see at point A the RIMs temp sensor hit over 86 degrees . I was dicking around with the BCS processes at the time just after Dough in. I dont quite know what i did but the BCS shut the RIMs down until i started it again at point B. You can see the dough in point on the MT temp at point A. Once the RIMs is switched back on and the MT temp rises to 66 degrees it is held rock solid by the RIMs (point C) you can see the RIMs temp see sawing as it keeps the MT temp rock solid. Works a treat

The bottom drain kegs have one disadvantage - i cant immediately see the status of the drain valve so im constantly filling them with it open which results in liquid all over the floor
So still on my to do list, Sparge arm, RIMs flow sensor, direct to drain
Chuggers inverted and mounted on the stand - they have splash cover - this is pre-pump control so wiring everywhere im afriad.
This is my new aeration tool - clicks on to the end of my Wort pipe Camlock and hangs on the edge of the edge of the FV and aerates the wort - nice
Ello ello ello..whats all this then. On analysing the BCS temp data i noticed a spike on the RIMs over the set safety limit (programmed at 80 degrees). You can see at point A the RIMs temp sensor hit over 86 degrees
-
setmash
Re: My big fat shiny American Keg brewery build with pics
Ive done 4 brews on the new rig now and its working great. Ive added the new Direct to Drain system. I have a couple of reinforced plastic pipes (low temp) connected directly to my drain. On the end of the pipes are camlocks that simply connect to the bottom output of the kegs. This makes dumping water and cleaning a doddle. The cleaning routine involves scraping out the mash tun or kettle, wash main crap out of the bottom of keg in to a bucket, then connect the direct to drain pipe and give a good rinse out. Its so easy to dump any waste straight out of the keg and in to the drain. Note because of how my drains work i dont need a trap - you might. I have two direct to drain hoses with camlocks - i never need more than two. I simply just attach to a hook under the rig when not being used. Its one of those little touches that makes brewing easier - I love it !
Here are the hoses directly connected to my drain using dishwasher drain components that you can get at any DIY shop
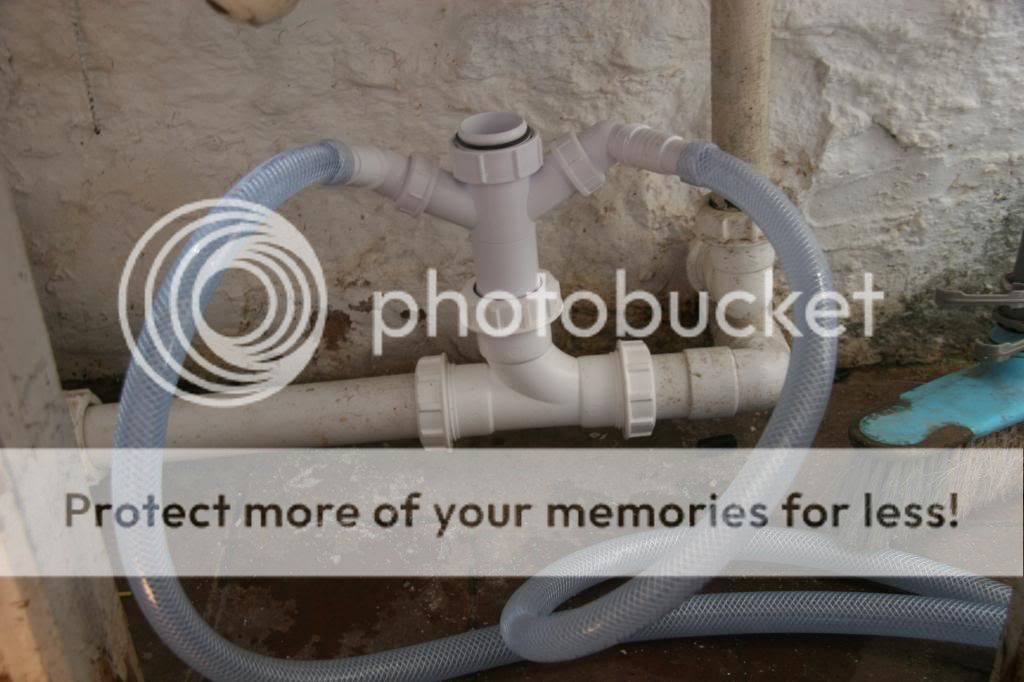
Here you can see the direct to drain hose connected directly to the bottom output of the MT keg
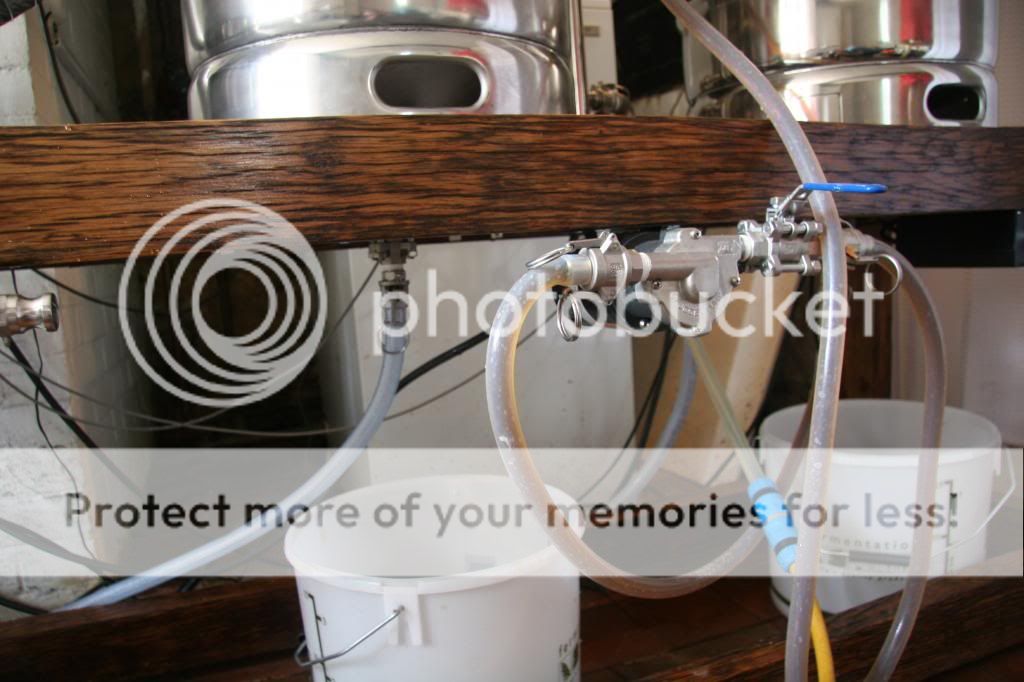
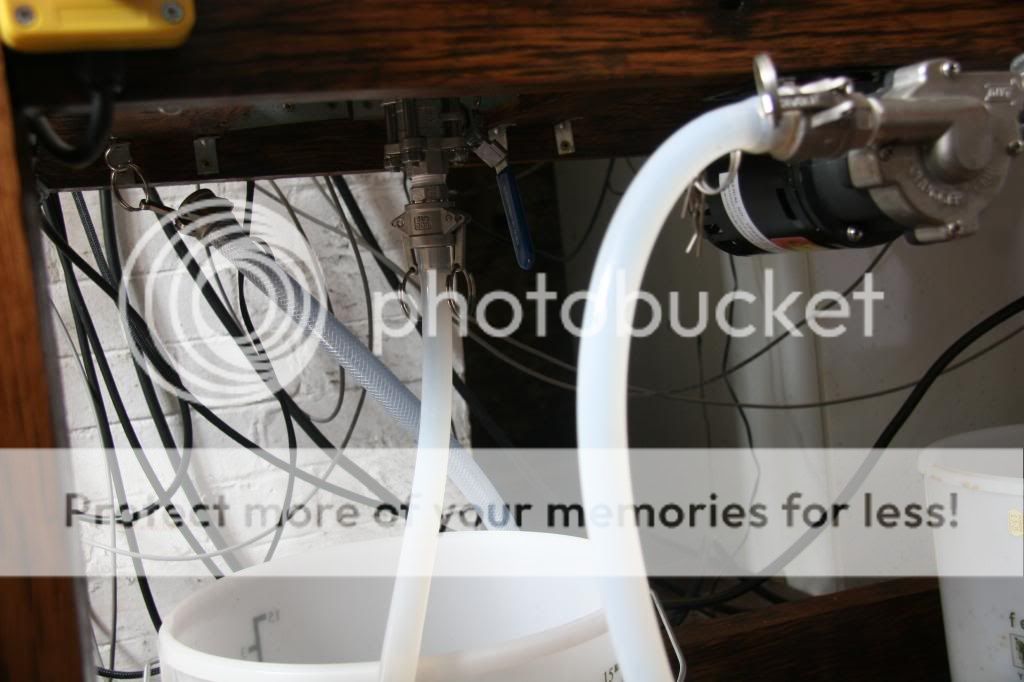
When not in use i simply hang the hose on the camlock rings under the rig so they are always close to hand. You can see the Direct to Drain hose its slightly blue in colour
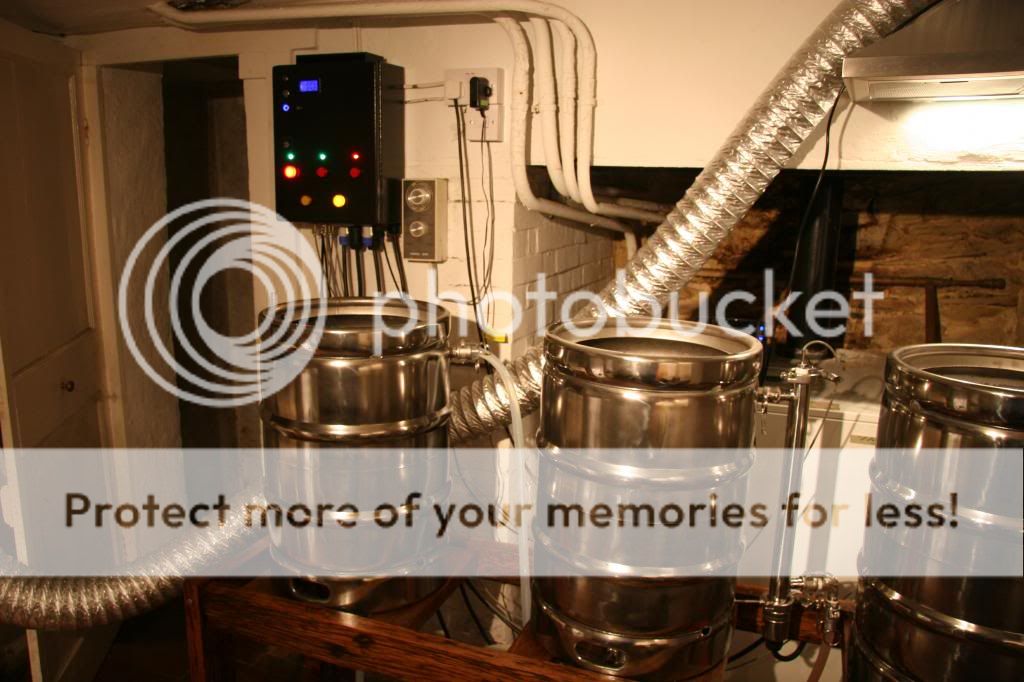
Moody shot of the control panel

Here are the hoses directly connected to my drain using dishwasher drain components that you can get at any DIY shop
Here you can see the direct to drain hose connected directly to the bottom output of the MT keg
When not in use i simply hang the hose on the camlock rings under the rig so they are always close to hand. You can see the Direct to Drain hose its slightly blue in colour
Moody shot of the control panel