
When I decided to reenter the hobby last summer, I knew that I would have to reduce my standard batch size if I was going to brew with any kind of frequency. I cannot drink anywhere near the amount of beer that I could drink when I first started brewing; therefore, I settled on 14L (actually 3.65 to 3.75 U.S. gallons) as my standard batch size. I chose 14L as my batch size because 3-gallon premix tanks are available and 3-gallon tanks free up an additional shelf in my brewing refrigerator for yeast slant and media storage. While I wound up purchasing a manufactured 10.5 U.S. gallon brewing kettle for the odd 5.75 U.S. gallon (5-gallon premix tank) or 6.75 U.S. gallon (two 3-gallon pre-mix tanks) batch, the 3.65 to 3.75 batch size has worked out quite well.
My preferred batch size is non-standard in the U.S.; therefore, I decided to build my kettle from scratch. I could have used a larger pre-manufactured kettle, but the height to diameter ratio would be have been wrong (one wants a kettle with a height to diameter ratio of at least 1:1 that is correctly sized for one's batch size), leading to increased evaporation rate, less efficient hop untilization, and a shallower fluid column while chilling. I do not recommend going this route unless one is certain that one's preferred batch size is non-standard. One will spend as much, if not more than one would spend purchasing a pre-manufatured kettle. My custom 6.75 U.S. gallon (27-quart) kettle was more expensive to build than my 10.5 U.S. gallon Polar Ware 361BP factory manufactured brewing kettle was to buy.
With that said, I have decided to post a few photographs of the 14L brew house that I assembled late last summer.
Brew House
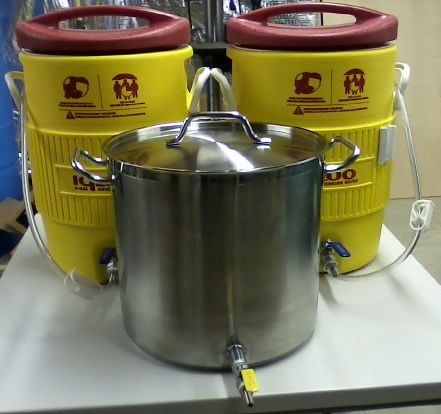
The entire brew house fits on a folding card table. While one can purchase pre-assembled beverage cooler-based hot liquor backs (HLBs) and mash/lauter tuns (MLTs) in the U.S., I sourced all of the parts and assembled the units shown in the photo above. I am far too frugal to pay twice the parts cost for items as simple to build as beverage cooler-based HLBs and MLTs.
Inside shot of the coupler weld
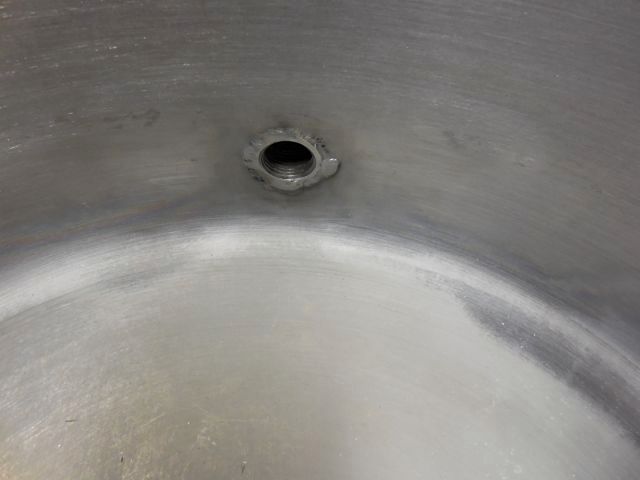
The kettle in this brew house started out as a Vollrath 27-Quart stock pot. The coupler was welded by a local sanitary welder. I live in a semi-rural area that still has dairy farms; therefore, finding a sanitary welder to perform the weld was not a problem. Welding this stock pot was a challenge due its diameter and the thinness of the material (~1.2mm).
False Bottom
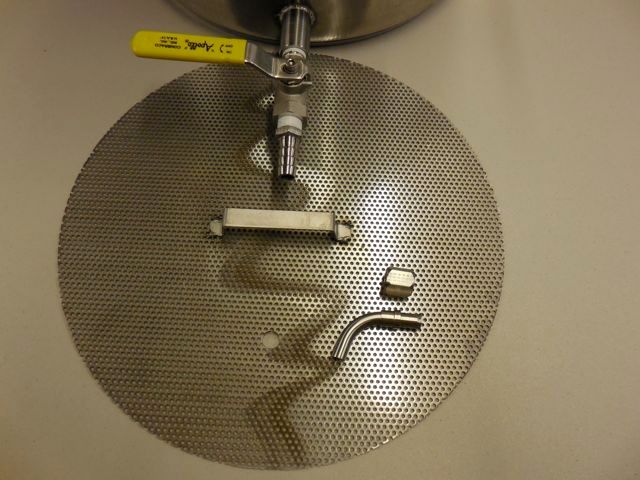
I ordered the custom size false bottom shown above from NorCal Brewing Solutions in California. I drilled the pickup tube hole because I did not know how far it needed to be located from the side of the kettle until I bent and flared the pickup tube. I wound up having to purchase cutting, flaring, and bending tools that are designed for working with stainless steel tubing because my copper tubing cutting and bending tools were not up to the task, and stainless steel flare fittings are 37 degrees whereas copper flare fittings are 45 degrees.
Kettle with Pickup Tube
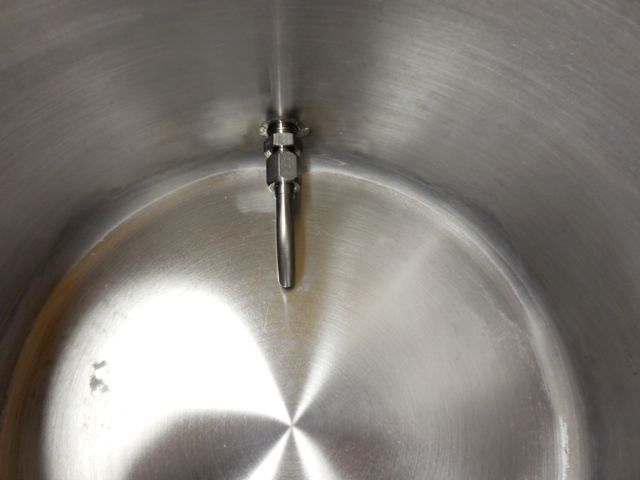
Kettle with Pickup Tube and False Bottom
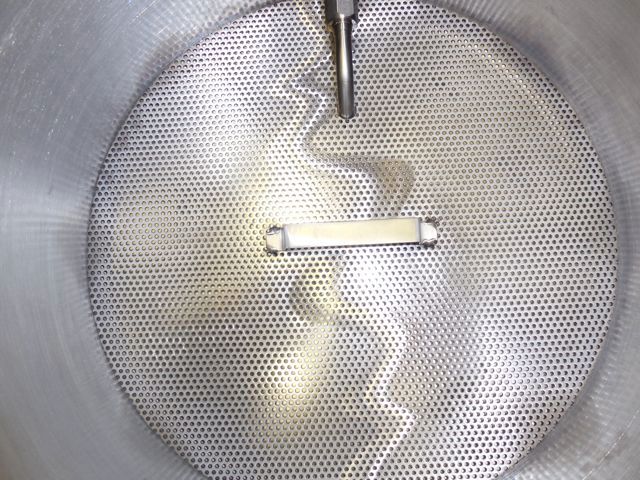
There is roughly 0.375" (9mm) of dead space under the false bottom. I only use whole cone hops (a.k.a. "leaf" hops). A false bottom coupled with whole cone hops and an immersion chiller or a counterflow chiller with a recirculating pump leads to very clear wort.
Mash/Lauter Tun False Bottom
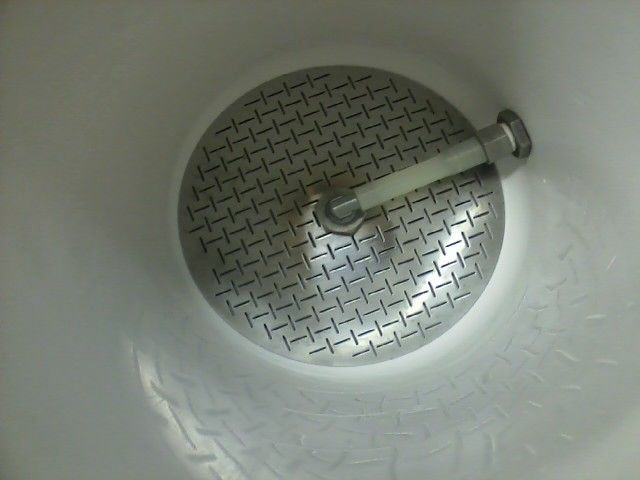
I have used several different false bottom designs in my mash/lauter tuns over the years, and this one is the nicest by far. It is the 9" version of Adventures in Homebrewing’s 16% open space false bottom.