Kegmenter DIY

The forum for discussing all kinds of brewing paraphernalia.
Post Reply
User avatar
barneey
Telling imaginary friend stories
Posts: 5423
Joined: Mon Jul 25, 2011 10:42 pm
Location: East Kent

Kegmenter DIY

Post by barneey » Mon May 11, 2020 10:54 pm

Having a little time on my hands I thought I would at least try and finish the DIY kegmenter.

Not wishing to spend near £300.00 on a shop bought one, why not make your own, with a few extra's.

Progress so far.

Image
Hair of the dog, bacon, butty.
Hops, cider pips & hello.

Name the Movie + song :)

D4V33
Steady Drinker
Posts: 47
Joined: Sun Apr 19, 2020 9:20 pm

Re: Kegmenter DIY

Post by D4V33 » Tue May 12, 2020 7:13 am

Good idea!

What are you attaching to the big tri clamp fitting?

User avatar
barneey
Telling imaginary friend stories
Posts: 5423
Joined: Mon Jul 25, 2011 10:42 pm
Location: East Kent

Re: Kegmenter DIY

Post by barneey » Tue May 12, 2020 9:47 am

The advantage of having a 4" triclover fitting is to aid cleaning of the keg, the disadvantage you need to screw the fitting up extremely tight as the surface area of the gasket is large in comparison with say a 1.5" fitting, otherwise it will start to whistle under pressure.

I also have a 4" to 1.5" adapter, which I will post pictures of later, this means that all standard 1.5" items can then be used with the keg, I have a Blichmann spunding valve to attach. Keeping the original spear housing in position means if necessary the keg can be forced carb'd up & there is an outlet for transfer of liquid.

Still an experiment at this stage, & I do need to sort out fermentation temperature control. My preferred method and certainly will all my other FV's is an external cooling jacket & Maxi setup, this might be possible on a keg by using the strengthening bands on the side with some plate stainless to enclose a band around the keg, or an external copper coil wrap + insulation. The easiest way would be a simple fridge setup.

Other things to do is to fit a thermowell to the 4 - 1.5 triclover reducer, I prefer to measure wort temps actually in the keg V temp probe stuck on the side.

Its a fun project really to see what is possible, my list of jacketed FV's include, 120l, 80l, 60l & also have the Grainfather FV, all as mentioned controlled by a Maxi. This project is more about the possibility of fermenting under pressure if the desire to do so prevails. The 80l & 60l flat bottomed FV's are set up to ferment more traditional Yorkshire Top croppers, where rousing is necessary and the ability to ferment under pressure is non existent. The GFFV is a jack of all trades which I tend to use most of the time, the 120l is when I used to only brew a few times a year due to work/ free time constraints.
Hair of the dog, bacon, butty.
Hops, cider pips & hello.

Name the Movie + song :)

chris2012
Under the Table
Posts: 1193
Joined: Sat Jun 23, 2012 10:13 pm

Re: Kegmenter DIY

Post by chris2012 » Tue May 12, 2020 11:05 am

Looks very nice!

How did you cut the fitting for the 4" triclamp out of interest and is it soldered / TIG'd ?

It sounds a very interesting project with the spunding valve etc. I bought one of these ones I need to play with - https://www.kegland.com.au/blowtie-diap ... e-kit.html (from aliexpress somewhere though)

What do you use for the jacket btw, I've used just beer line before, but a jacket sounds good!

User avatar
barneey
Telling imaginary friend stories
Posts: 5423
Joined: Mon Jul 25, 2011 10:42 pm
Location: East Kent

Re: Kegmenter DIY

Post by barneey » Tue May 12, 2020 12:18 pm

I only have the ability both equipment and skill wise to silver solder stainless. Always wanted some welding equipment but the cost is so prohibited for the stuff I would like to do. I do however have a friendly local welder who can carry out such jobs (ex pharmaceutical welder).

TCT cutters could be used to make the hole etc. however my friendly welder also has a plasma cutter, so for a small fee ;) 
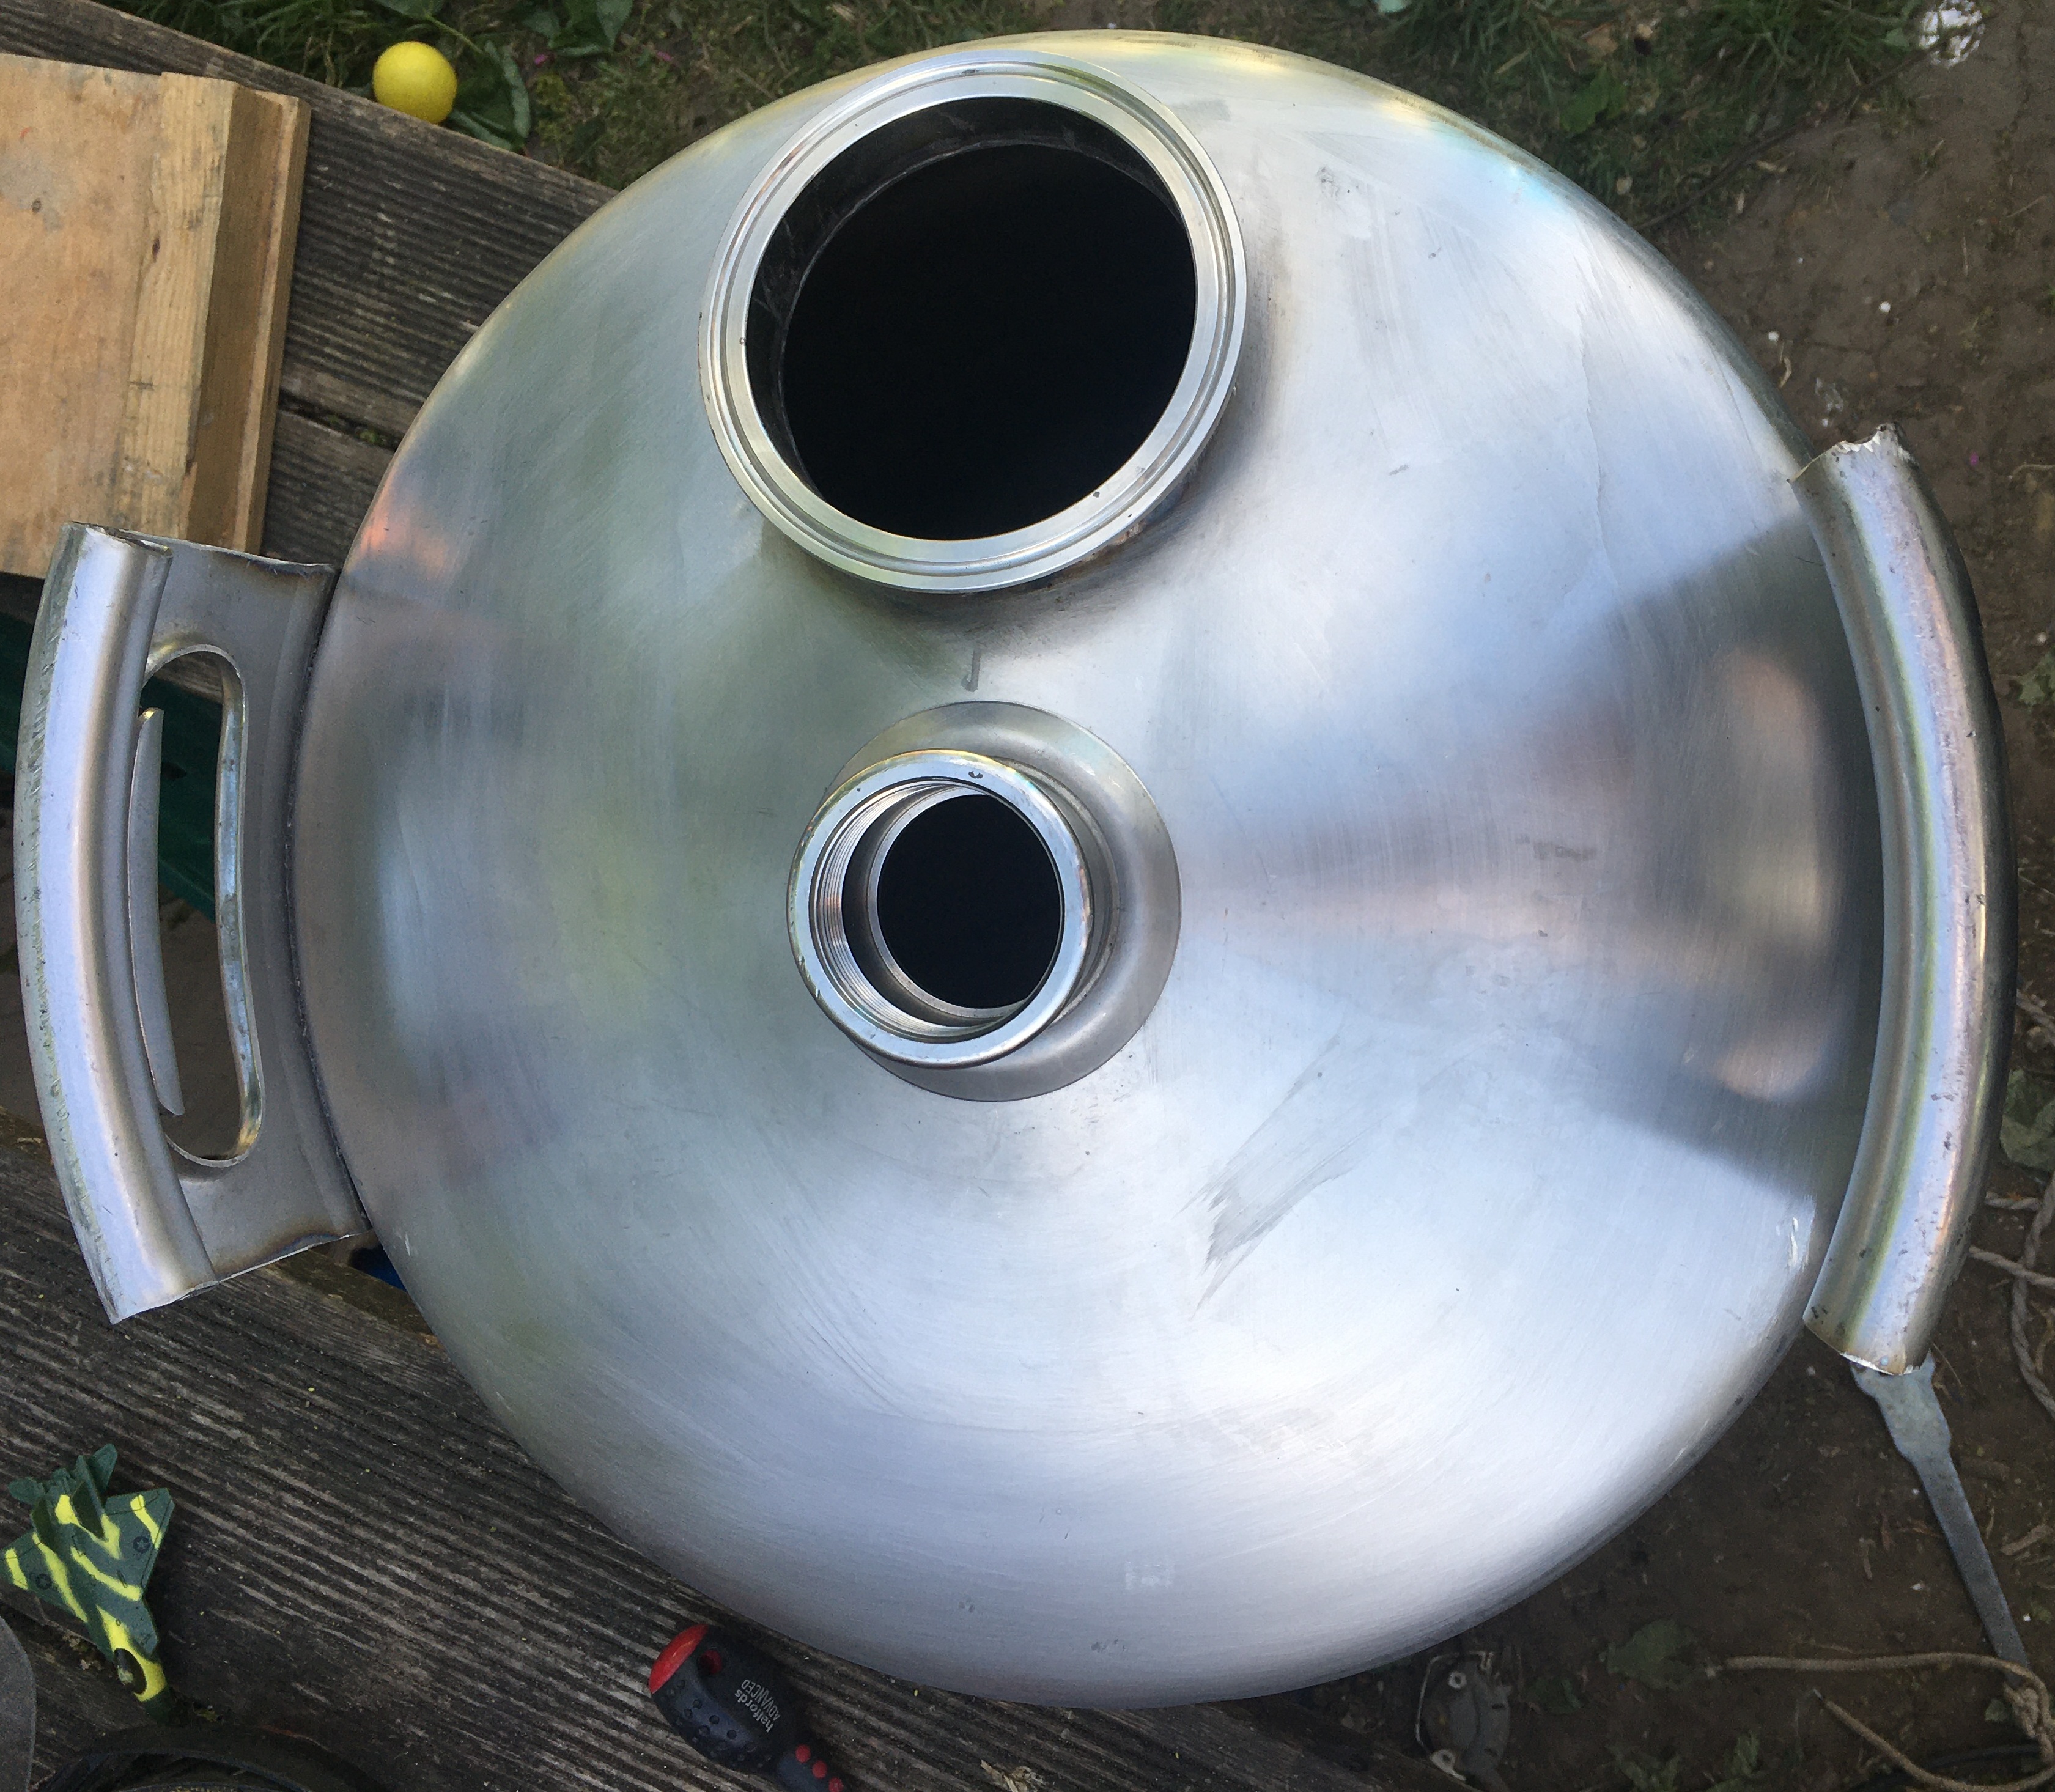
I got him to carryout the hole cutting and welding for me. Also due to the complex curve on the top of the keg the triclover fitting in its standard state doesnot sit exactly flat on the surface maybe only a mm out at 2 points but it needs attention at welding stage, so not a job for a wannabe welder like me. Heat and possible distortion also need to be considered, although kegs are a quality stainless thick material.

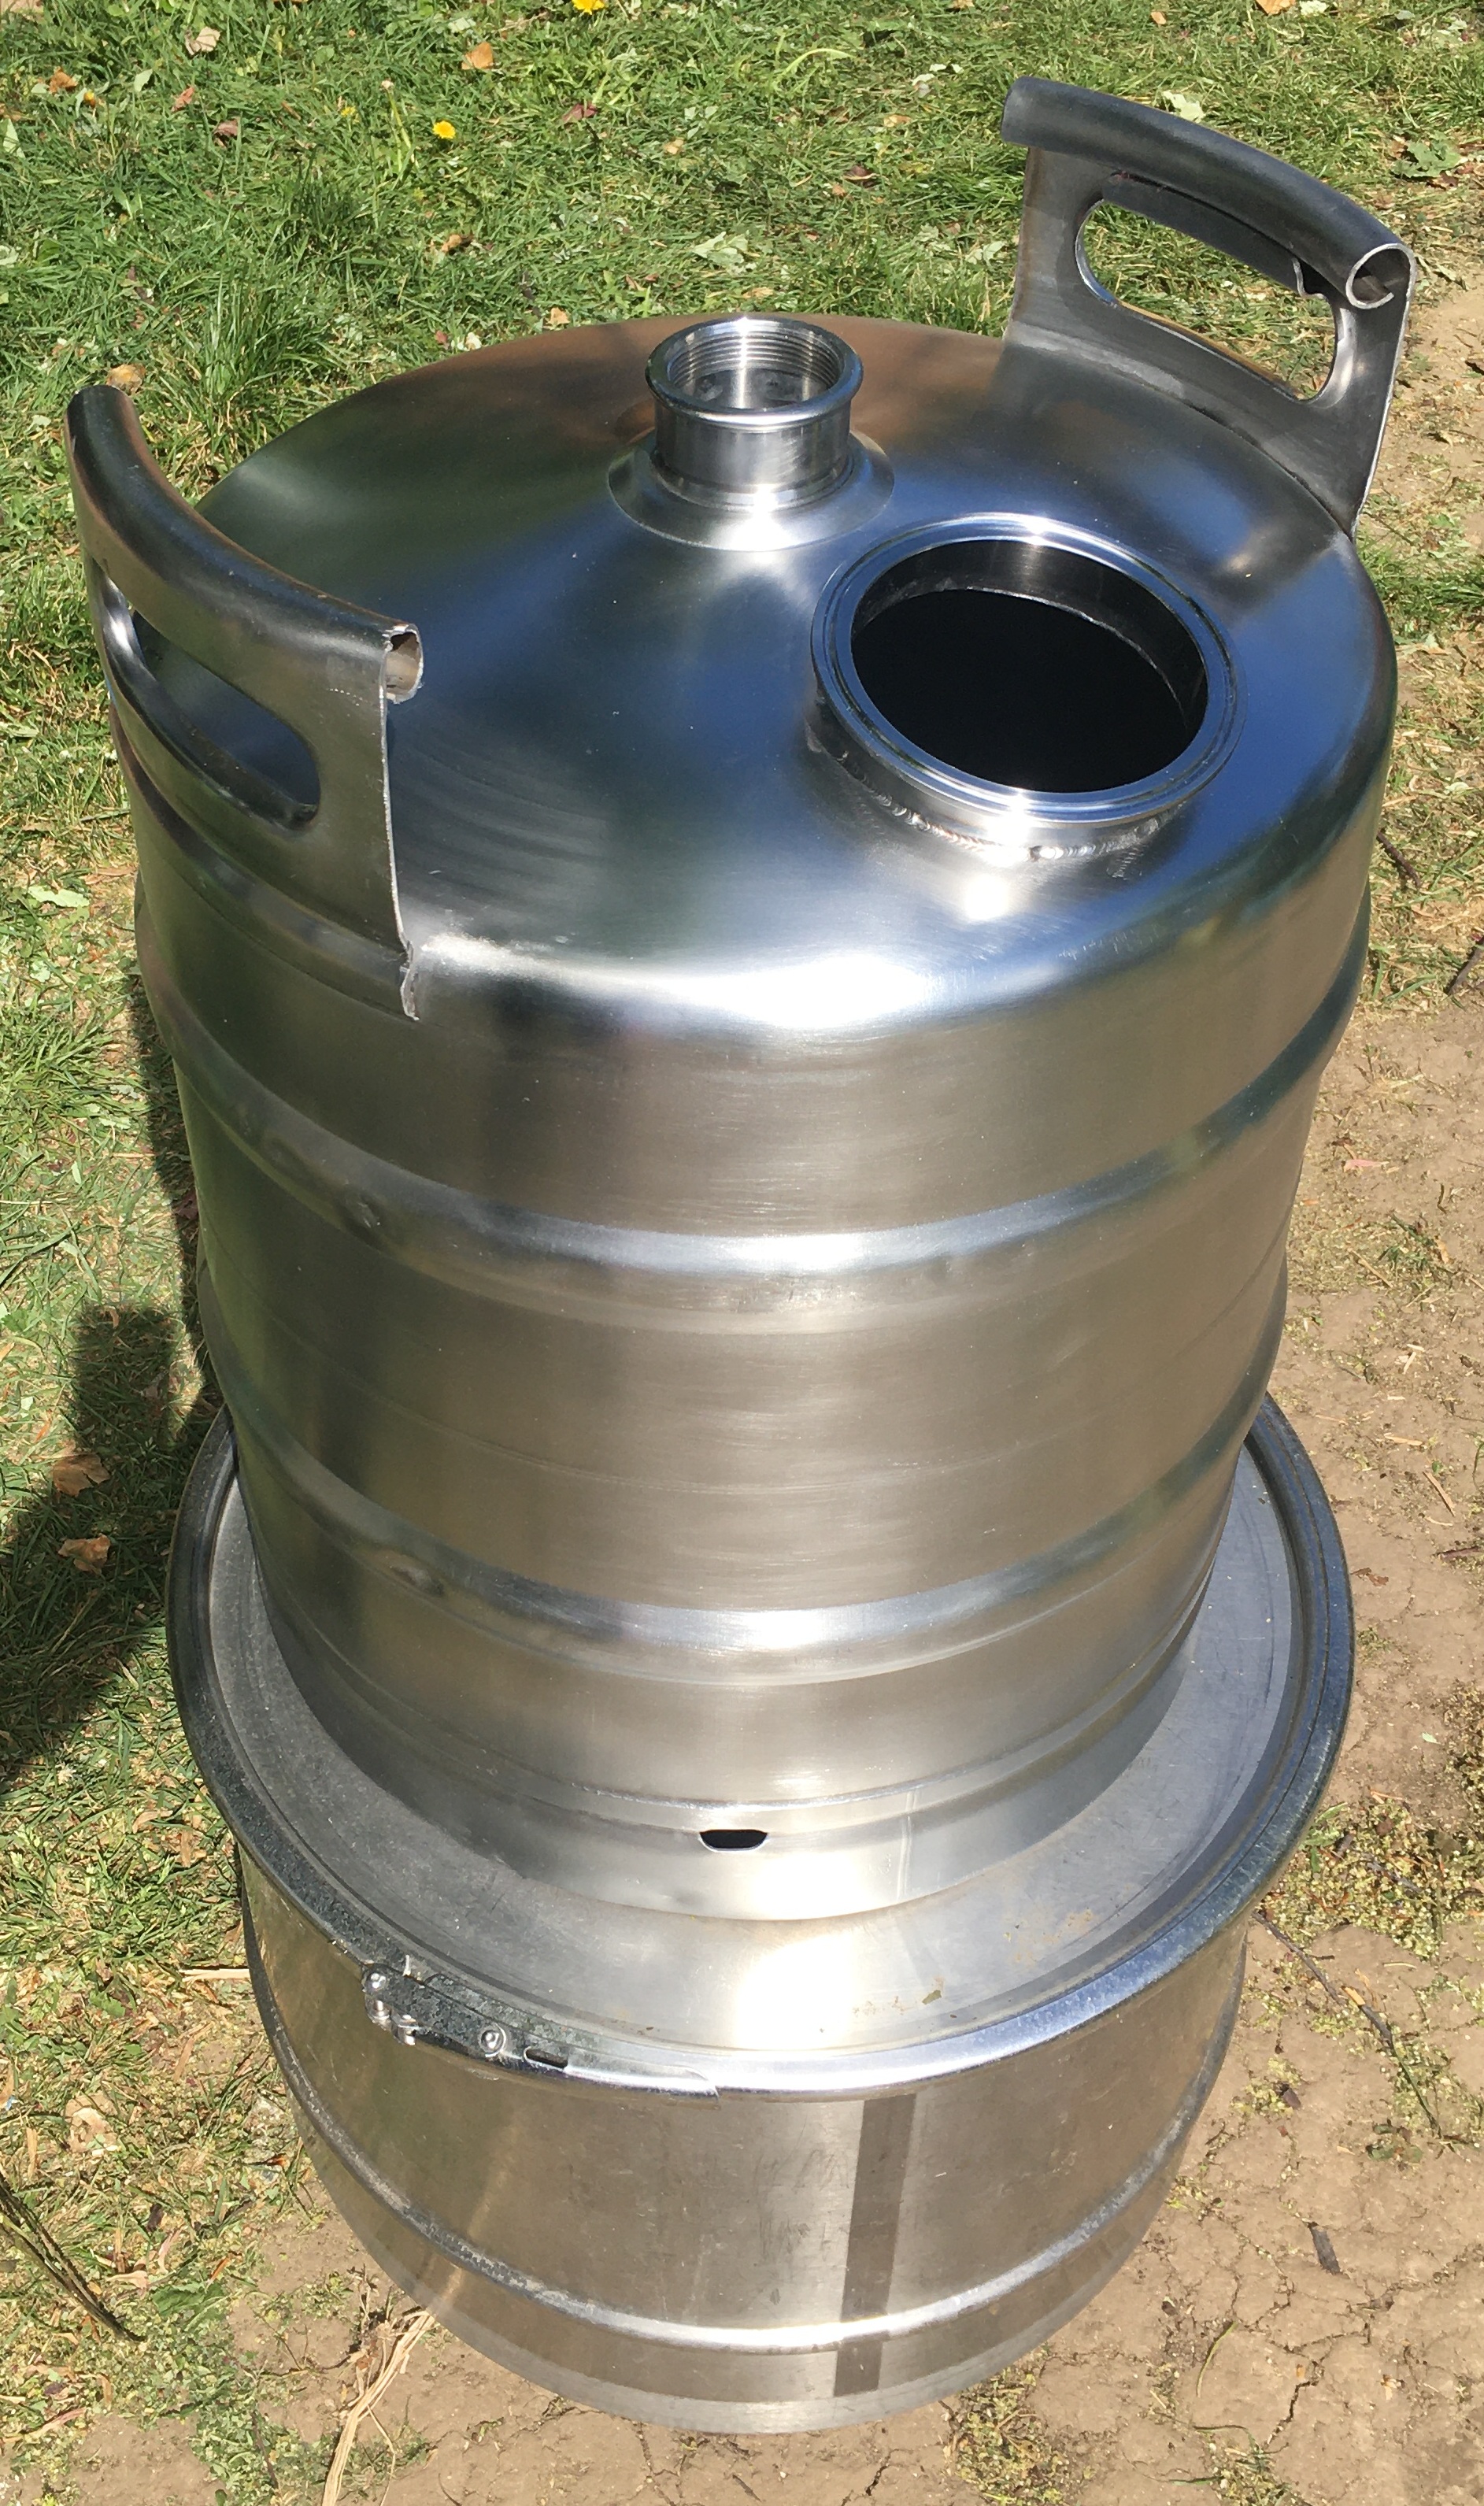
I took an angle grinder etc to the chime part to allow access for the welding to be carried out + access to any future brewing fittings, once satisfied that the welding & ability to hold pressure was satisfied the weld holding the rest of the chime top was ground off to provide the dome finish.

APITA to clean the keg to a condition that I am happy with & there is only so much time enthusiasm lasts when using Wet & dry, D4V33 pointed me in the direction a suitable brush burnishing piece of equipment.

For a cooling externally I have used copper 8/10mm in the past for the other FV's (converted thermo pots), copper better transfer condition. The thermo pot conversions are an entirely different build, no welding required. See this thread viewtopic.php?f=6&t=80741

Failing going for an external cooling solution an internal stainless coil would be a simple option.

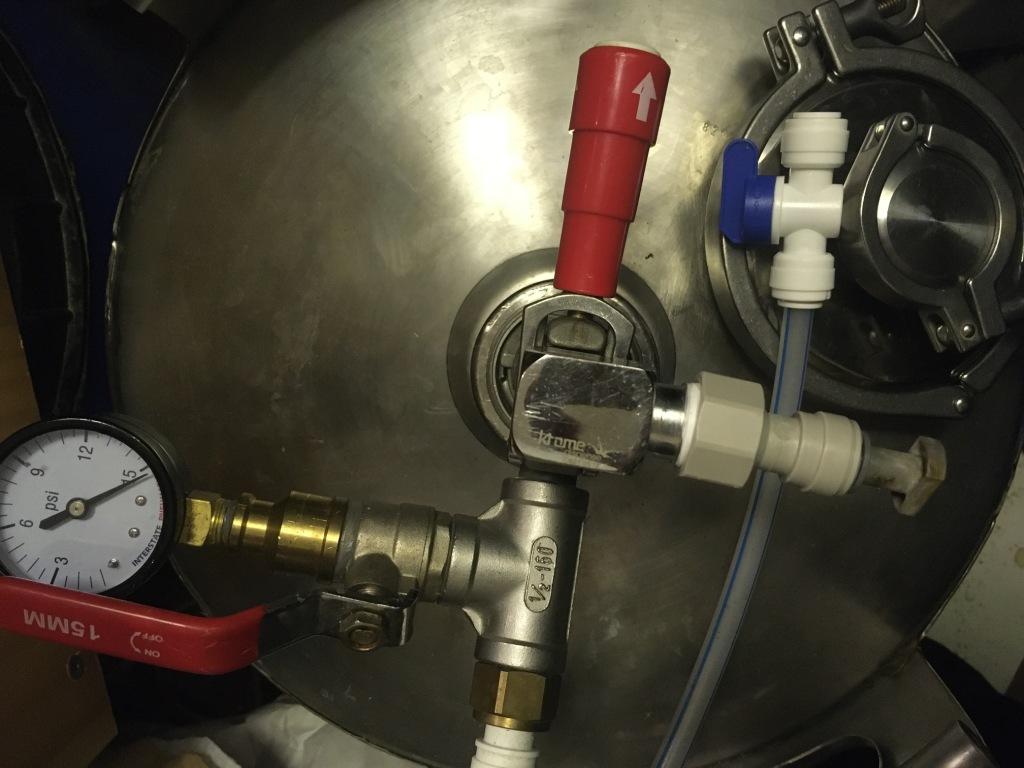
This is not a very good photo but it shows my test on the keg, the top part of the chime still on + the 4" to 1.5" adapter.

Image
Hair of the dog, bacon, butty.
Hops, cider pips & hello.

Name the Movie + song :)

User avatar
barneey
Telling imaginary friend stories
Posts: 5423
Joined: Mon Jul 25, 2011 10:42 pm
Location: East Kent

Re: Kegmenter DIY

Post by barneey » Wed May 13, 2020 3:53 pm

A bit more of a clean up today.

Image
Hair of the dog, bacon, butty.
Hops, cider pips & hello.

Name the Movie + song :)

chris2012
Under the Table
Posts: 1193
Joined: Sat Jun 23, 2012 10:13 pm

Re: Kegmenter DIY

Post by chris2012 » Wed May 13, 2020 4:19 pm

Looking very shiny :)

And can see the nice welding now

Thanks for the link on your thermopot copper coil system too. The expanding foam usage is especially
interesting to me at the moment, as I'm wondering about using some around my plastic mash tun.

User avatar
barneey
Telling imaginary friend stories
Posts: 5423
Joined: Mon Jul 25, 2011 10:42 pm
Location: East Kent

Re: Kegmenter DIY

Post by barneey » Wed May 13, 2020 5:09 pm

If you can, buy the 2 part expanding foam, it flows so much better than the can stuff.
Hair of the dog, bacon, butty.
Hops, cider pips & hello.

Name the Movie + song :)

D4V33
Steady Drinker
Posts: 47
Joined: Sun Apr 19, 2020 9:20 pm

Re: Kegmenter DIY

Post by D4V33 » Fri May 29, 2020 10:38 pm

barneey wrote:
Wed May 13, 2020 3:53 pm
A bit more of a clean up today.

Image
Good job 👍🏻

User avatar
barneey
Telling imaginary friend stories
Posts: 5423
Joined: Mon Jul 25, 2011 10:42 pm
Location: East Kent

Re: Kegmenter DIY

Post by barneey » Wed Jul 08, 2020 9:06 pm

Image
Image
Image

Thought I might as well finish off this thread. Fully insulated jacket, external cooling coil & spunding valve.
Hair of the dog, bacon, butty.
Hops, cider pips & hello.

Name the Movie + song :)

User avatar
leedsbrew
Steady Drinker
Posts: 53
Joined: Sun Apr 28, 2019 9:51 pm

Re: Kegmenter DIY

Post by leedsbrew » Fri Jul 10, 2020 5:41 pm

Top work there Barneey


Sent from my iPhone using Tapatalk

User avatar
wmfd
Piss Artist
Posts: 173
Joined: Fri May 01, 2009 9:15 pm

Re: Kegmenter DIY

Post by wmfd » Sun Jul 12, 2020 9:21 am

Yes, cracking work, almost a shame to cover up its all round shininess in the jacket!
Planning: Election interference Russian Imperial Cocoa Stout and something for Christmas
Fermenting: Nothing beery (there is a kombucha going though)
Conditioning: Nothing
Bottled (Drinking): 1936 Mackesons, Weissbeer, Summer Lightning

My supplies from http://www.themaltmiller.co.uk

Post Reply