

I recently bought one of Brew Builder's excellent stainless Mini FVs. It's the perfect size for me as I don't brew anything bigger than one corny keg at a time. And, as I've been brewing a lot more in recent months, I wanted to get my kegerator back into operation full-time. But, this left me without a fridge to ferment in.
The obvious solution is to buy another fridge, but: 1) I don't have room, and 2) No non-essential travel during Lockdown, etc... etc...
So, I looked at converting the FV to make a system similar to the SS Brewtech FTSs². I know other JBK contributors have made or use similar systems too.
I already had a stainless coil (my old wort chiller and the first piece of homebrew kit I ever bought - around 10 years ago!) and a heat pad.

I sourced a 12V, 500mA submersible pump from Amazon. It has a similar pumping speed to the one used in the SS Brewtech system.
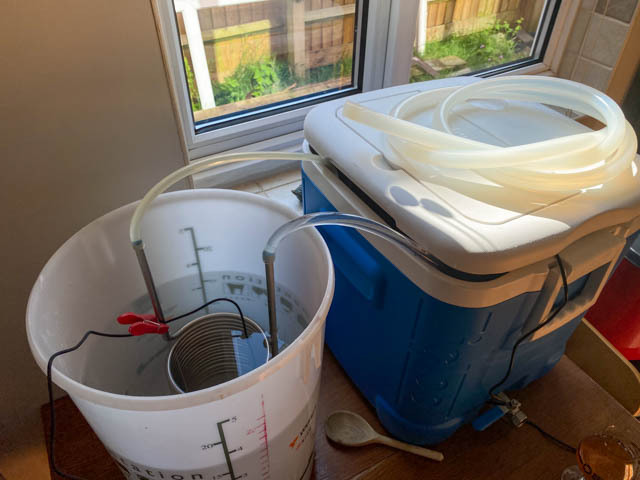
Before spending more money, I tested the concept with a plastic FV, Inkbird controller and my old 45L coolbox mash tun. With water and ice packs in the cool box, I raised the temperature in the FV with hot water and waited for the pump to kick in. It worked well!
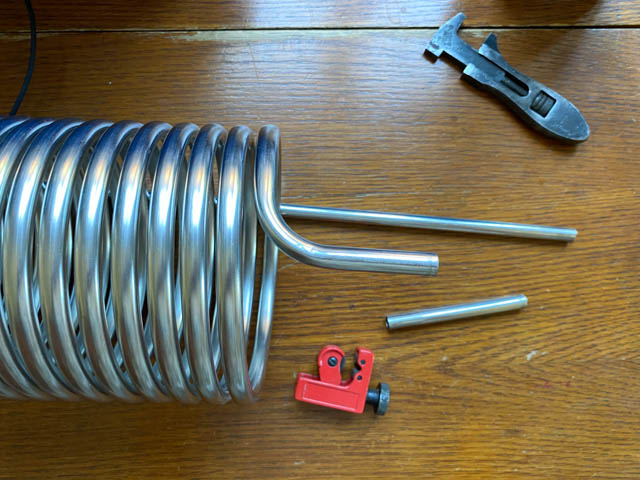
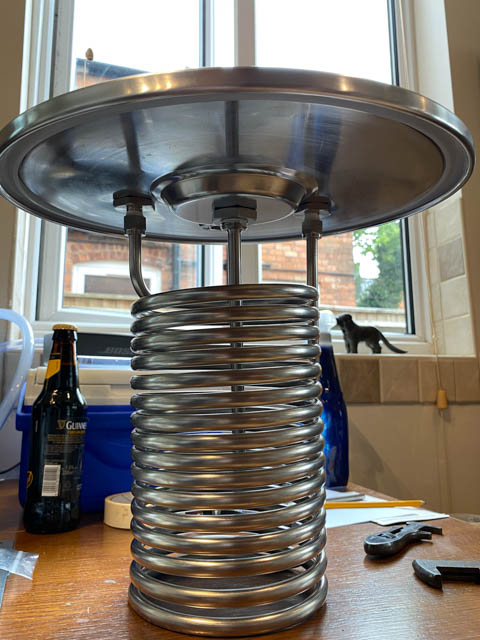
After measuring multiple times, I cut the coil to size.
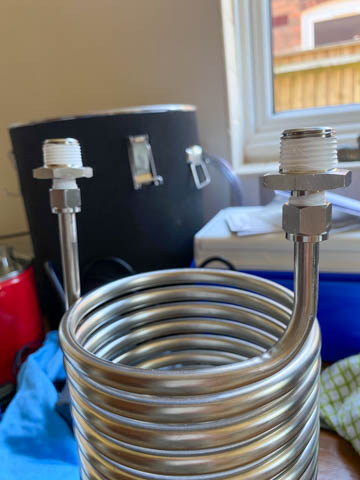
The stainless bulkhead fittings and hose tails are probably the most expensive parts of the conversion! It took a while to find the correct fittings for the pipe size, but I sourced these 3/8" Compression to 1/2" BSP fittings from Angel Homebrew (links TBC as the site is currently down).
The compression nuts needed a little 'persuasion' to fit onto the pipe, so I reckon the OD of the pipe is 10mm rather than the 3/8 inch I'd measured... but the pipe ends went through the ferrules/olives and into the fittings a treat.
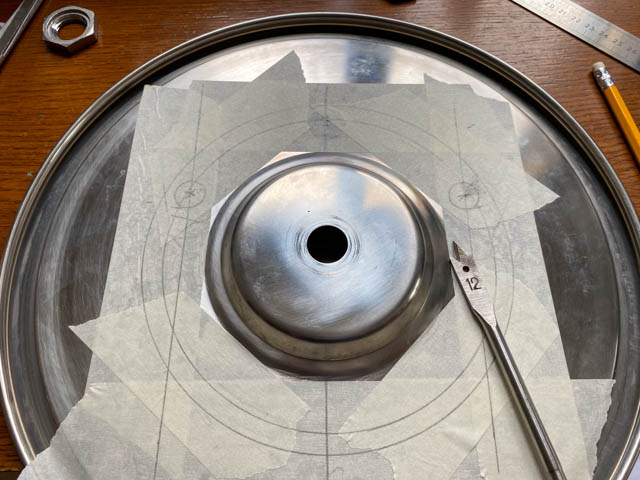
A LOT of time was spent marking out the holes so that the fittings didn’t foul the dip in the lid or pull the ends of the coil apart. In the end, the coil sits very slightly off-centre.
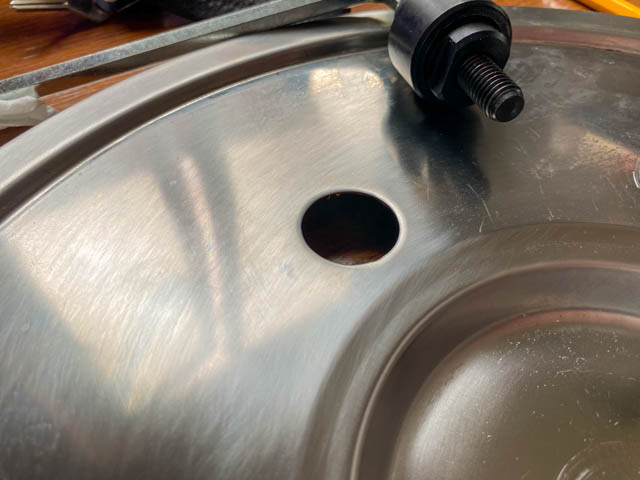
After drilling pilot holes, I punched 22.5mm holes for the bulkhead fittings. Q-Max - accept no substitute!
Now, here's an odd thing:
I didn't realise that the fittings were tapered BSP rather than parallel. The 1/2 inch back nuts only went down so far down the thread before - as designed - digging into it. But, this left quite a gap between the nut, lid and rest of the fitting. Rather than packing the gap with washers, I swapped the back nuts with the ones supplied with the Brew Builder kit. They ran all the way down the shank! So, is this a difference in manufacturer's tolerances, or a slightly different sized - yet still 1/2 inch - nut?
Either way, they fit and the Angel Homebrew nuts work perfectly on the Brew Builder parts
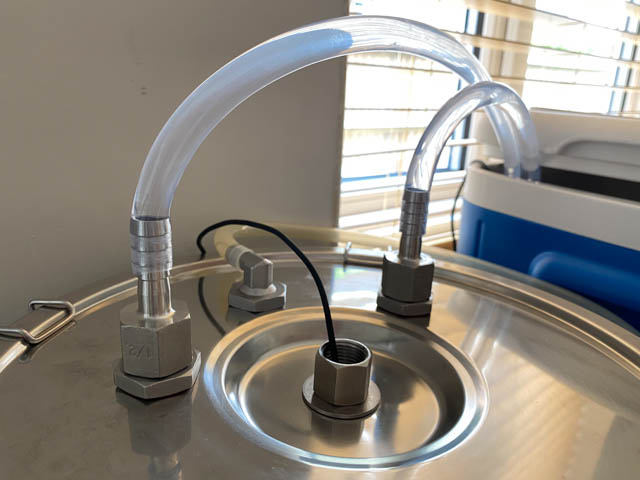
With another hole (21mm) Q-max’d for the blow-off tube, a Brew Builder 200mm thermowell sits directly in the centre of the lid.
Once assembled, I ran the pump for around an hour to make sure nothing leached into the fermenter through the fittings.
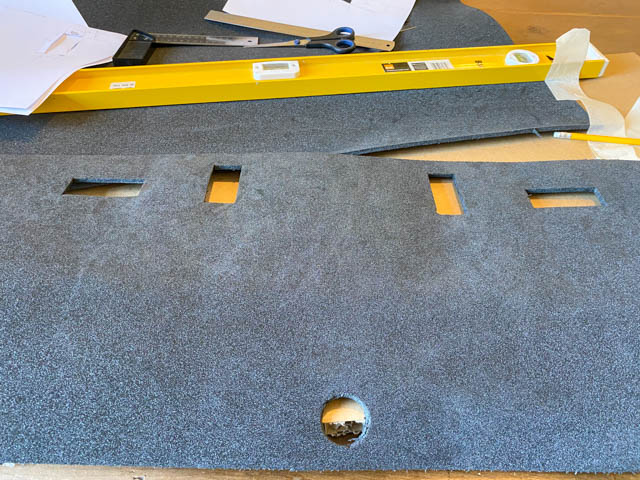
I made an insulating jacket from a sheet of 5mm Plastazote closed-cell foam and Velcro tape.
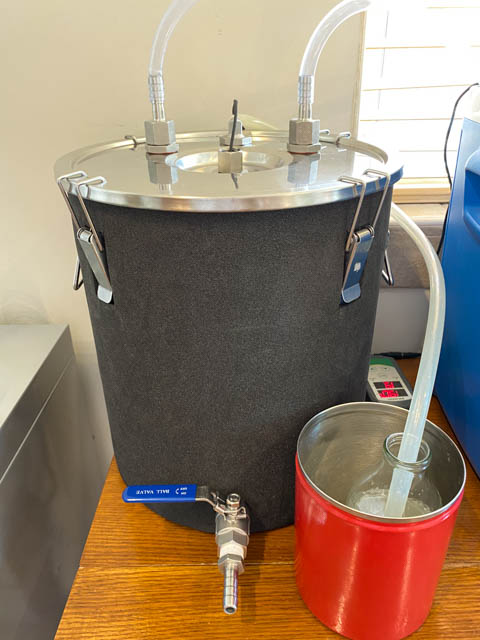
Here it is completed, up and running with a brew. I also converted a small 5L cool box but decided that there wasn’t enough cold water in the reservoir to make a meaningful temperature change. So, for this brew I’m using the 45L mash tun with around 15 litres of water. The cooling comes courtesy of a couple of 2L PET bottles of water frozen overnight, swapped twice daily. They’d probably last longer if I could close the lid of the coolbox.
Results:
Four days into fermenting, the system has kept the brew steady at the set temperature of 19C +/- 0.5C. I’m surprised (and impressed) how quickly the temperature drops back when the pump kicks in.
Is it as versatile as a fridge? Can I crash-cool or lager with it? Nope, not with frozen PET bottles. Does it keep a steady fermenting temperature? Yes. And, it looks awesome next to the Kegerator
I might hook it up to a Maxi chiller or some other chilling system (glycol?) in the future. But I want to know whether a truly stable fermenting temp makes a difference to brewing at this scale before spending a small fortune.
Cheers,
FB.


