
Making a Hopstopper
Re: Making a Hopstopper
yeah, really neat and tidy edge crimping, good job.
-
WishboneBrewery
- CBA Prizewinner 2010
- Posts: 7874
- Joined: Sun Nov 30, 2008 9:06 pm
- Location: Keighley, West Yorkshire
- Contact:
Re: Making a Hopstopper
You know, I might have to blatantly copy this eventually!
-
charliefarley
- Hollow Legs
- Posts: 337
- Joined: Tue Oct 26, 2010 6:09 pm
- Location: Land of 340+ CaCO3
Re: Making a Hopstopper
I bought a couple of pieces of mesh to make one of these.
When I realised that the mesh was just bigger than the size of the bottom of my mash tun bucket, I used one piece for a simple version of the hopstopper (folded in half and single crimped on three edges - no stitching):

and one for a false bottom (with beer line around the edge):

tested both last weekend and they worked great.
When I realised that the mesh was just bigger than the size of the bottom of my mash tun bucket, I used one piece for a simple version of the hopstopper (folded in half and single crimped on three edges - no stitching):
and one for a false bottom (with beer line around the edge):
tested both last weekend and they worked great.
-
WishboneBrewery
- CBA Prizewinner 2010
- Posts: 7874
- Joined: Sun Nov 30, 2008 9:06 pm
- Location: Keighley, West Yorkshire
- Contact:
Re: Making a Hopstopper
Nice pizza oven man!
LIke the false bottom from mesh, cool.
LIke the false bottom from mesh, cool.
-
charliefarley
- Hollow Legs
- Posts: 337
- Joined: Tue Oct 26, 2010 6:09 pm
- Location: Land of 340+ CaCO3
Re: Making a Hopstopper
Cheers!pdtnc wrote:Nice pizza oven man!
LIke the false bottom from mesh, cool.
Work has now started on phase two - a fire brick grill/bbq and a designated food prep area with space for an outdoor keggerator of course!
-
staplefordbill
Re: Making a Hopstopper
Go to test this for the first time yesterday. WOW! Garth's equine analogy was entirely apt.  Really fast, crystal clear run-off and it drained to the very bottom of the boiler. Loads more aeration than I normally get. Came back from work tonight and this was the result:
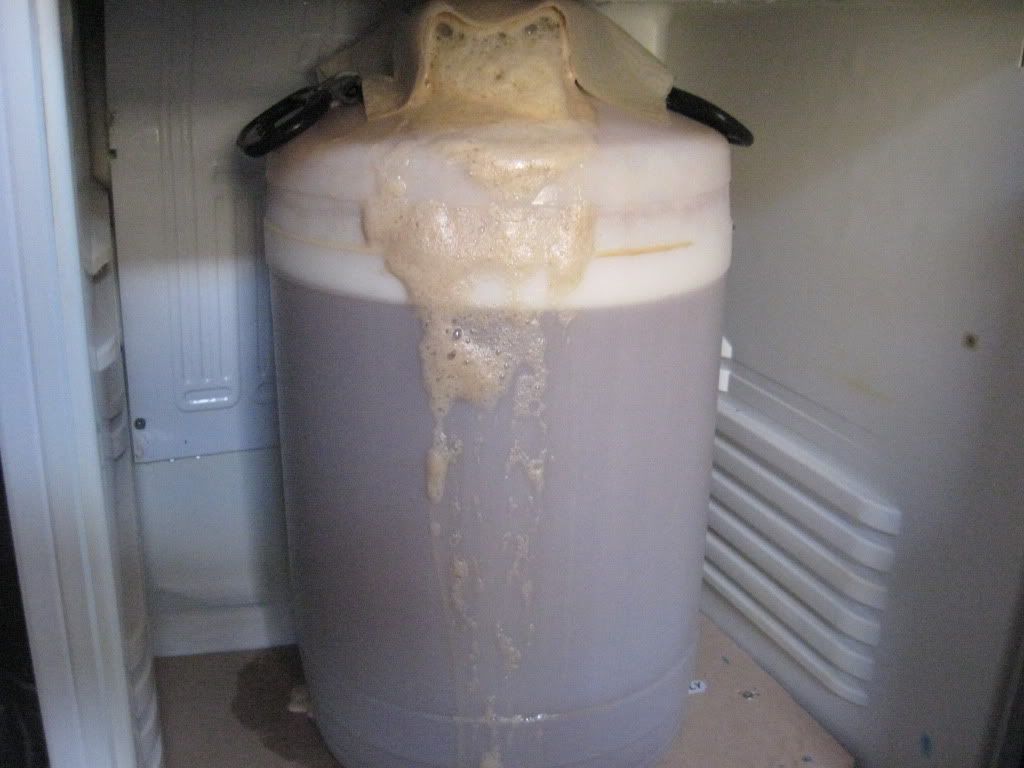
I've never had anything like that before. I've had one or two inches of Krausen at the most. So thank you Garth!
I've never had anything like that before. I've had one or two inches of Krausen at the most. So thank you Garth!
-
WishboneBrewery
- CBA Prizewinner 2010
- Posts: 7874
- Joined: Sun Nov 30, 2008 9:06 pm
- Location: Keighley, West Yorkshire
- Contact:


-
staplefordbill
Re: Making a Hopstopper
Looks good pdtnc! Making one of these has made a bigger difference to my brewing than any other upgrade (fermenting fridge, stainless steel false bottom etc.) Always have good aeration now and haven't had a single slow start to fermentation - with the standard drilled copper pipe it happened frequently.
-
WishboneBrewery
- CBA Prizewinner 2010
- Posts: 7874
- Joined: Sun Nov 30, 2008 9:06 pm
- Location: Keighley, West Yorkshire
- Contact:
Re: Making a Hopstopper
I threw everything bad i had at this on Sunday and it did the job with no fuss at all 
-
Aleman

- It's definitely Lock In Time
- Posts: 6132
- Joined: Sun Jun 03, 2007 11:56 am
- Location: Mashing In Blackpool, Lancashire, UK
Re: Making a Hopstopper
I've modified my design since building the original one to fit in the 150L boiler I now have.
First take a couple of circles of 6mm copper tube, solder the ends together to make circles, then flatten them to give a couple of flat discs through which you drill a bunch of 3mm holes through both discs


Take a couple of pieces of #30 Stainless mesh and cut a couple of discs from it that are about 1cm bigger than the copper discs. You can see I have a 'dimple' in one of the discs, that I made to fit the 3" bottom drain in the NanoCopper. By putting the mesh in the copper and pushing a whisky bottle tube of the appropriate diameter into it . . . If you don't have an appropriately sized single malt tin . .. go and buy one


In the top piece I found the centre, by folding it in half twice, then cut a cross in the middle so that a standard 15mm tank connector would fit. I reversed the Flange nut of the tank connector and used that as a sealing surface for the 12" Female right angled 15mm compression fitting to fit the easy bend copper tube into. . . . Using the flange nut I can adjust the height of the pick up and put the tank connector right to the bottom of the well if required.


As you can see from the last image you fit the stainless mesh to the copper disc by just folding over the edge . . try not to cut yourself . . . Once you have attached each piece of mesh to its own disc you then fit them together using 3mm button headed bolts and washers.


And finally fit it in place . . . and use the easy bend tube to get the hop stopper right down on the base of the boiler.

The benefit of this one over my older hop stopper where the mesh was folded over and crimped together is that this can be taken apart to clean if anything gets stuck inside.
First take a couple of circles of 6mm copper tube, solder the ends together to make circles, then flatten them to give a couple of flat discs through which you drill a bunch of 3mm holes through both discs
Take a couple of pieces of #30 Stainless mesh and cut a couple of discs from it that are about 1cm bigger than the copper discs. You can see I have a 'dimple' in one of the discs, that I made to fit the 3" bottom drain in the NanoCopper. By putting the mesh in the copper and pushing a whisky bottle tube of the appropriate diameter into it . . . If you don't have an appropriately sized single malt tin . .. go and buy one
In the top piece I found the centre, by folding it in half twice, then cut a cross in the middle so that a standard 15mm tank connector would fit. I reversed the Flange nut of the tank connector and used that as a sealing surface for the 12" Female right angled 15mm compression fitting to fit the easy bend copper tube into. . . . Using the flange nut I can adjust the height of the pick up and put the tank connector right to the bottom of the well if required.
As you can see from the last image you fit the stainless mesh to the copper disc by just folding over the edge . . try not to cut yourself . . . Once you have attached each piece of mesh to its own disc you then fit them together using 3mm button headed bolts and washers.
And finally fit it in place . . . and use the easy bend tube to get the hop stopper right down on the base of the boiler.
The benefit of this one over my older hop stopper where the mesh was folded over and crimped together is that this can be taken apart to clean if anything gets stuck inside.
-
WishboneBrewery
- CBA Prizewinner 2010
- Posts: 7874
- Joined: Sun Nov 30, 2008 9:06 pm
- Location: Keighley, West Yorkshire
- Contact:
Re: Making a Hopstopper
very nice
-
dave.wilton
Re: Making a Hopstopper
I built mine too using the tank connector and a single elbow. I used a push fit elbow so no soldering. I'm giving it a christening with hop hammer IIPA this weekend!

I don't use three elements, one is a backup
I don't use three elements, one is a backup
-
WishboneBrewery
- CBA Prizewinner 2010
- Posts: 7874
- Joined: Sun Nov 30, 2008 9:06 pm
- Location: Keighley, West Yorkshire
- Contact:
Re: Making a Hopstopper
excellent work there Dave
-
phatboytall

- Lost in an Alcoholic Haze
- Posts: 501
- Joined: Thu Apr 15, 2010 1:01 pm
- Location: Ringwood
- Contact:
Re: Making a Hopstopper
Well now i know what i'm doing with my spare SS mesh...
I am not a Beer expert.....thats exactly the point.
Check out my blog where i review bottled beers
http://www.thebeerbunker.co.uk/ or find me on twitter @thebeerbunker
Check out my blog where i review bottled beers
http://www.thebeerbunker.co.uk/ or find me on twitter @thebeerbunker
-
dave.wilton
Re: Making a Hopstopper
Using my new hop stopper with hop hammer Imerial IPA. 262g of hops! My losses were huge (30L down to 18L 90min boil), but I can't blame the hop stopper for that.
