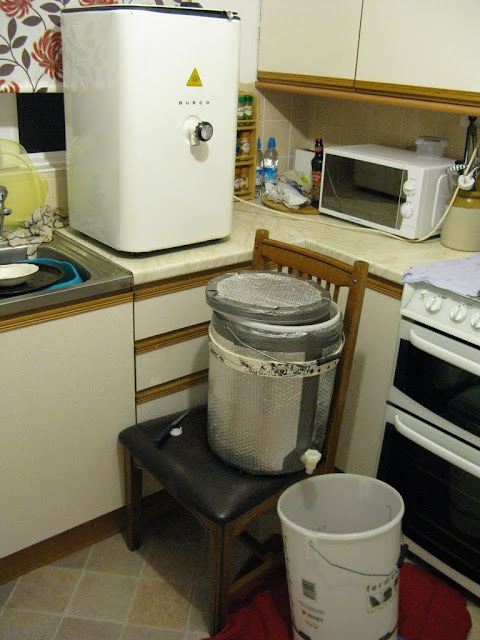
First up was a new HLT.
I had decided to sell me trusty old Burco 44L to my father as he always had his eye on it. He seems to be very happy with the old enamelled beast and I hope they have very many happy years brewing together. Incidentally it also comes in handy for boiling up loads of water for processing pig carcasses on slaughter day at the farm!
The HLT is based on a 50L stainless keg (legitimately purchased from Morrow Brothers). Forgot to take a pre-build photo but looked like any other one.
Across the whole build I decided to use recycled kegs as I had the following brief in my head:
- It needs to be fairly cheaply done but durable, safe and versatile in use.
- Bottom draining wherever possible as I found cleaning out my old mashtun and boiler a PITA!
- Stainless or copper wherever possible as I hate using plastic (slight tree hugger mentality worried about chemicals leaching).
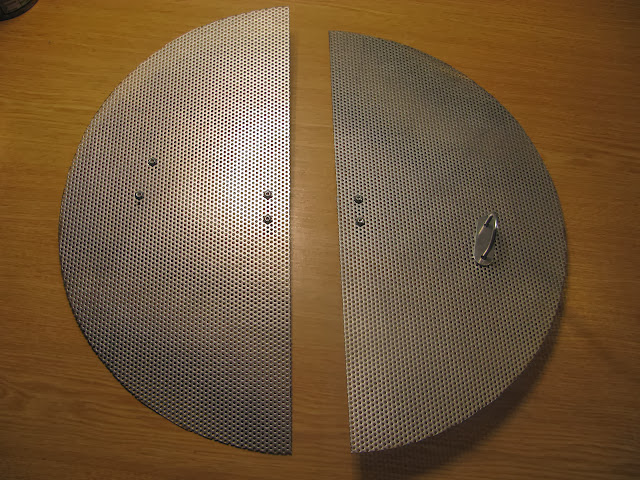
To make it into anything approaching a pot I decided to cut the top off.
Lets be clear - If I were to start over I would 100% definitely have opted for the - flip it over and use a tri-clamp to connect to the neck method. Although it costs a little more, it is far more effective and serviceable.
However I only recently discovered this was possible and I decided asking my mate to braze copper elbows to the base was the cheapest/best solution for any bottom draines. With a hole cut out of the top and a disc lid cut from a scrap of stainless sheet I had the basis of a pot. Next up hole cutting.
I had thought of the HLT having a bottom drain but as this vessel will only ever hold clean water I decided it wasn't necessary as no cleaning is needed. So I opted for the usual valve and dip tube. I also needed to cut hold for a sight glass, thermowell and element. I also wanted to add a float switch for boil dry protection.
The first three were all going to be connected with standard 15mm brass tank connectors so simply a case of getting hold of a small 4mm and large 10mm cobalt bit and a Qmax hole punch. I found this process to be harder than expected even with good quality tools. Firstly the keg wall is, I think, a lot thicker than that of the stockpots often used. I broke several 4mm cobalt bits during the whole build as there is a very fine line between not applying enough pressure and work hardening the steel and applying too much pressure. If you apply too much pressure the bit 'bites' into the stainless to much and can snap. Once the 4mm hole is done, I open it out to 10mm with a larger bit to allow the QMax punch to get in. I should add that I used transmission fluid as my cutting oil as I had a spare bottle. The other real pain is the strain on the drill. I used several. The problem is you want the bit turning very slowly. Hovering on the trigger strains the drill terribly and I killed one cheap old mains drill I had lying around during the build.
Small holes drilled and importantly filed smooth and we are on to the big hole for the immersion element.
I chose immersion elements as they are durable and future proof (if my element blows in 5 years time I know I will be able to get another to swap in easily and cheaply). To fit this to the HLT I decided to use the big brass mechanical 'Essex' flanges used elsewhere. Impressive bits of heavy duty kit! There were to be coupled with some trade quality (but not inacoly/stainless) regular short 3kw immersion elements.

To fit the flange I drilled my two pilot hole as before before then taking at the HLT with a big old Bosh cobalt hole saw. Nicely made and incredibly strong it needed control, plenty of fluid and pressure and a good drill to back it up. Once they start biting into the stainless they tear through quite quickly and you have to be careful to not go too quick or you end up with a messy hole and damaged hole saw.

Once through there was a seemingly endless bout of filing and widening of the hole to allow the flange to fit (it needs a 64mm hole). To do this I used some Bosch grinding attatchments for my drill on medium speed. Neighbours really loved me that evening as the sound really echoes!

Time to fit the flange.

They dont like the curved stiff shape of the stainess wall and so need some serious pressure to get the to tighten up and press the stainless wall flat. I used a big ol' 60cm stilson wrench from Toolstation but in all honesty it wasnt big enough and I had to faff around with it adjust right to its max and slipping often, hence the scratched. Able to get loads of torque on it though when it gripped.

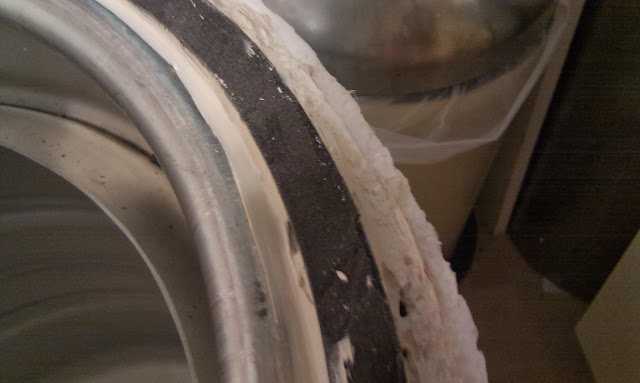
Fittings all done! Dry fitted the immersion element for fun and all was good. Time to insulate and finish the exterior. I really wanted to insulate each vessel well to ensure maximum energy efficiency, minimum heat up times and to allow the proces to be split over two days if needed.
To do this I used a combination of what I had, what I found at boot bales and what I was recommended to go out and buy. I decided on a combination of polystyrene decoroll, closed cell foam and silver back bubble wrap. Polysterene is by far and away the cheapest insulation material and I have found it performs really well in past projects, so that's a good start. However it is very very fragile and ugly as sin. I planned to add a top layer of foil backed bubble wrap to smarten things up but was concerned about fragility. So went into town and got hold of some reasonably priced black closed cell foam sheet. It is stiff and very durable but also not that pretty so went for a final plan of three layers - polsterene first, foam second and silver bubble wrap last.


A fairly complicated evening of measuring, cutting, gluing and rolling it all up ensued. I used luggage straps to keep it all super tight whilst the glue cured. I used Gripfill which stank the bloomin house out!

The edges were finished and sealed up fairly tidy with a roll of silver aluminium tape.


The lid now looked out of place so I cut a disc of foam and bubble wrap and also insulated that too. I then added a stainless drawer handle off eBay to make it easier to handle.


Of course it is really no where near finished! First up plumbing. Cheap but good quality trade 15mm brass fittings and lever valves throughout were the order of the day. I had decided that camlocks were out of my budget but that I wanted to have some abilty for quick disconnects. Step forth cheap eBay brass hose and tap connectors.
The main valve was connected directly to the tank connector
The thermowell hole simply needed a brass tank connector with its centre drilled out to allow 15mm copper to pass through. I also cut back the insulation around the fitting a little to allow for tightening with tools.
The sight glass had a 1/2BSP female x 15mm compression elbow screwed onto the end of a 15mm tank connector. Only just deep enough to reach out past the insulation. Into the compression fitting I had a half metre or so of 15mm clear acrylic tubing. The polycarbonate tubing was too expensive for me. It doesnt quite rise vertically as the HLt wall is begining to curve inwards where I have attatched it - needs a support at the top to keep it from moving around.


The float switch comes with its own washer and nut so just a case of drilling a small hole (approx 8-10mm) for it and screwing it down. I added a 3.5mm headphone jack to the end of the bare wires for neatness and connectivity.


With the immersion element screwed in, I then set about wiring up a short permanent lead for it. I used a short length or the nice rubbery 2.5mm immersion flex for peace of mind. To the end of this I added a blue 16A commando plug as even though the shed wasnt ready I had decided already to use these sockets as the immersion elements would be pushing regular 13A plus and sockets to the max and they dont cost much more. This brewery needs to be safe and reliable enough to run unattended at night etc.


Bravo! Looks pretty much done! A quick leak test revealed a little more tightending on a couple of fittings was needed but overall happy.


Whilst doing the leak test I also calibrated the sight glass by adding two litres of water at a time and marking the sight glass with a permanent marker pen.
Next up the MT!