New Brewery build

The forum for discussing all kinds of brewing paraphernalia.
Post Reply
Wyvern

New Brewery build

Post by Wyvern » Sat Aug 09, 2014 7:04 pm

Hi,

So the time has come to replace the old plastic DIY kit viewtopic.php?f=2&t=64093&p=674299&hili ... np#p674299 with new shiny kit.

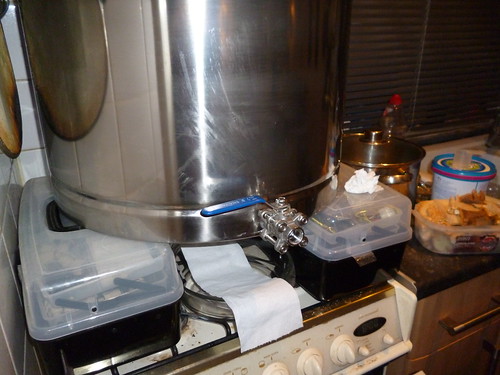
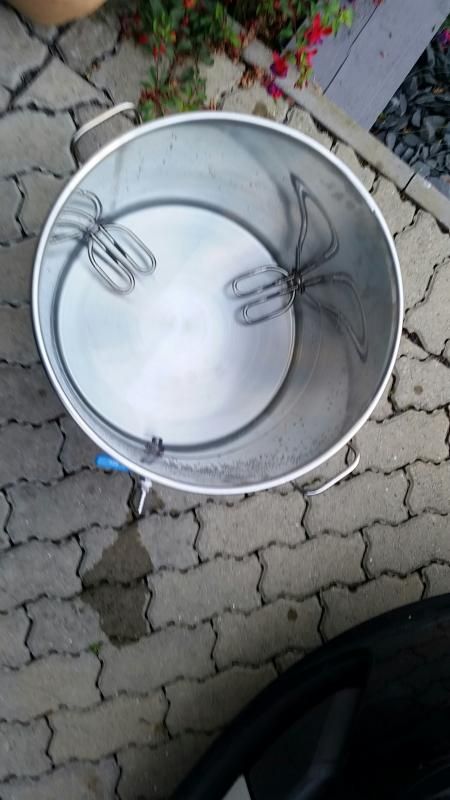
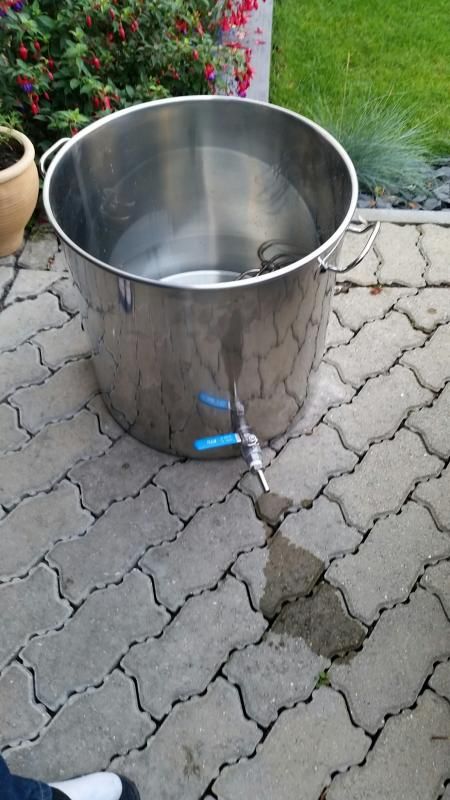
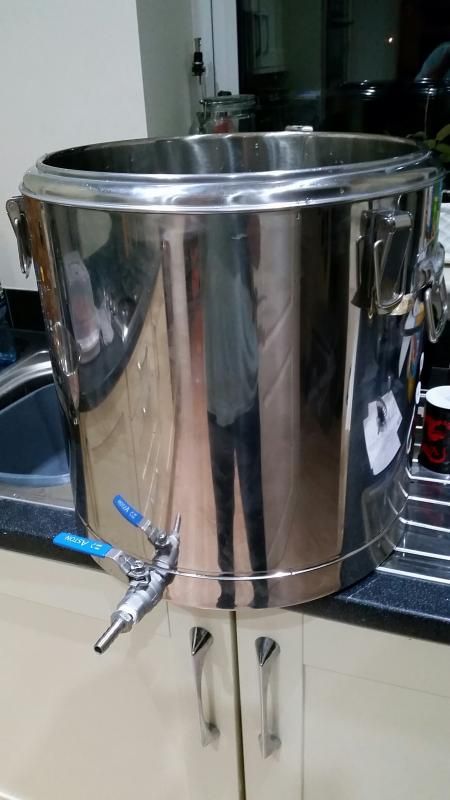
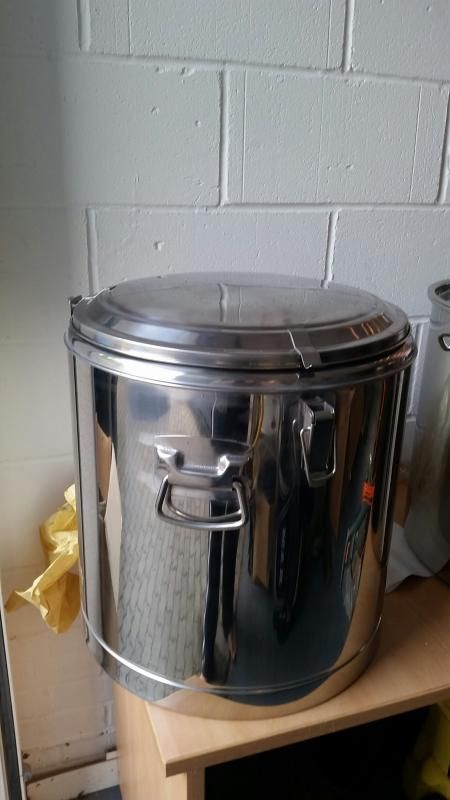
I've Just taken delivery of a 50ltr Thermos pot and 70ltr SS pot from Germany in the hopes of transforming it into my next brewery. I know many of you have done this before so please don't hold back on tips :)
ImageImage

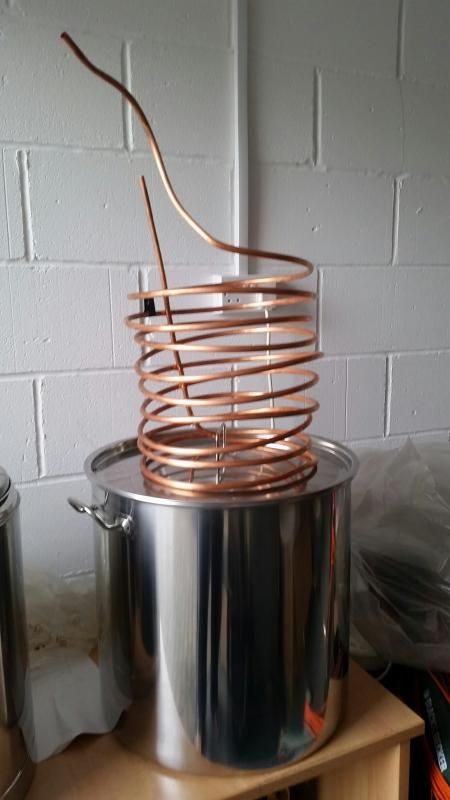
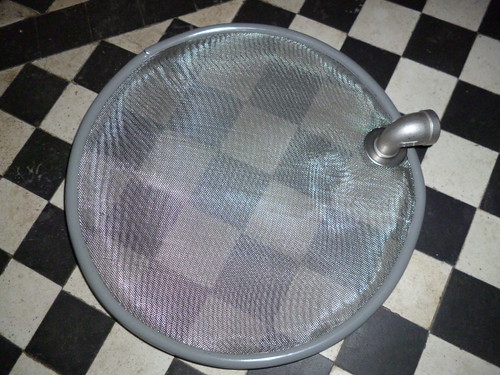
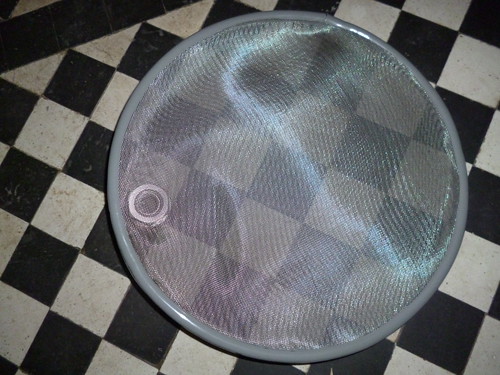
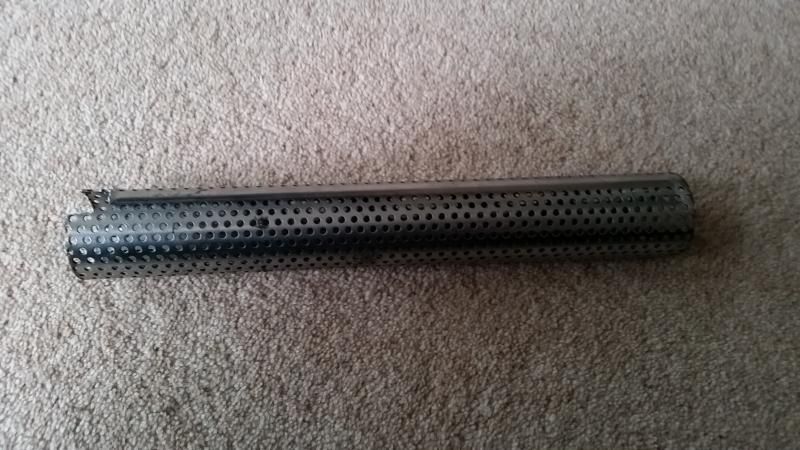
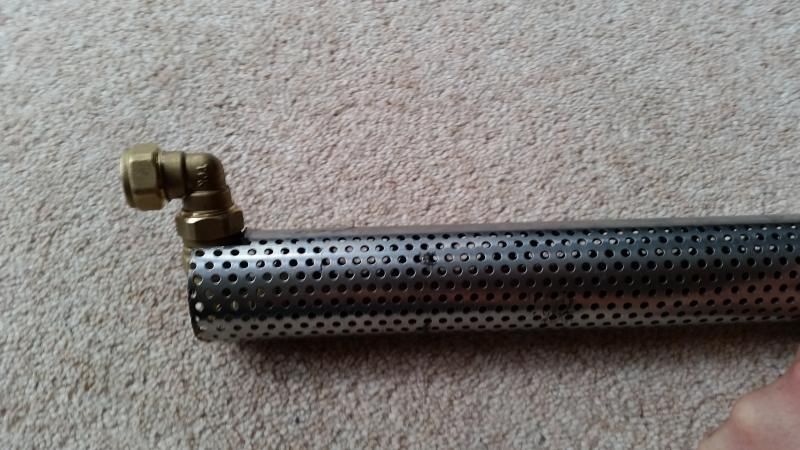
I've also made a immersion cooler out of 10mm microbore copper tubing as with the old setup cooling took too long with frozen milk bottles lol.

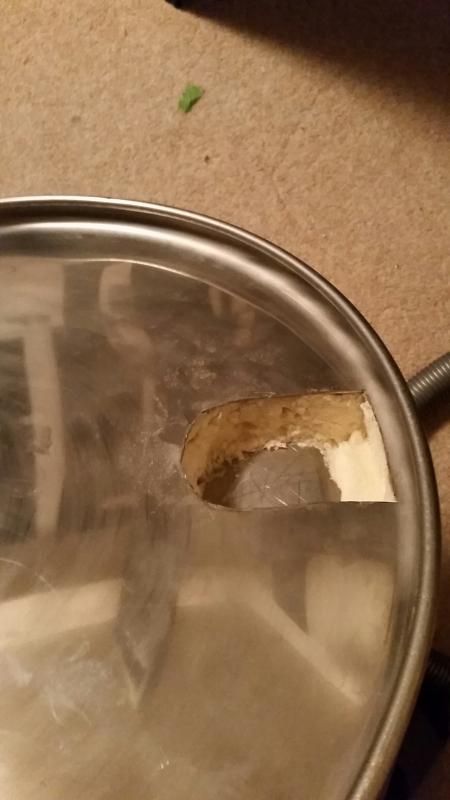
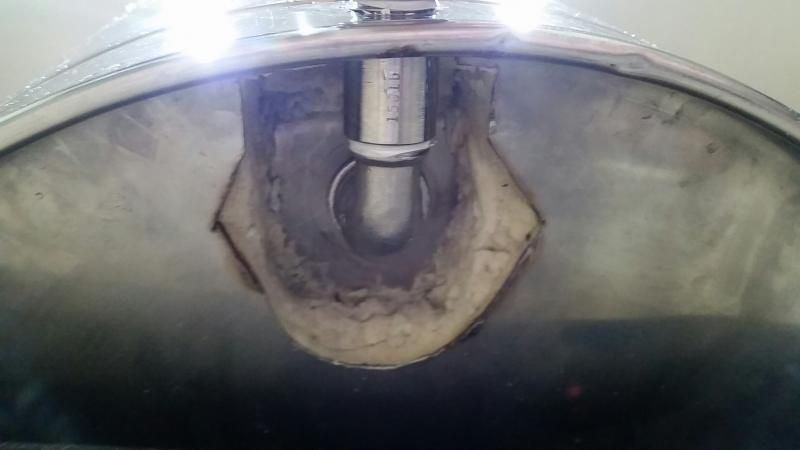
so stage 1 if to fit all the taps, kettle elements and link up a pump for wort recirculation whilst cooling. I'm still waiting on the q-max cutters to arrive but i'm itching to make a start.

ImageImage

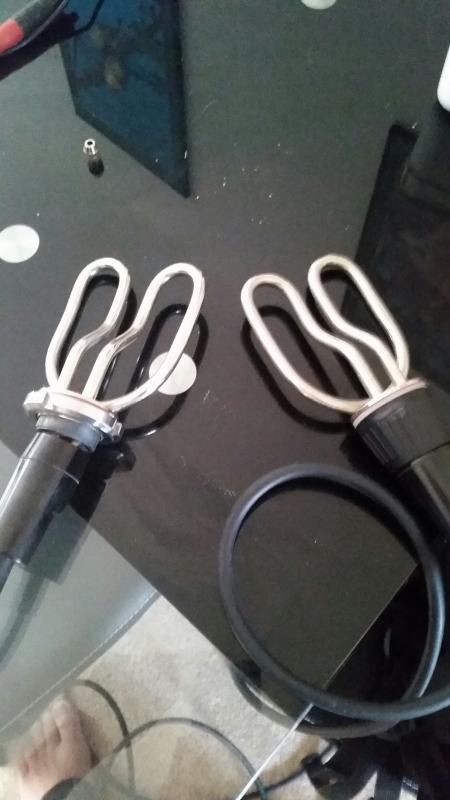
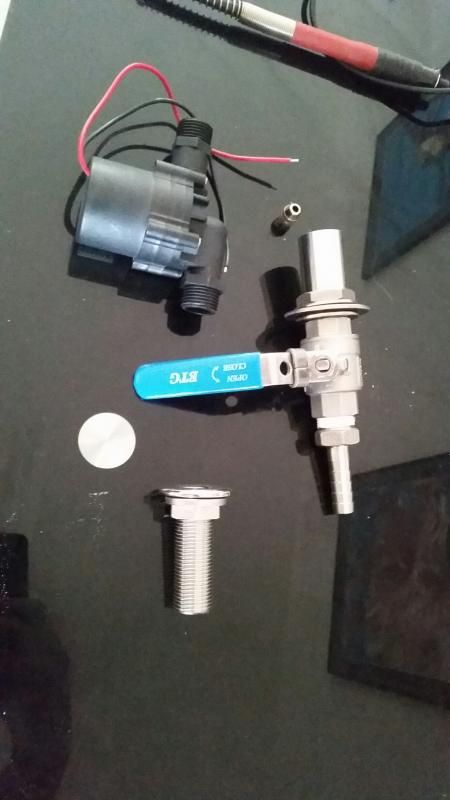
I'll be using 2 2750W kettle elements to power the boiler, those were off ebay, the tap, pump etc from Angel Homebrew. I still have a few plumbing bits to get for the mash tun.

The plan for stage 2 (2-3 months away) is to add another pump and build in a value kettle HERMS which will be controlled by a Raspberry Pi acting as a PID.

I'll keep the tread updated with progress.

Wyvern

Fil
Telling imaginary friend stories
Posts: 5229
Joined: Sun Oct 16, 2011 1:49 pm
Location: Cowley, Oxford

Re: New Brewery build

Post by Fil » Sun Aug 10, 2014 12:08 am

If your planning a bottom drain for the tun, this is the sort of size you want to cut the skin fitting down to and grind down an elbow to fit under the base..
Image
consider a side (front) drain rather than a central one, it will allow a simple forward tip to reduce your deadspace to a few tens of ml
... and a simple bes m/m barel nipple feeds a male thread out the side through the bottom rim for a tap/valve ;)
Image

string tied off through a washer can be used to pull the tun drain bits together from the outside.. and a smear of lsx thread sealer on the bottom of the skin fitting flange will seal it nicely against the stainless steel bottom skin.

giving mine a final leak test ;)
Image
ist update for months n months..
Fermnting: not a lot..
Conditioning: nowt
Maturing: Challenger smash, and a kit lager
Drinking: dry one minikeg left in the store
Coming Soon Lots planned for the near future nowt for the immediate :(

Wyvern

Re: New Brewery build

Post by Wyvern » Sun Aug 10, 2014 9:45 am

That's great! A side-bottom drain like yours is what I was going to aim for as it seems a bit easier than a center drain. Not that I expect any of this to be easy.

That's a lot off the skin fitting, I guess it needs it if everything is to fit flush underneath.

That's a nice looking tun! What efficiency are you getting from it?

I'm actually also missing a false bottom for the Tun ans well as hop filter for the boiler, I'm still mulling over a few designs but I'd be interested to know what others are using.

Fil
Telling imaginary friend stories
Posts: 5229
Joined: Sun Oct 16, 2011 1:49 pm
Location: Cowley, Oxford

Re: New Brewery build

Post by Fil » Mon Aug 11, 2014 12:14 am

check out mrlard at the homebrewbuilder.co.uk (a brewer with a day job and young family)
email him for a quote for a cut to size perforated SS sheet for a tun FB..

the SS mesh from £shop splatter guards with some split beerline make a simple cheap garth style mesh pocket hop filter..Image
Image

attack the job with the right tools and you will be fine,, a belt sander is the tool to grind down the hard SS bits, its not a fast job, and will create a nasty fine black dust and the bits get very hot very quickly..
Chopping off a length of a parallel nipple from the skin fitting to start with helps too.
think i ended up with just 2 or 3 turns of thread on the skin fitting ;)

re efficiency ive hit targets using it, but am still working out the ideal prewarm and up in strike temp to hit the ideal mash temp without adding extra hot water.. the large SS interior needs more prewarming than my old smaller cold box tun ;)
ist update for months n months..
Fermnting: not a lot..
Conditioning: nowt
Maturing: Challenger smash, and a kit lager
Drinking: dry one minikeg left in the store
Coming Soon Lots planned for the near future nowt for the immediate :(

Wyvern

Re: New Brewery build

Post by Wyvern » Mon Aug 11, 2014 7:51 pm

So my q-max cutters arrived today so I made a start on the boiler.

Was actually not too stressful, so I measured and cut the holes. Fitted the taps and Elements.

ImageImage

All filled up and leak tested. Now just awaiting my cutting discs for the mash Tun.

Thanks Fil, I'll have a look at those. Ive got a plan for the hop filter which im hoping will work. I'll update once I've goit it installed.

Wyvern

Wyvern

Re: New Brewery build

Post by Wyvern » Thu Aug 14, 2014 3:24 pm

I have the parts for the hop filter now, will post pictues tonight of it completed.

The kettle elements were purchased from here
http://www.ebay.co.uk/itm/Universal-275 ... 485ab41dfe

w

Wyvern

Re: New Brewery build

Post by Wyvern » Thu Aug 14, 2014 6:21 pm

Right so here is the hop filter. Don't see why it shouldn't work. ofc any feedback is appreciated.

Here's the inside part, more holes to come but the drill bit broke.

Image

Here's the outside part, just need to seal up the ends.

Image

And Finally how it fits together.

Image

daddies-beer-factory

Re: New Brewery build

Post by daddies-beer-factory » Fri Aug 15, 2014 8:09 pm

Looking good - i would suggest to the ends of your immersion chiller - you put in a big bend, so they come out of the pot and face down (like the internet ones)

this is because if the connector leaks , it wont start spraying hose water into your beer, it will run downwards.

mine usually has a couple of leaks every brew day & I stop the water & tighten/ adjust the connector. :mrgreen: :mrgreen: :mrgreen:

Wyvern

Re: New Brewery build

Post by Wyvern » Fri Aug 15, 2014 10:42 pm

daddies-beer-factory wrote:Looking good - i would suggest to the ends of your immersion chiller - you put in a big bend, so they come out of the pot and face down (like the internet ones)

this is because if the connector leaks , it wont start spraying hose water into your beer, it will run downwards.

mine usually has a couple of leaks every brew day & I stop the water & tighten/ adjust the connector. :mrgreen: :mrgreen: :mrgreen:

Good call!! I'll get that done this weekend, was hoping to have my BES delivery this week so I can finish the mash tun plumbing but no such luck although it is swmbo's birthday so that might not have gone down too well.

Managed to do a pretty tidy job on the mash tun so far using a dremel and some diamond edged cutting discs.

Image

Wyvern

Re: New Brewery build

Post by Wyvern » Thu Aug 21, 2014 5:54 pm

Just finished fitting the drain and tap to the mash tun, cuts all over my hands to prove it :shock:

Image

Image

Had to cut a bit more out of the bottom but no leaks, will fill the cavity with expanding foam to insulate.

I think I will contact homebrewbuilder for a false bottom, its no more expensive than sourcing the parts and making it myself.

Fil
Telling imaginary friend stories
Posts: 5229
Joined: Sun Oct 16, 2011 1:49 pm
Location: Cowley, Oxford

Re: New Brewery build

Post by Fil » Thu Aug 21, 2014 6:56 pm

looking good. ) much neater underneath than mine ;) Rather than builders foam which is a real pita to use, and will offer little structural support, can i suggest lining the void and fittings with cling film or foil and pumping in a few separate layers of frame sealant or decorators caulk, over a few days let a layer cure before piling more on and you will build up a solid plug in no time which will support the fittings against any leverage applied when operating the valve, and should you need to access the fittings you should be able to lever it out in one due to the foil or film lining stopping it adhering to the pipework or base/insulation remaining in place.

i did mine without the foil lining, only thinking of it after the job ;) when operating my valve the force needed would also move the valve to one side a fraction of a mm and flex the inner skin just noticeable prior to packing the void with a mixture of remnants from old gun cartridges like caulk, silicone and frame sealant left over from other jobs. now its not a problem..
ist update for months n months..
Fermnting: not a lot..
Conditioning: nowt
Maturing: Challenger smash, and a kit lager
Drinking: dry one minikeg left in the store
Coming Soon Lots planned for the near future nowt for the immediate :(

Post Reply