Thermopot mash tun conversion

The forum for discussing all kinds of brewing paraphernalia.
User avatar
JamesF
Drunk as a Skunk
Posts: 986
Joined: Fri Feb 10, 2012 12:09 am
Location: West Somerset

Thermopot mash tun conversion

Post by JamesF » Sun Oct 25, 2015 12:14 am

As I've managed to spend most of today in the beer shack and as I now have all the parts required I thought I'd make a start on putting together my new mash tun, which mostly involves putting in an offset bottom drain. Using the assembled parts as a guide I marked out where I needed to cut away the base to give access for attaching the deck fitting and elbow, my plan being to cut a hole with a hole saw and then extend it to the edge with the Dremel. Unfortunately even chinagraph pencil doesn't seem to mark stainless steel very well.

Image

The hole saw just couldn't cut it though (see what I did there? :) As you can see here it made almost no impression whatsoever. I therefore abandoned the idea of a neat circular hole, squared it off, broke out the Dremel and got medieval on the base.

Image

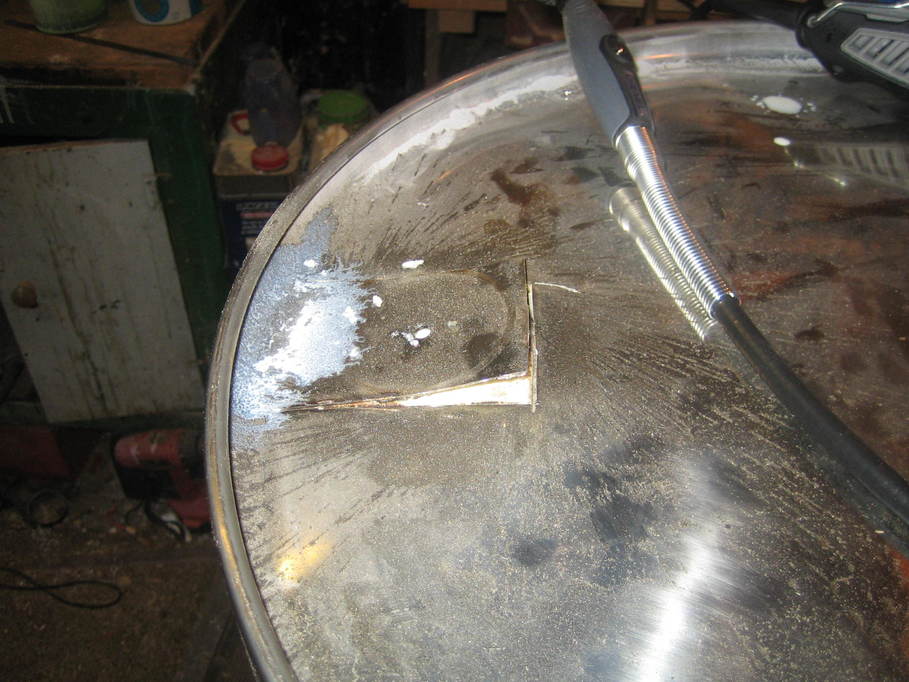
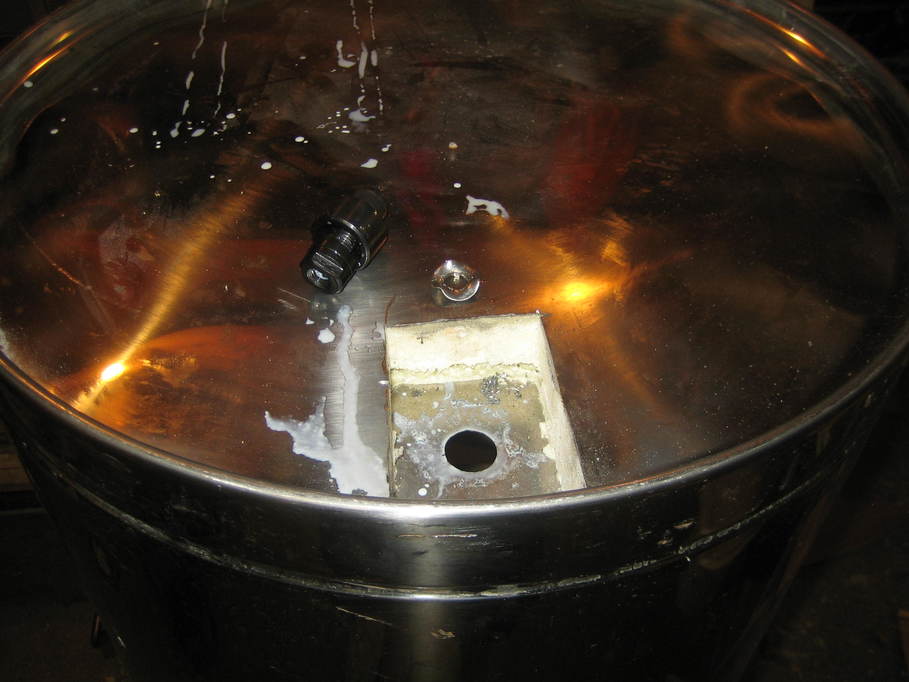
By this time my metal-cutting wheel had reached about 20mm diameter. That turned out quite handy. I prised up the "flap" I'd cut so far and removed the insulation from underneath, right to the edge of the pot. That allowed me to squash the flap down into the empty space and with the reduced size of the cutting wheel I could trim out the curved section fairly neatly, leaving me with the final hole.

Image

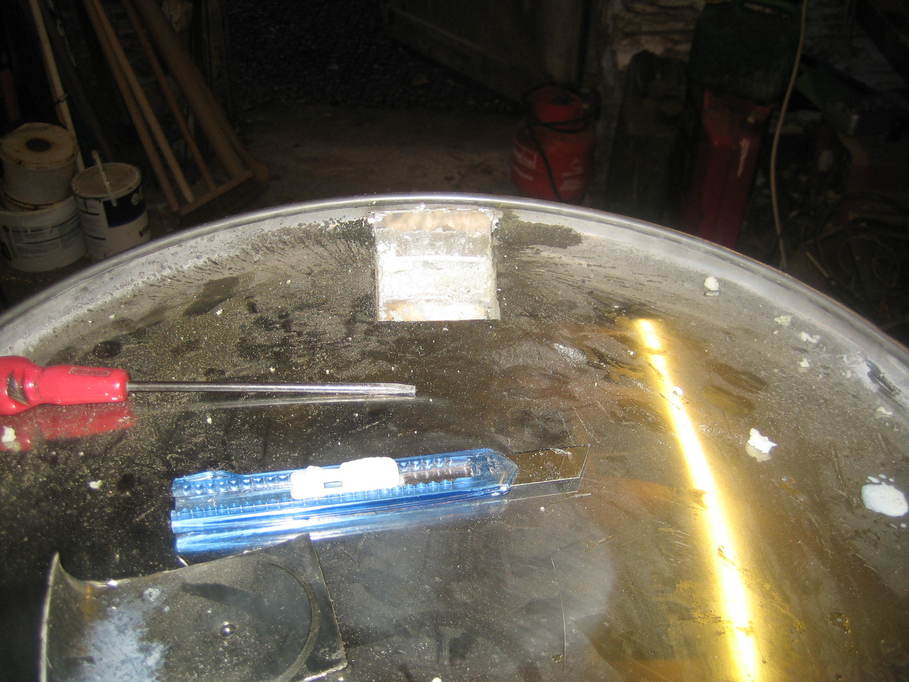
The knife was great for getting the insulation out because the blade could be extended far enough to reach all the way to the inner skin, which a standard stanley knife won't do.

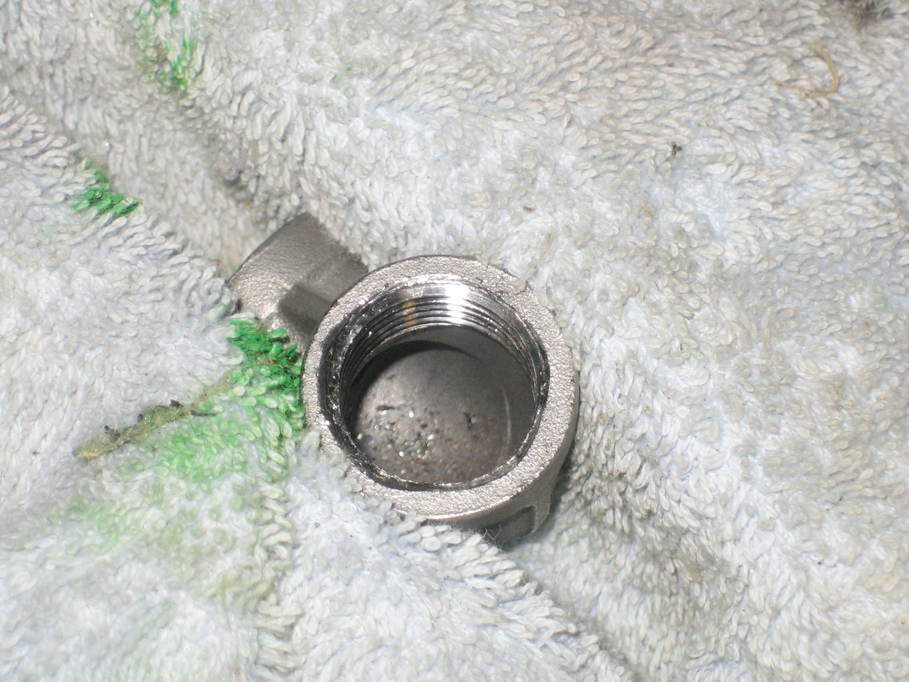
That's as far as I've got today. Tomorrow I can hopefully just cut a hole in the base and the side wall with my Q-Max cutters, possibly cut down the thread on the deck fitting and finish assembling it all.

James

YeastFace Brew Co.

Re: Thermopot mash tun conversion

Post by YeastFace Brew Co. » Sun Oct 25, 2015 12:37 am

We have had opposite fortunes today. After after 30 minutes and a litre of veg oil my holesaw made a tidy hole.

User avatar
JamesF
Drunk as a Skunk
Posts: 986
Joined: Fri Feb 10, 2012 12:09 am
Location: West Somerset

Re: Thermopot mash tun conversion

Post by JamesF » Sun Oct 25, 2015 12:45 am

I need some better quality holesaws I think. I'm not sure the one I was using was really up to stainless. It would have appealed had it worked but still, rectangular hole, circular hole, they all look the same when the pot is the right way up :)

James

YeastFace Brew Co.

Re: Thermopot mash tun conversion

Post by YeastFace Brew Co. » Sun Oct 25, 2015 1:05 am

I wish I took photos. I was so proud of the holes made by the holesaw ([censored]) and the Q.Max, it was when I tried to cut out the side of the pot I was close to killing or blinding myself and the father in law. Try again tomorrow (not me). :mrgreen:

I tried to get my pilot hole going last night with a few bits I had, shit. Bought a 2-14mm step bit this morning, glorious.

YeastFace Brew Co.

Re: Thermopot mash tun conversion

Post by YeastFace Brew Co. » Sun Oct 25, 2015 1:11 am

It's quite cool we're doing pretty much the same conversion at the same time, although it seems as though you could have done with my holesaw and I could've done with your Dremel!

User avatar
JamesF
Drunk as a Skunk
Posts: 986
Joined: Fri Feb 10, 2012 12:09 am
Location: West Somerset

Re: Thermopot mash tun conversion

Post by JamesF » Tue Oct 27, 2015 12:38 am

Got a bit more of this done last night. First I cut the hole in the base for the deck fitting to go through:

Image

From that I estimated the height of the hole on the side, erring on the side of making it too low (or high, with the pot upside down) as I can always use a washer or two as a spacer between the base and the elbow.

Image

As it happens it fits quite nicely.

Which is more than can be said for the deck fitting and elbow. I know some people have said that they didn't need to cut down the threaded section of the deck fitting, so I put the elbow in a vice and did the deck fitting up as far as I dared without being a complete philistine. No way will it go all the way in without being cut down. That done however, it wouldn't come out again. I had the devil's own job winding it back and forth to eventually get it to run all the way out of the threads, and I was left with a large pile of swarf inside the elbow :(

Image

I suspect that when the fitting stopped going in it was actually touching the inside wall of the elbow. The swarf is presumably from poor finishing of the thread, probably also in the elbow. I have a few and they all seem to be the same though. So, chopping half an inch or so off the end of the deck fitting is the next job. Get that done and I think it can all be assembled.

James

User avatar
JamesF
Drunk as a Skunk
Posts: 986
Joined: Fri Feb 10, 2012 12:09 am
Location: West Somerset

Re: Thermopot mash tun conversion

Post by JamesF » Wed Oct 28, 2015 9:23 pm

Not much time this evening, but I've cut down the deck fitting so the thread is about 12mm long and tidied up the end with the grinding wheel and a file so it screws back into the elbow happily. I've also made a seal to fit underneath it inside the mash tun from a piece of silicone baking sheet. If there's time tomorrow I might actually get to assemble everything, give it a bit of a clean up (the false bottom feels a little greasy) and do a leak test.

James

User avatar
Andy
Virtually comatose but still standing
Posts: 8716
Joined: Fri Nov 18, 2005 1:00 pm
Location: Ash, Surrey
Contact:

Re: Thermopot mash tun conversion

Post by Andy » Wed Oct 28, 2015 9:25 pm

Nice work chaps! Use *plenty* of PTFE tape on the fitting threads when assembling ! :)
Dan!

schlafsack

Re: Thermopot mash tun conversion

Post by schlafsack » Wed Oct 28, 2015 9:44 pm

I've managed to ruin several SS fittings by trying to screw things together without checking the threads first. I now make sure that I check each and every thread for manufacturing debris before I put anything together. Looks to me like you had some waste left over from the cutting that's got mashed when you inserted the deck drain.

User avatar
Wonkydonkey
Drunk as a Skunk
Posts: 847
Joined: Sat Mar 01, 2014 9:37 am
Location: In the Stables

Re: Thermopot mash tun conversion

Post by Wonkydonkey » Wed Oct 28, 2015 9:45 pm

Very nice, someone will be happy when it's finished... :=P althou do do remember how long the time it took to build mine. All those little jobs add up

And that reminds me its worth a good boil with oxi in it to help remove all the manafacturing gunk off.

I thought I'd cleaned mine till I did a brew :shock:
To Busy To Add,

User avatar
JamesF
Drunk as a Skunk
Posts: 986
Joined: Fri Feb 10, 2012 12:09 am
Location: West Somerset

Re: Thermopot mash tun conversion

Post by JamesF » Wed Oct 28, 2015 9:56 pm

schlafsack wrote:I've managed to ruin several SS fittings by trying to screw things together without checking the threads first. I now make sure that I check each and every thread for manufacturing debris before I put anything together. Looks to me like you had some waste left over from the cutting that's got mashed when you inserted the deck drain.
Yes, if I do much more I might get a 1/2" BSP tap and die just so I can clean things up properly before putting them together.

James

YeastFace Brew Co.

Re: Thermopot mash tun conversion

Post by YeastFace Brew Co. » Wed Oct 28, 2015 10:45 pm

What attachment are you using on the dremel and how long did it take you to cut out your rectangle?

I need to clean up the lip/join so I can cut the hole for the nipple. Attempted this evening but was very slow progress.

User avatar
JamesF
Drunk as a Skunk
Posts: 986
Joined: Fri Feb 10, 2012 12:09 am
Location: West Somerset

Re: Thermopot mash tun conversion

Post by JamesF » Thu Oct 29, 2015 12:18 am

I'm using the standard metal-cutting disc. Didn't take very long at all, to be honest. Perhaps twenty minutes to half an hour, given that I was making it up as I went along.

I started by cutting as much of the flat part of the base as I could without damaging the rim, then lifted it up and using the knife and screwdriver pictured above I dug out all the insulation. Then I squashed the "flap" down into the space left by the insulation and cut horizontally under the rolled lip of the rim. It's actually very easy to go through both layers of metal at this point. I did at one point but it's barely visible from the outside of the pot. Finally I joined the cut along the edges of the flap to the cut under the lip pretty much any way I could manage. The first was more awkward than the second. By the time I made the horizontal cut I'd worn one cuttings disc down a fair bit, so I swapped to a new one for the horizontal cut and then went back to the remains of the worn one just to finish those last two bits off as it was easier to get the smaller wheel in under the lip.

Oh, I had to get the wheel spinning nice and fast before it would work well, too. I think I was using it at something like 15,000rpm. At lower speeds it wouldn't cut nicely at all and was much harder work.

James

YeastFace Brew Co.

Re: Thermopot mash tun conversion

Post by YeastFace Brew Co. » Thu Oct 29, 2015 5:37 pm

I think I have two metal cutting discs left, so I'll have another go at the weekend. I just need to cut enough of the lip away to be able to fit the Q.Max through properly, so hopefully I can do that. If not I may attempt to grind it down.

My parents are bringing up my 2 33l pots at the weekend, so next job will be converting those.

Planning on one last brew on my old equipment on Sunday.

User avatar
JamesF
Drunk as a Skunk
Posts: 986
Joined: Fri Feb 10, 2012 12:09 am
Location: West Somerset

Re: Thermopot mash tun conversion

Post by JamesF » Thu Oct 29, 2015 5:47 pm

Ahhh, yes, I guess your smaller pots may not have enough clearance to feed the fittings through unless the lip is removed. Mine fitted very nicely (and in fact I finished assembling it earlier today but haven't had time to take photos yet).

James

Post Reply