
Jim's Beer Kit
Practical Homebrewing
Racking
Racking is simply the process of running off the beer from the primary fermenter leaving the yeast deposit behind. If the beer were left on the layer of yeast left by primary fermentation for an extended period of time, the dead yeast cells would decompose (a process called autolysis) and cause off flavours in the beer.
How Do I Know When My Beer is Ready to Rack?
This is the most frequently asked question by beginning home brewers. Instructions with beer kits often specify a time period from pitching the yeast; however this is an unreliable method as speed of fermentation depends on so many factors (temperature, yeast strain, wort composition etc).
Correctly made ales should stop fermenting at approximately one quarter of the original (starting) gravity (OG). For example a beer with OG of 1.040 (40 points) should stop fermenting at approximately 1.010 (10 points, i.e. one quarter of 40). The best way to judge is to take specific gravity readings with a hydrometer or refractometer on at least 2 successive days - if the gravity is within a couple of points of the quarter gravity stage and remains stable over 2 days the beer is safe to rack.
Many brewers (me included) just leave the brew alone for 2 weeks after pitching the yeast. This not only makes pretty sure primary fermentation is complete, but also allows most of the yeast to settle down thus improving the beer's clarity. It also reduces the chance of accidentally infecting your beer by constantly opening the fermenter and poking your hydrometer in there!
Transfer
The type of vessel you rack the beer into will depend on how you intend to store and serve it. For example if you are using a home brew beer keg you will transfer directly into that, whereas if you intend to bottle, you will usually transfer into a bottling bucket first. For more information on serving options, see the 'Serving' tab.
Transfer can be via a syphon tube which is placed as near the bottom of the fermenter as possible without disturbing the sediment, the other end being placed in the racking vessel. The flow is started by using an inline pump (safest) or by sucking on the end of the tubing until the syphoning process is able to sustain itself (risk of causing an infection in the beer, but very common and usually seems to work OK).
I recommend the easier method of having a tap fitted to your fermenter and using that to transfer the beer. At this stage of the brewing process, it is desirable to minimise contact between the beer and air, so it's best to use a piece of tubing going from the tap to the bottom of the racking vessel.
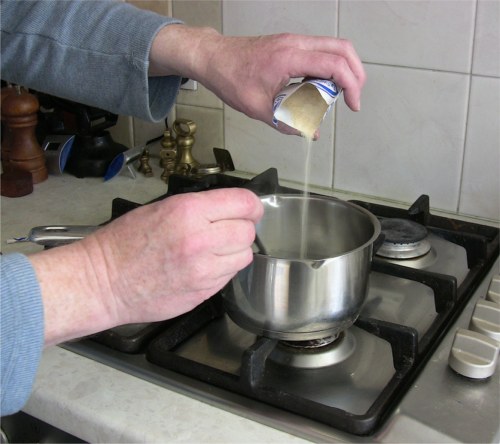
Priming
In order to create condition (the fizz or sparkle) in the finished beer it is usually necessary to add further sugar (or other fermentable substance such as spraymalt). This extra sugar is fermented by the yeast inside a sealed pressure vessel (e.g. a keg, cask or bottle) and creates carbon dioxide gas that provides the fizz in your beer. The usual amount if using household sugar is 60 to 80g (2 - 3 oz) in a 5 gallon batch, depending on how fizzy you want it. Dissolve the priming sugar in a small quantity of boiling water which you can then add to the bulk of the beer in the keg or bottling bucket. Alternatively the primings can be added to each bottle individually.
While it is possible to rely on remaining slow fermenting sugars (as most commercial brewers do for cask ales), we home brewers usually let our beer ferment out fully in the primary, then add a controlled amount of sugar to get the correct amount of condition - particularly important when bottling, as too much condition can cause bottles to burst.
Krausening
Krausening was used in Germany following the introduction of the German beer purity law in the 16th century (Reinheitsgebot), which did not allow the addition of sugar to beer. Krausening involves adding actively fermenting beer wort to stimulate secondary fermentation.
Krausening does have some advantages, because fresh, active yeast is added to the beer which can assist with secondary fermentation - however this is mainly applicable to lagers which undergo an extended secondary fermentation and maturation. Generally speaking there's not much point in krausening ales. There's also the disadvantage that you need to have a new brew actively fermenting to take your krausen from - while this is not a problem in a commercial brewery, it can be for the average home brewer.
If you're interested in this technique, Google will point you to all the information you'll ever need!
Finings
At this stage, you can also add finings such as gelatine or isinglass, but it's best to avoid these if bottling as they cause the sediment to be unstable - see the 'Serving' tab for more details. Gelatine is best added to a small quantity of almost boiling water which is then added to the bulk of the beer in the keg or cask (this can be the same water in which you have dissolved the priming sugar).
Isinglass should not be heated, but added directly to the keg or cask - however be aware that isinglass is very tricky to use in the domestic environment; ready made isinglass only keeps for a very short time and making it yourself from the dried version is a skill that few home brewers have mastered.
Secondary Fermentation
During the next 5 days or so, a secondary fermentation occurs that converts the added sugar into a small amount of alcohol and enough carbon dioxide gas to create condition and allow head formation when the beer is poured. Temperature control is desirable during this process, and if you have a brew fridge, you should use it, setting the temperature to about 18 º C. If the temperature is too high, the gas will not dissolve as easily or quickly into the beer.
Conditioning
Once the initial secondary fermentation is complete (as mentioned above, this takes about 5 days), the beer should be 'cold conditioned'. During this phase, the beer should be kept somewhere near serving temperature (12 - 14 º C), to allow the gas produced during secondary fermentation to be thoroughly dissolved in the beer. The beer also matures during this period, turning from (often) harsh 'green' beer into the beautifully balanced drink we love.
The conditioning and maturation process takes at least 4 weeks for session beers, but stronger or more complex beers can take much longer - as long as several years for a good strong barley wine. Drinking your beer too young is a practice to be avoided at all costs!
Copyright Information: This site designed by Jim Dunleavy